Instagram Reel Tutorial: How to Use the Sound from a TikTok Trend

Sometimes the best trends and sounds are found over on TikTok. You can actually borrow those whether or not you're a TikToker. Watch the video above and/or read the slides below-- whatever is easiest for you!
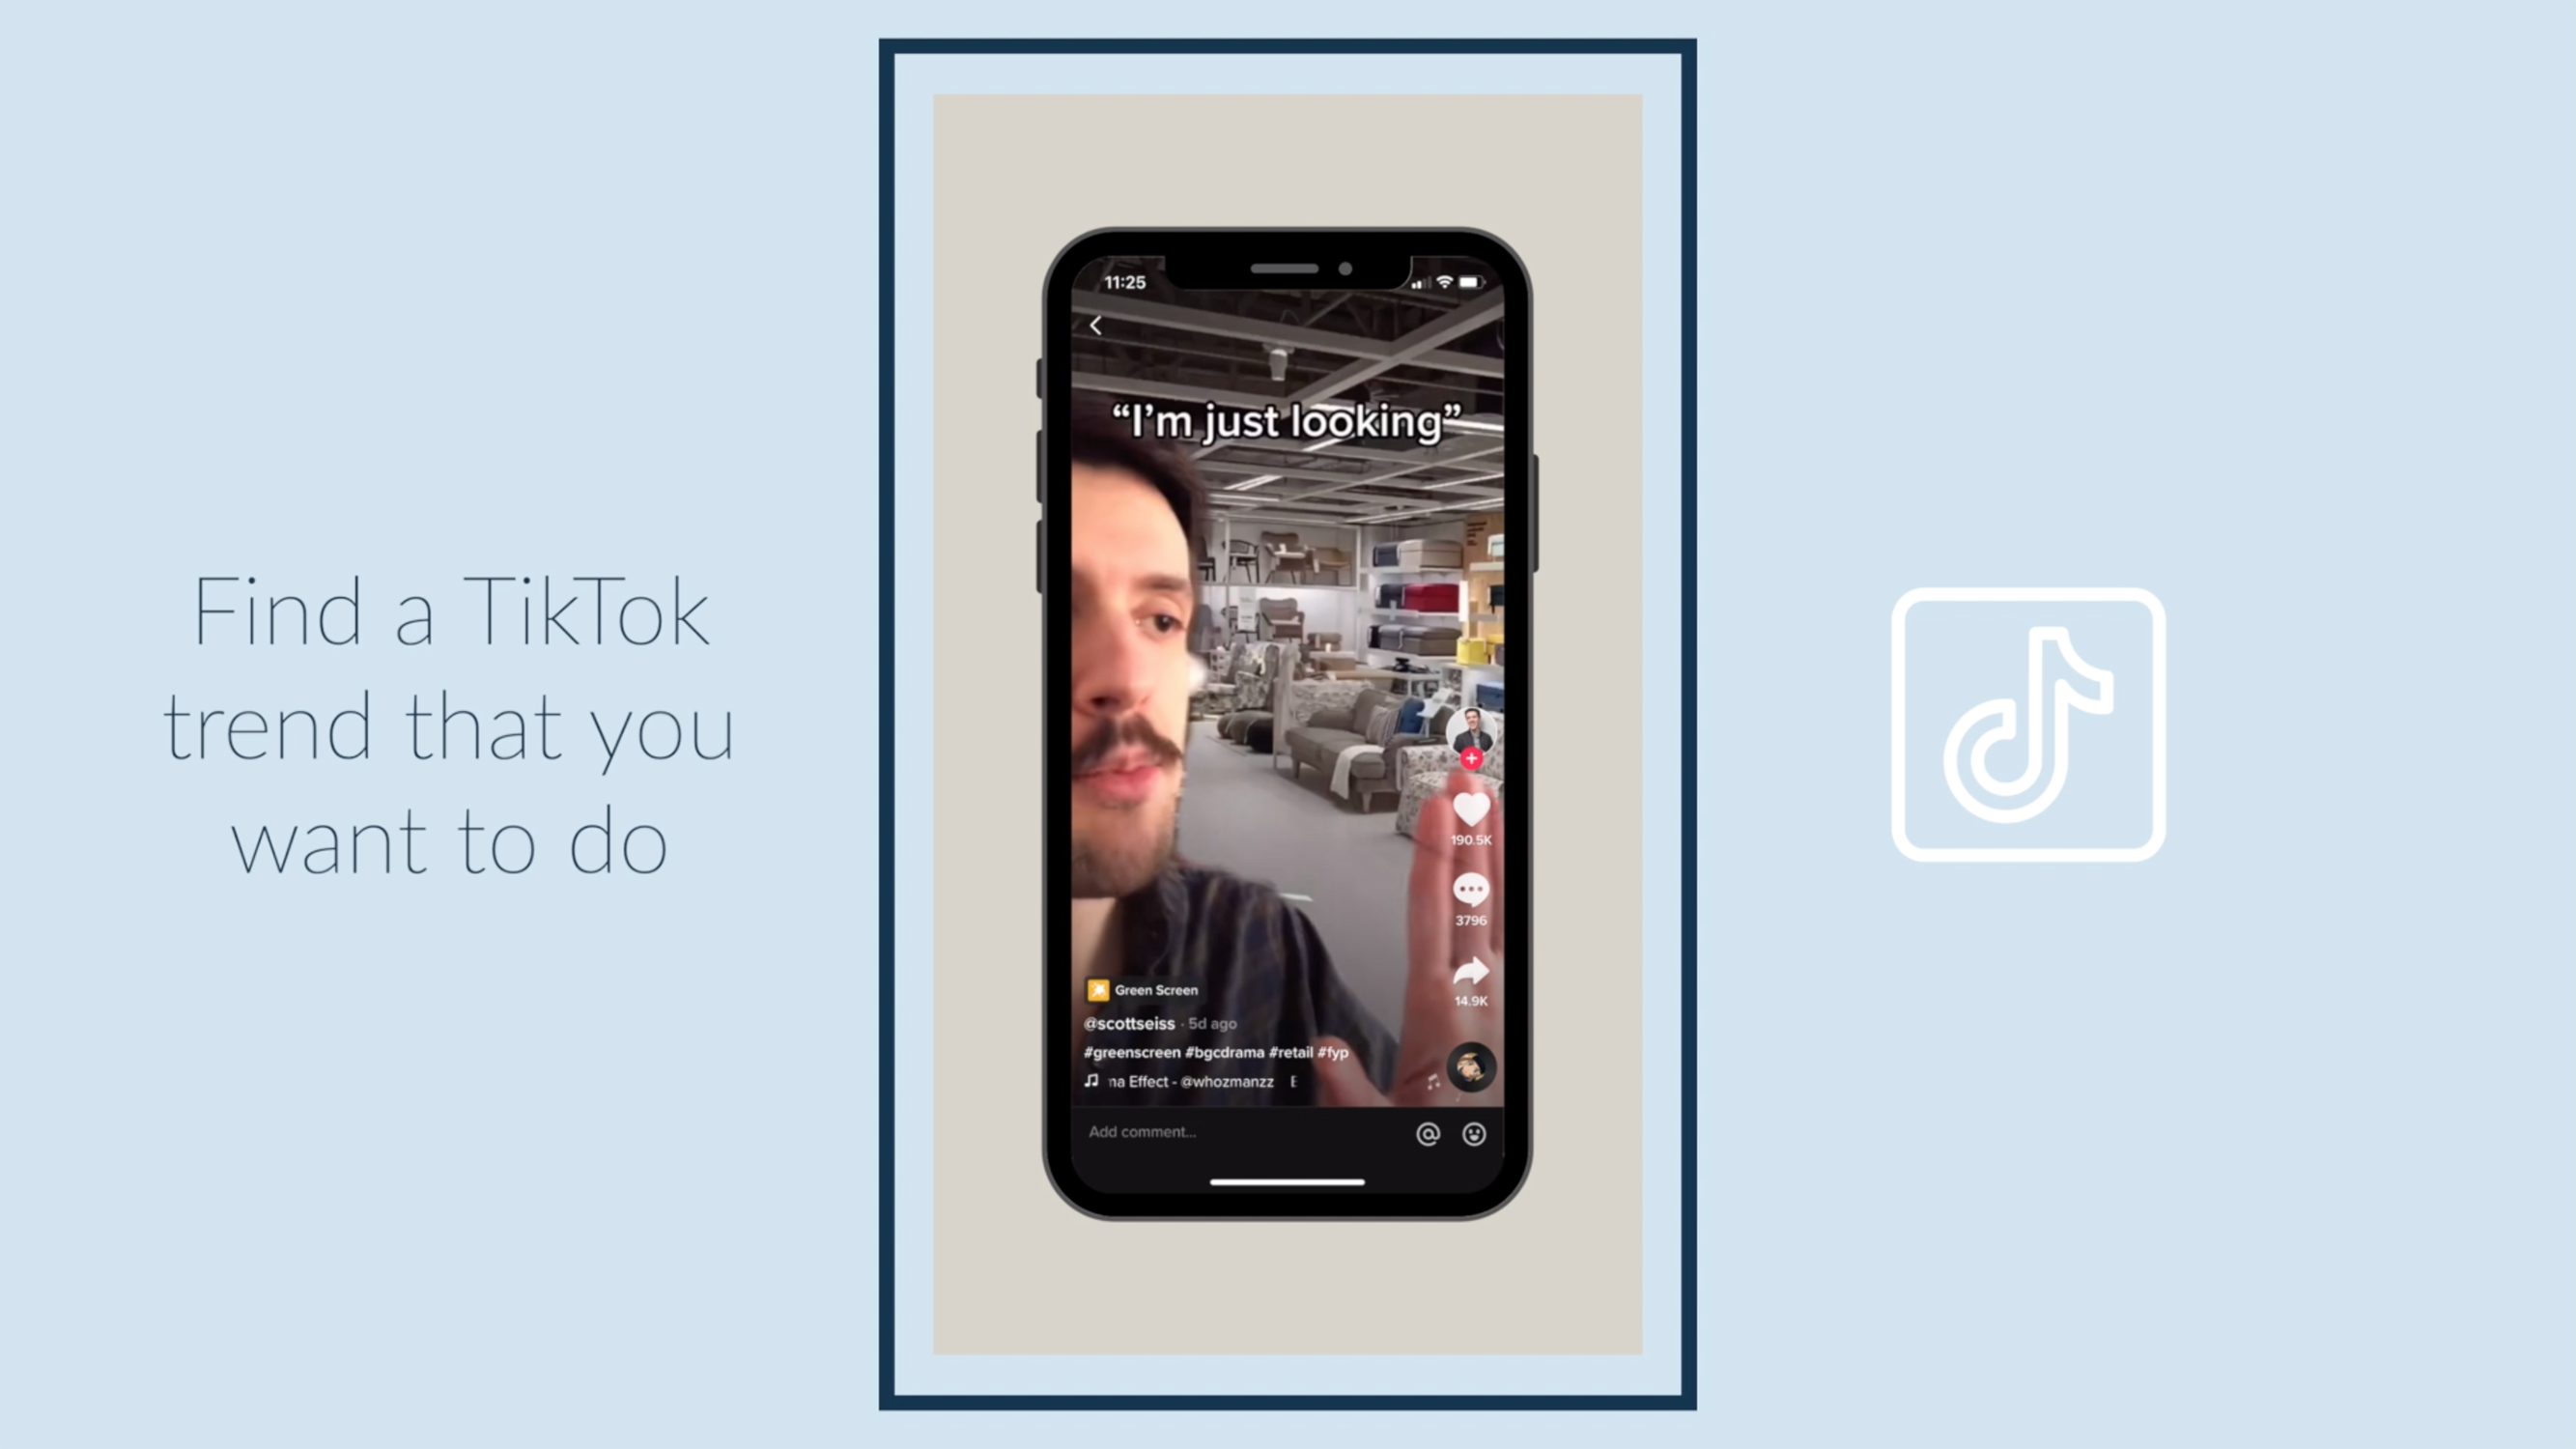
Find a TikTok trend that you want to do.
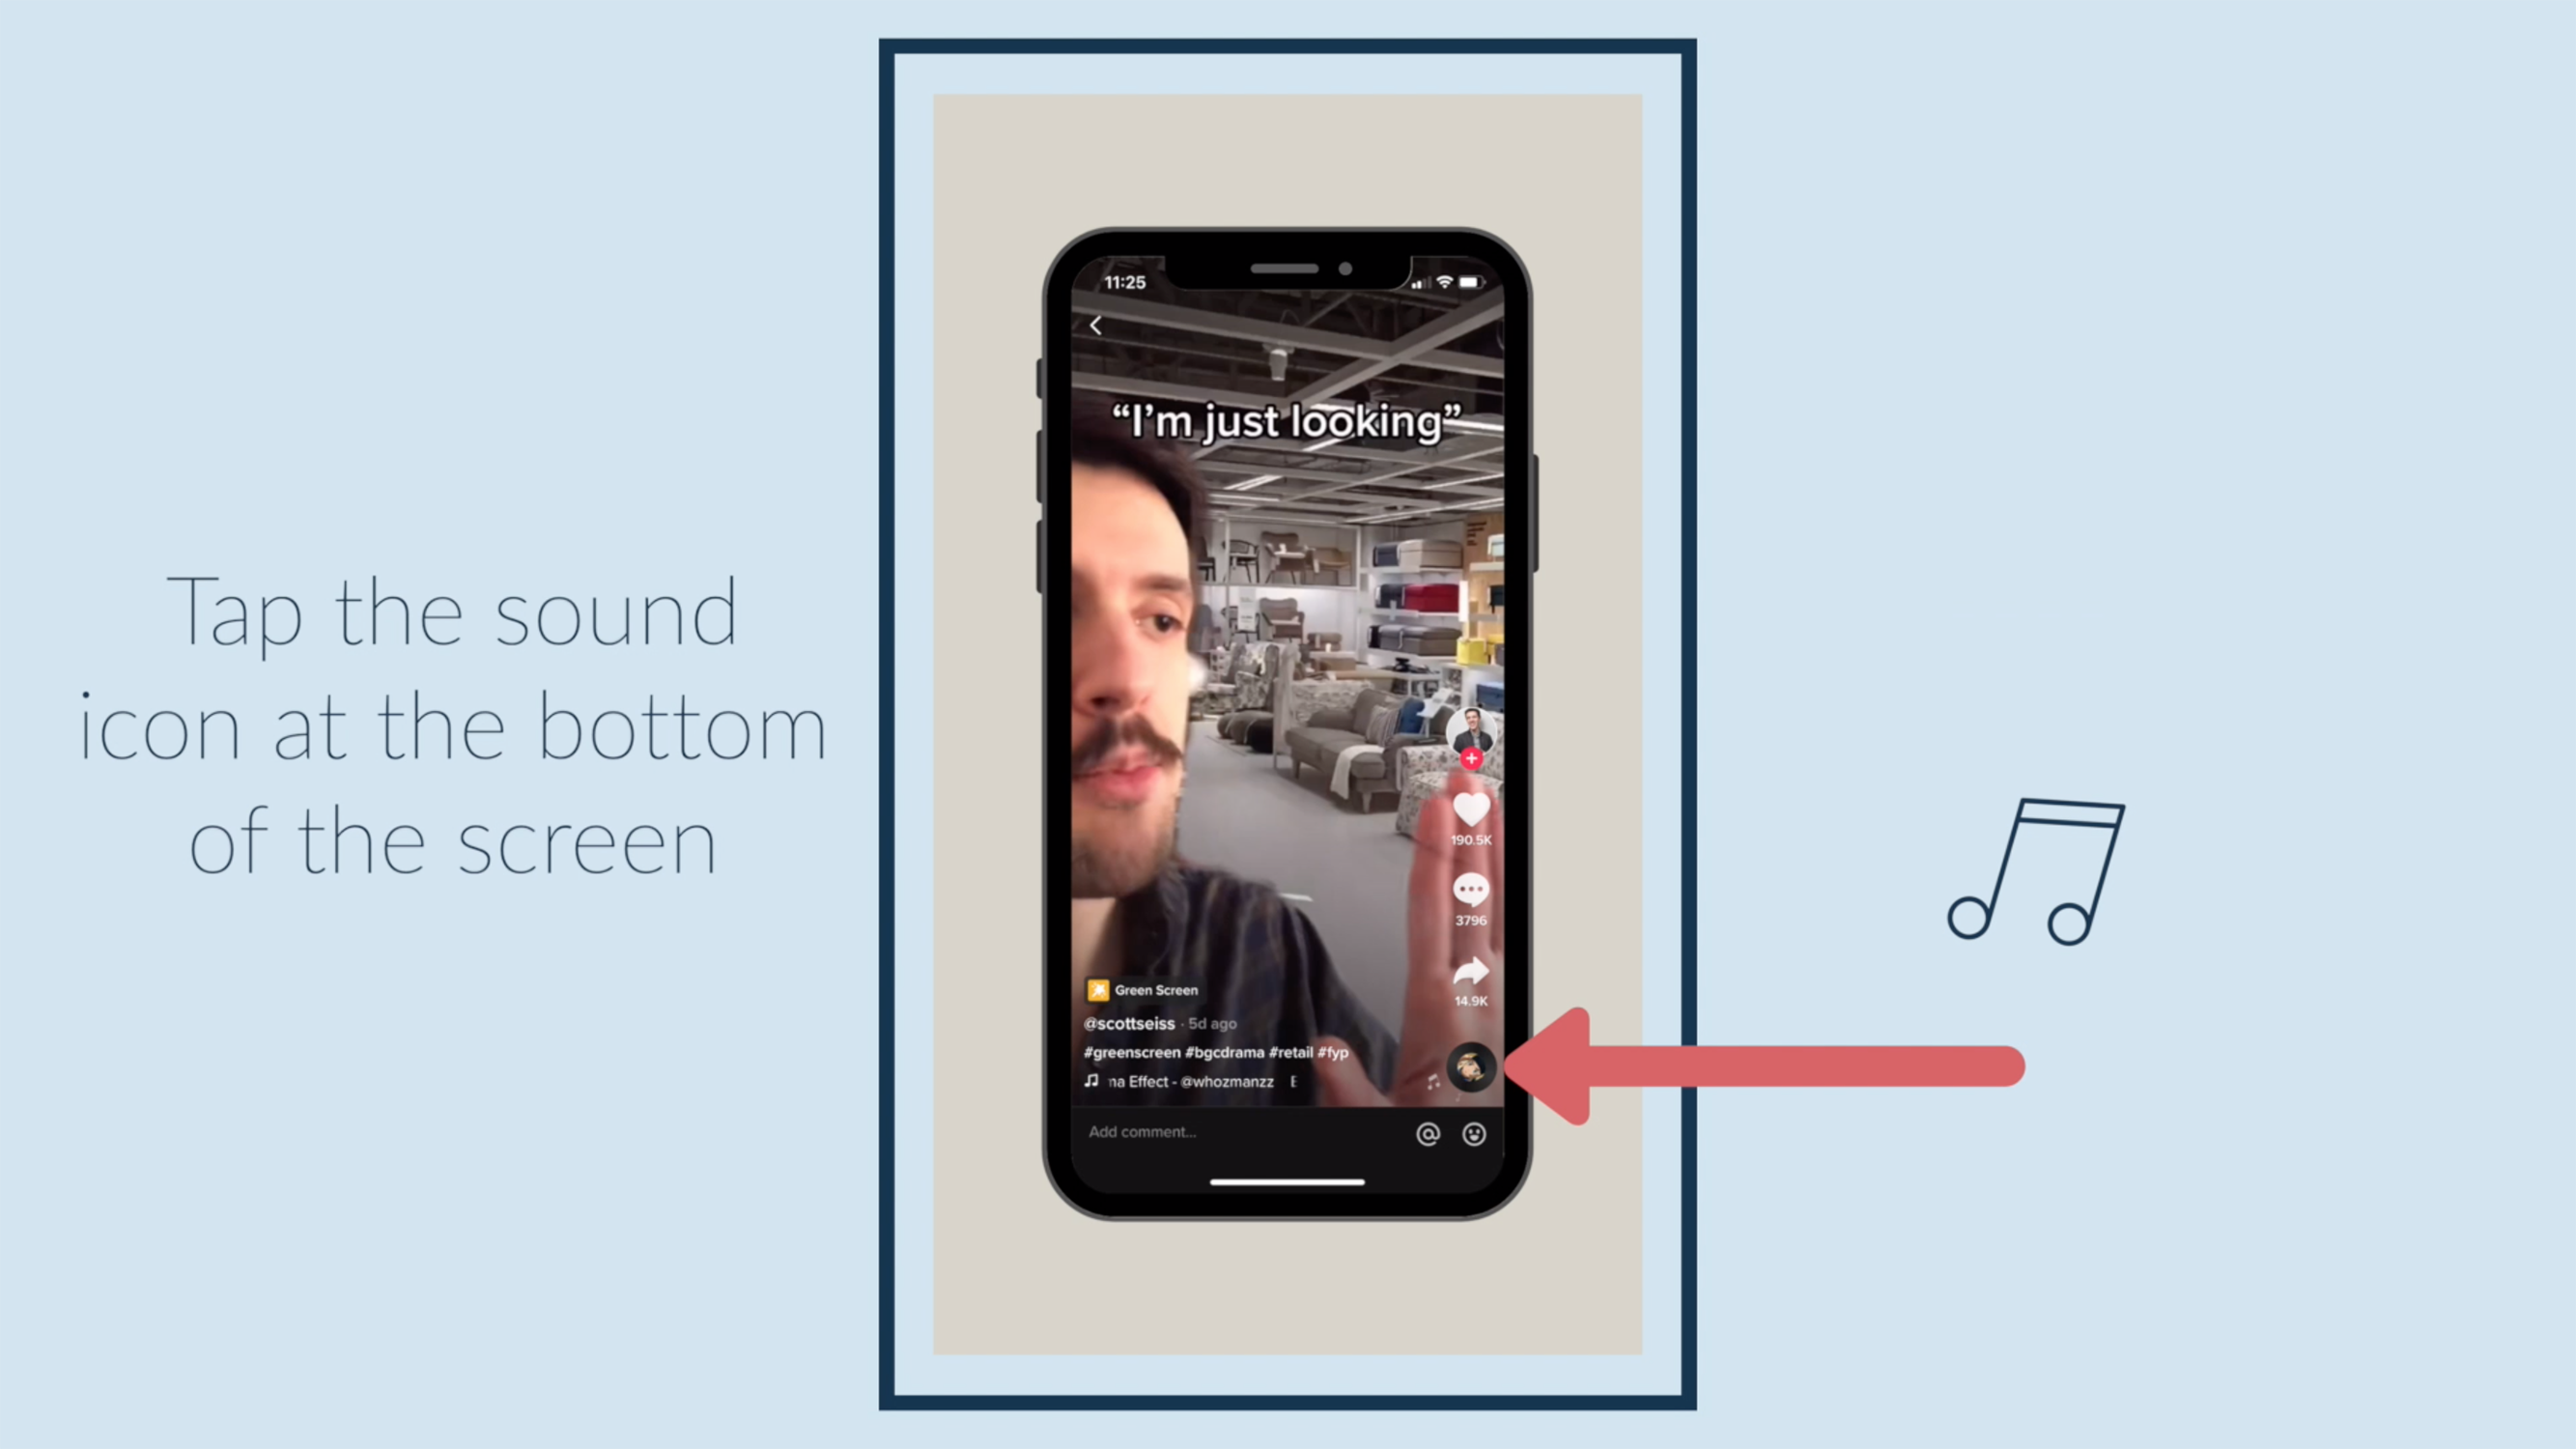
Tap the sound icon at the bottom of the screen.
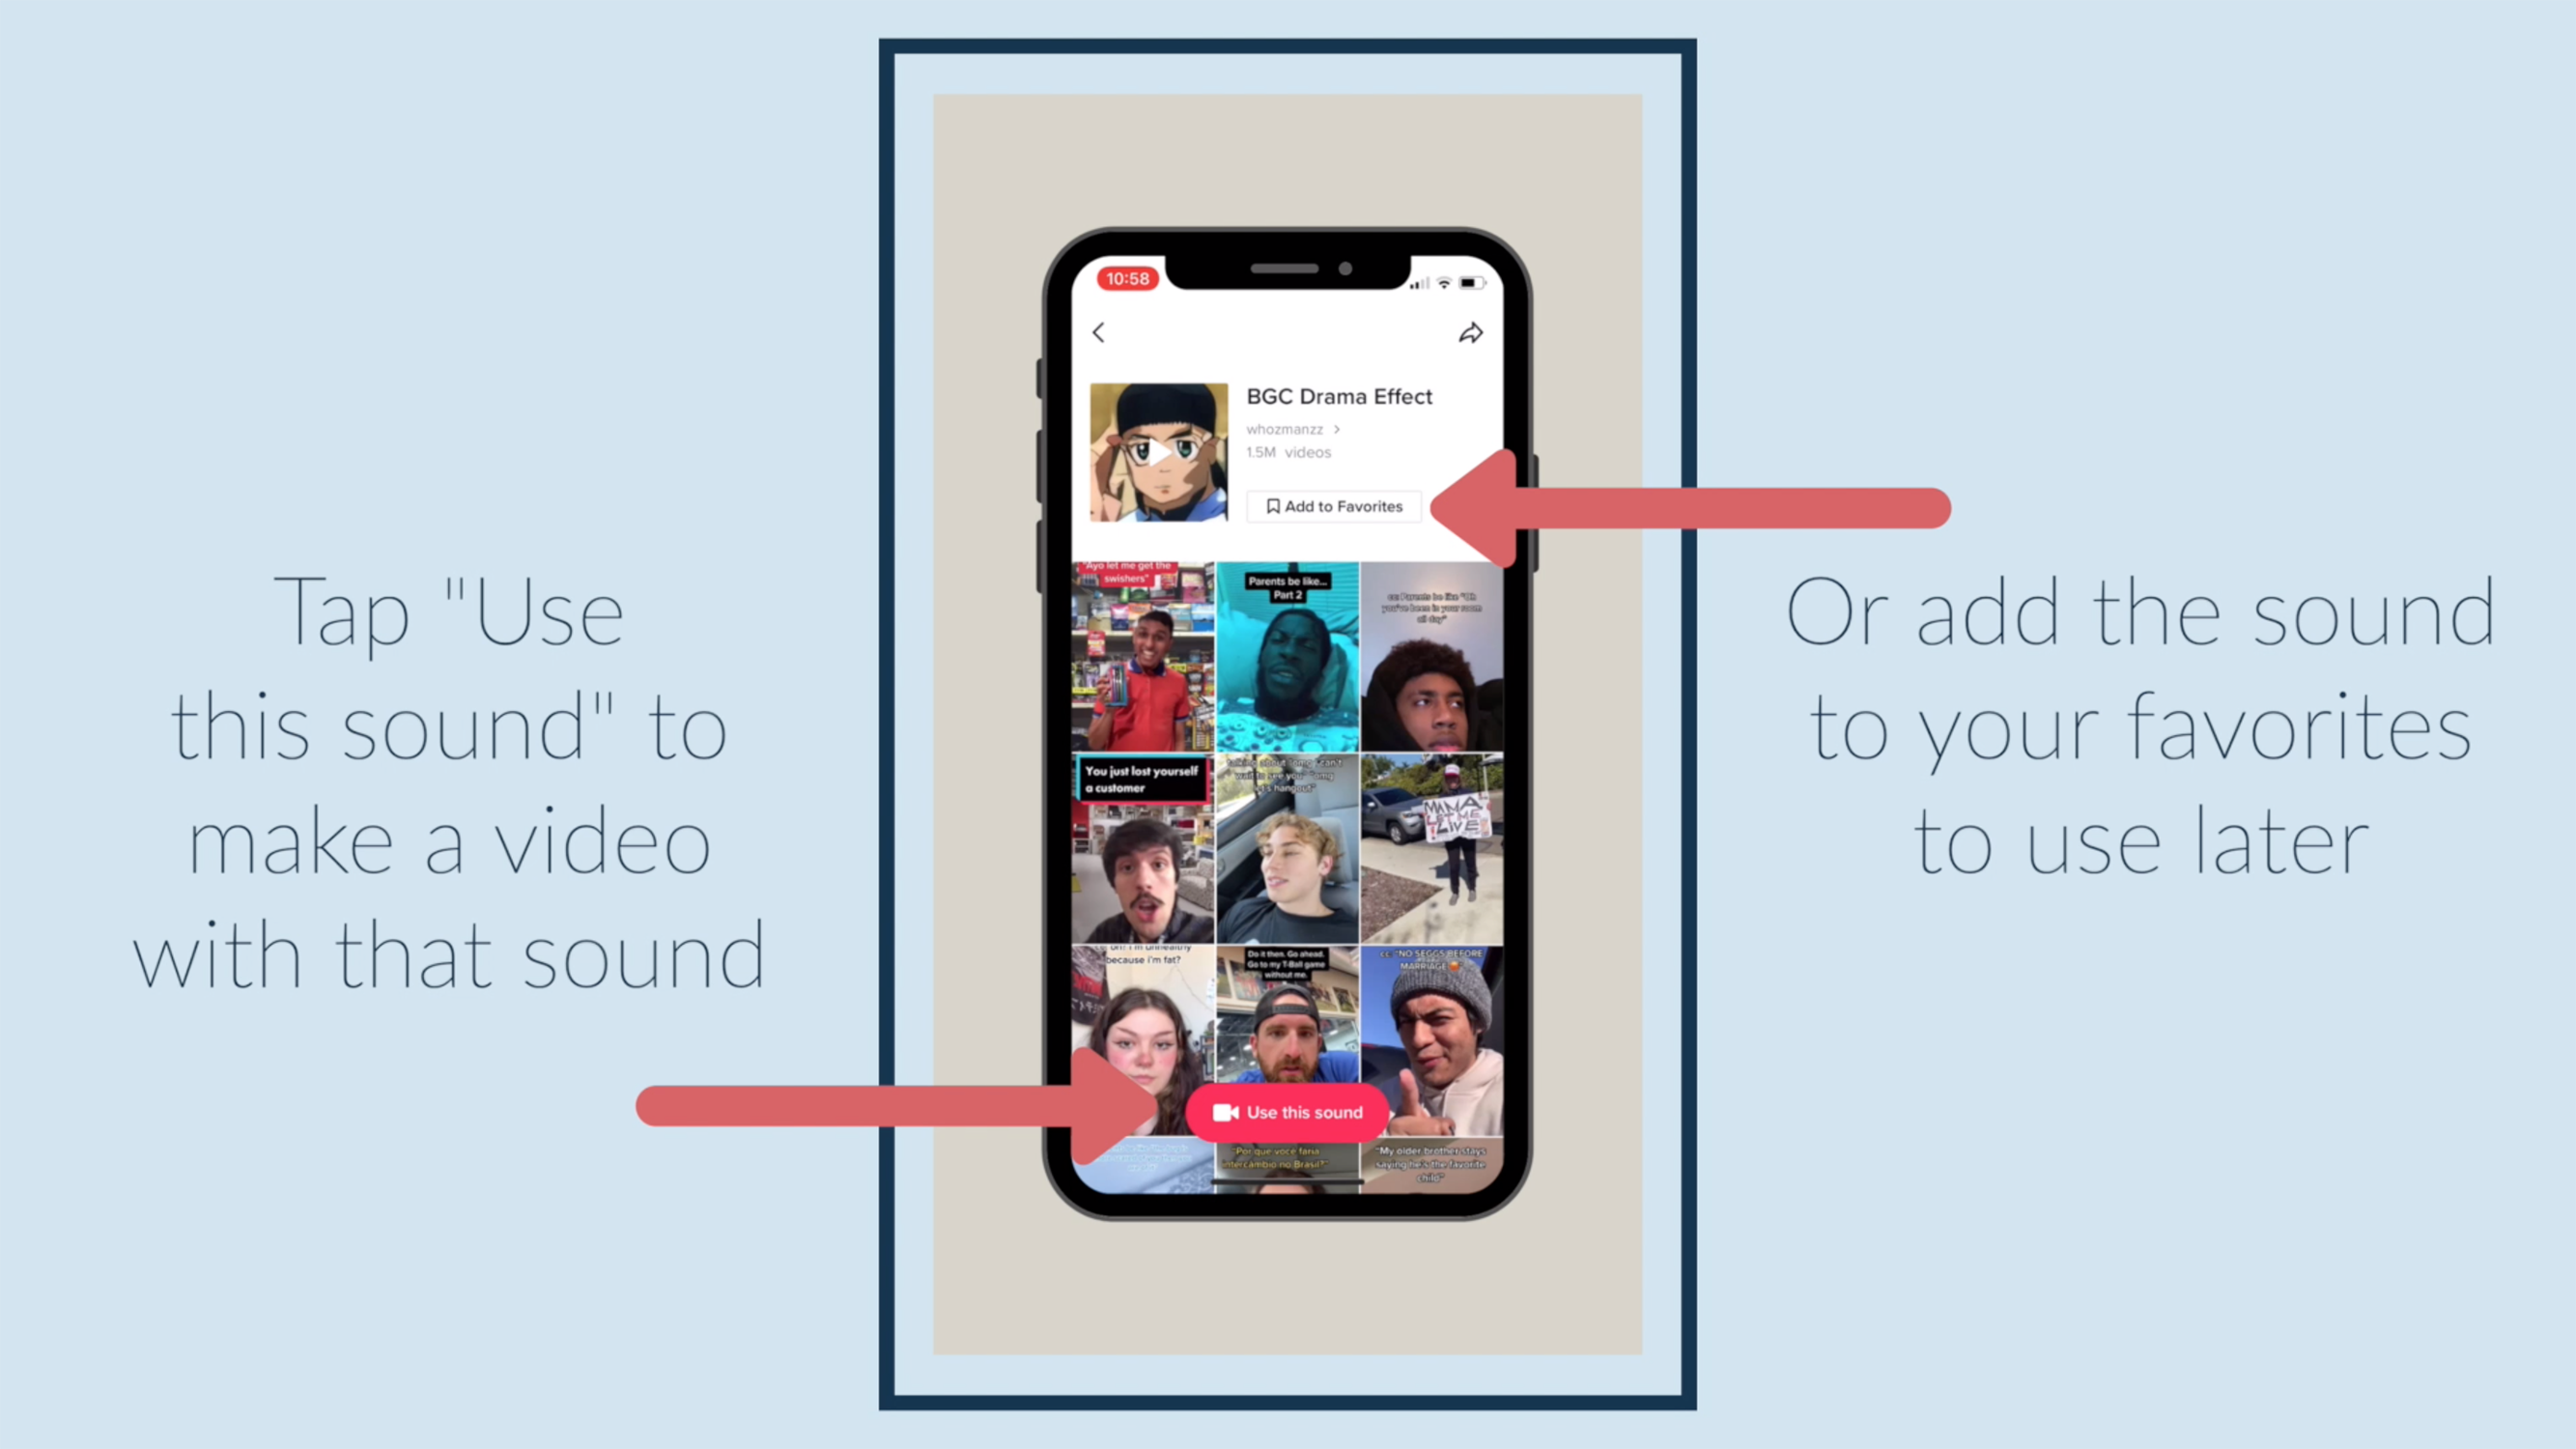
Tap "Use this sound" to make a video with that sound, or add the sound to your favorites to use later.
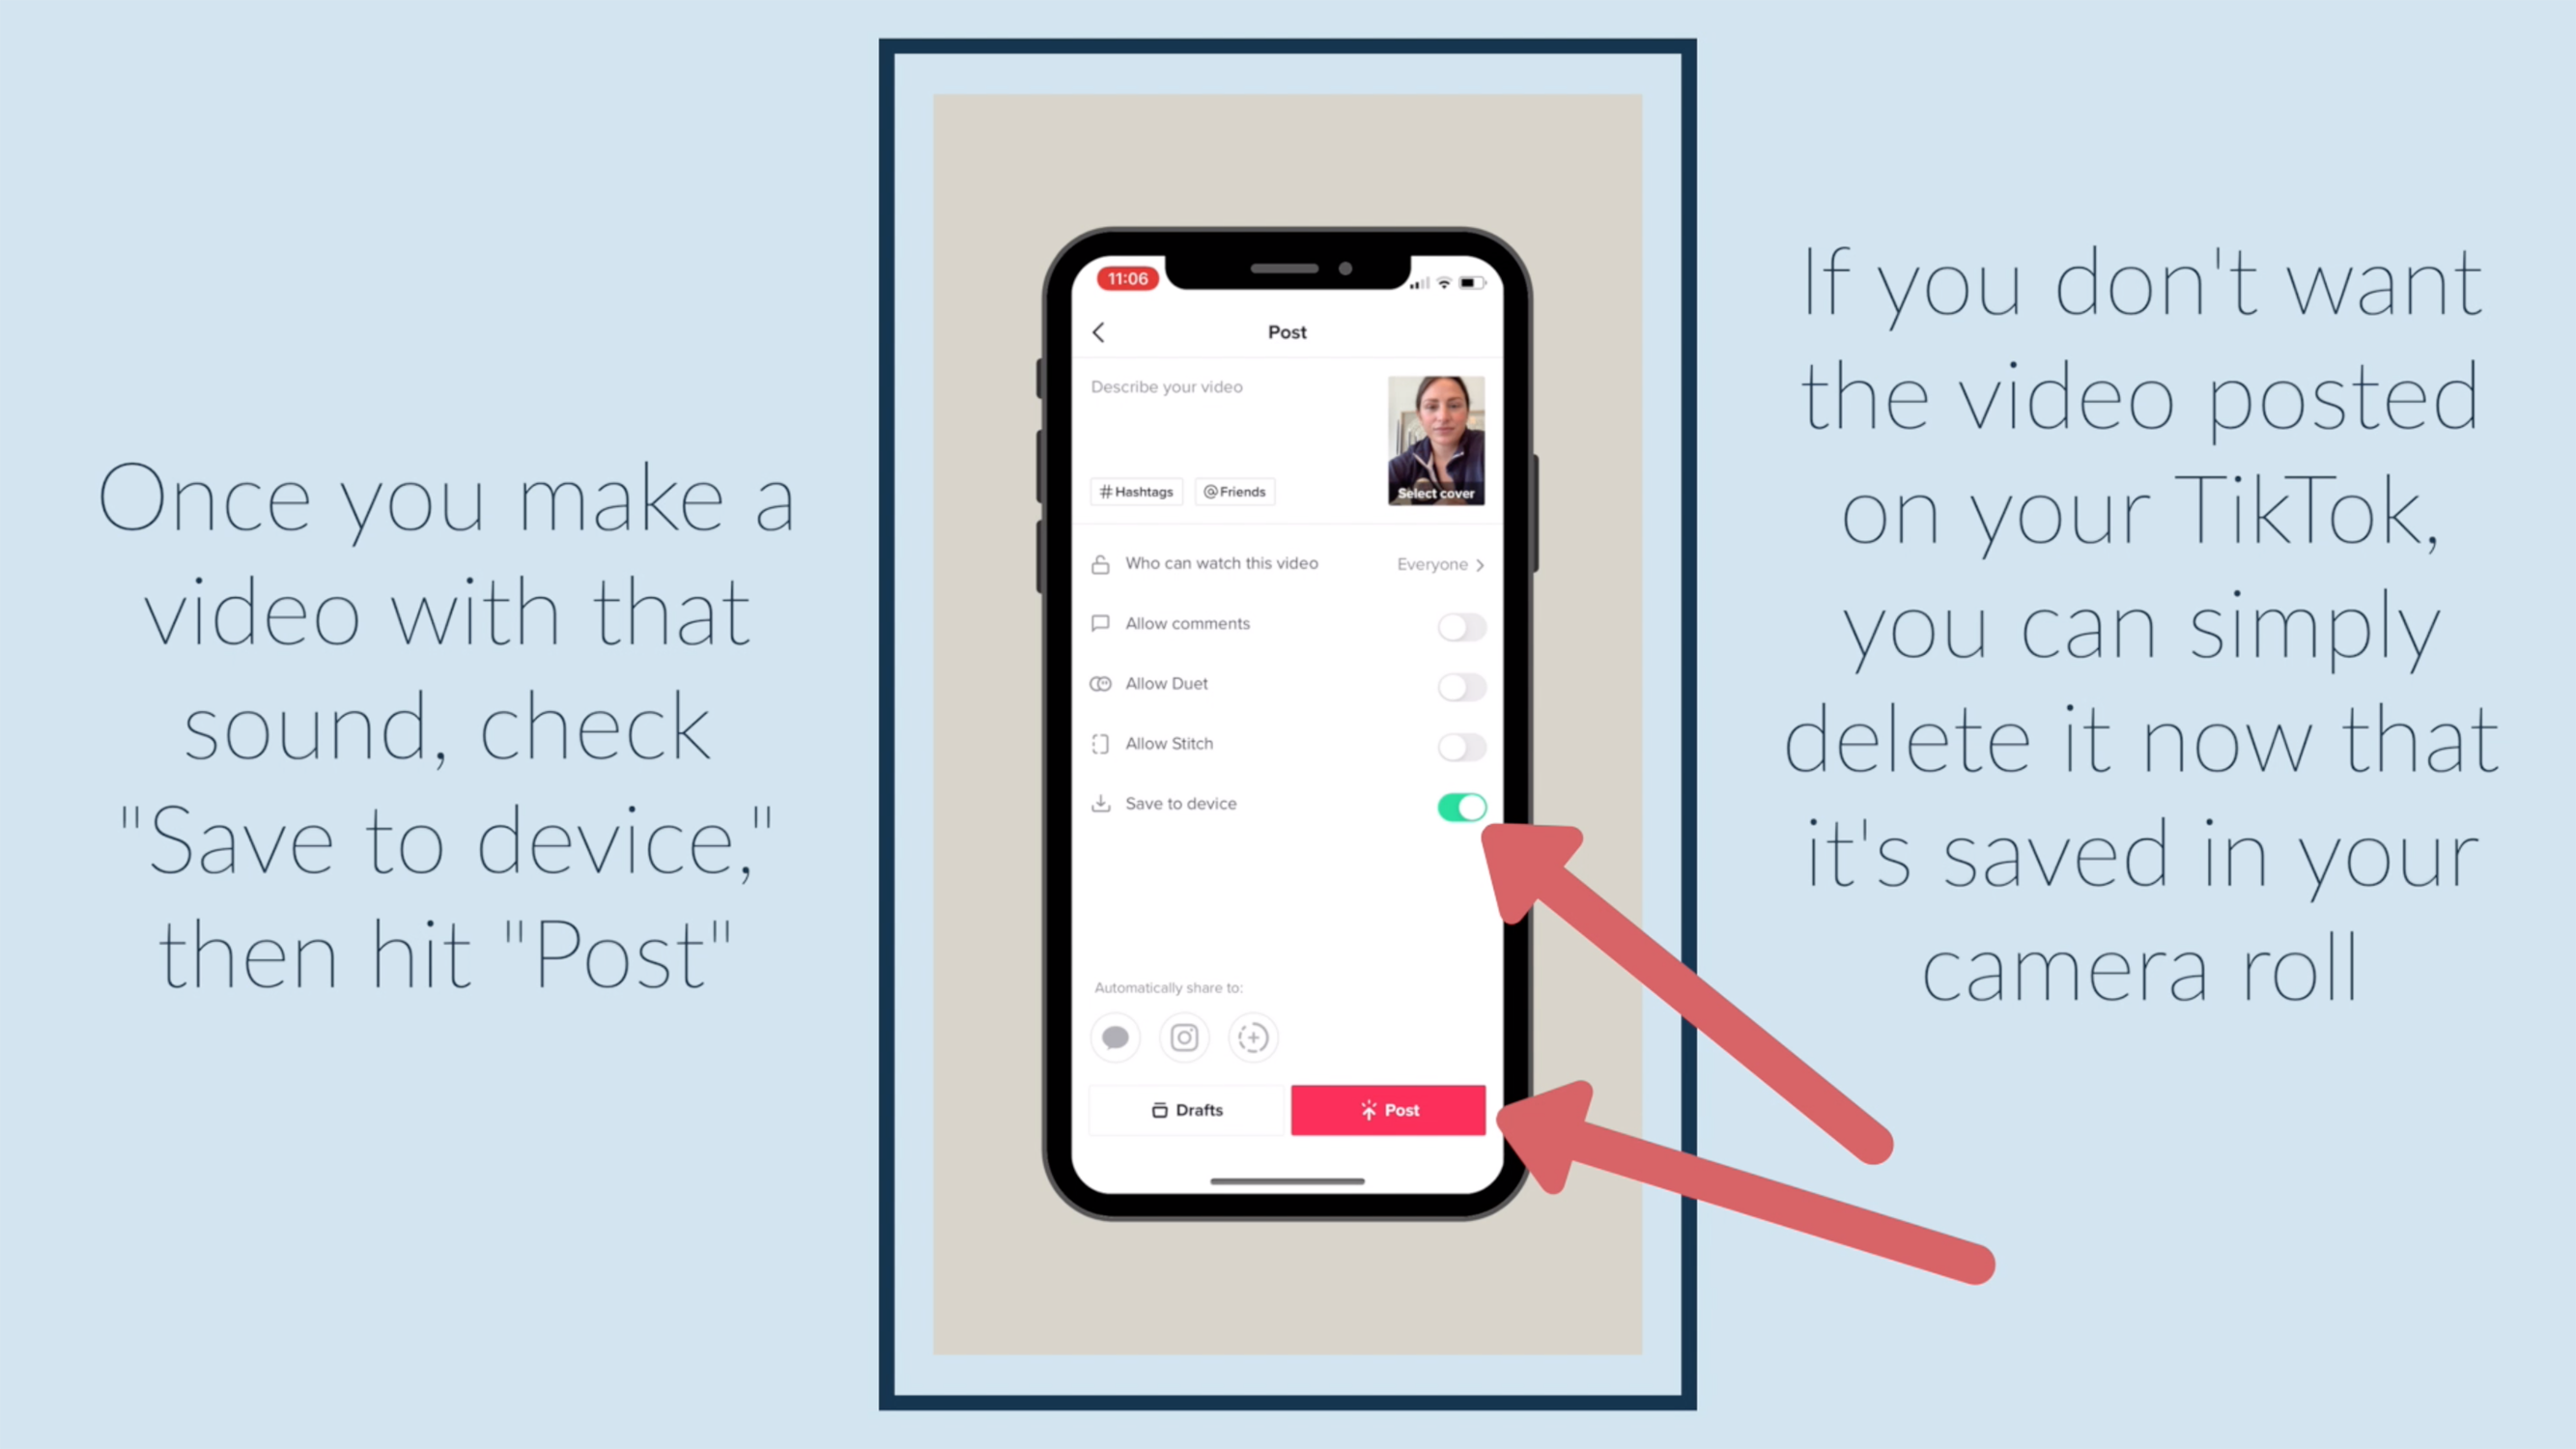
Once you make a video with that sound, check "Save to device," then hit "Post." If you don't want the video posted on your TikTok, you can simply delete it now that it's saved in your camera roll.
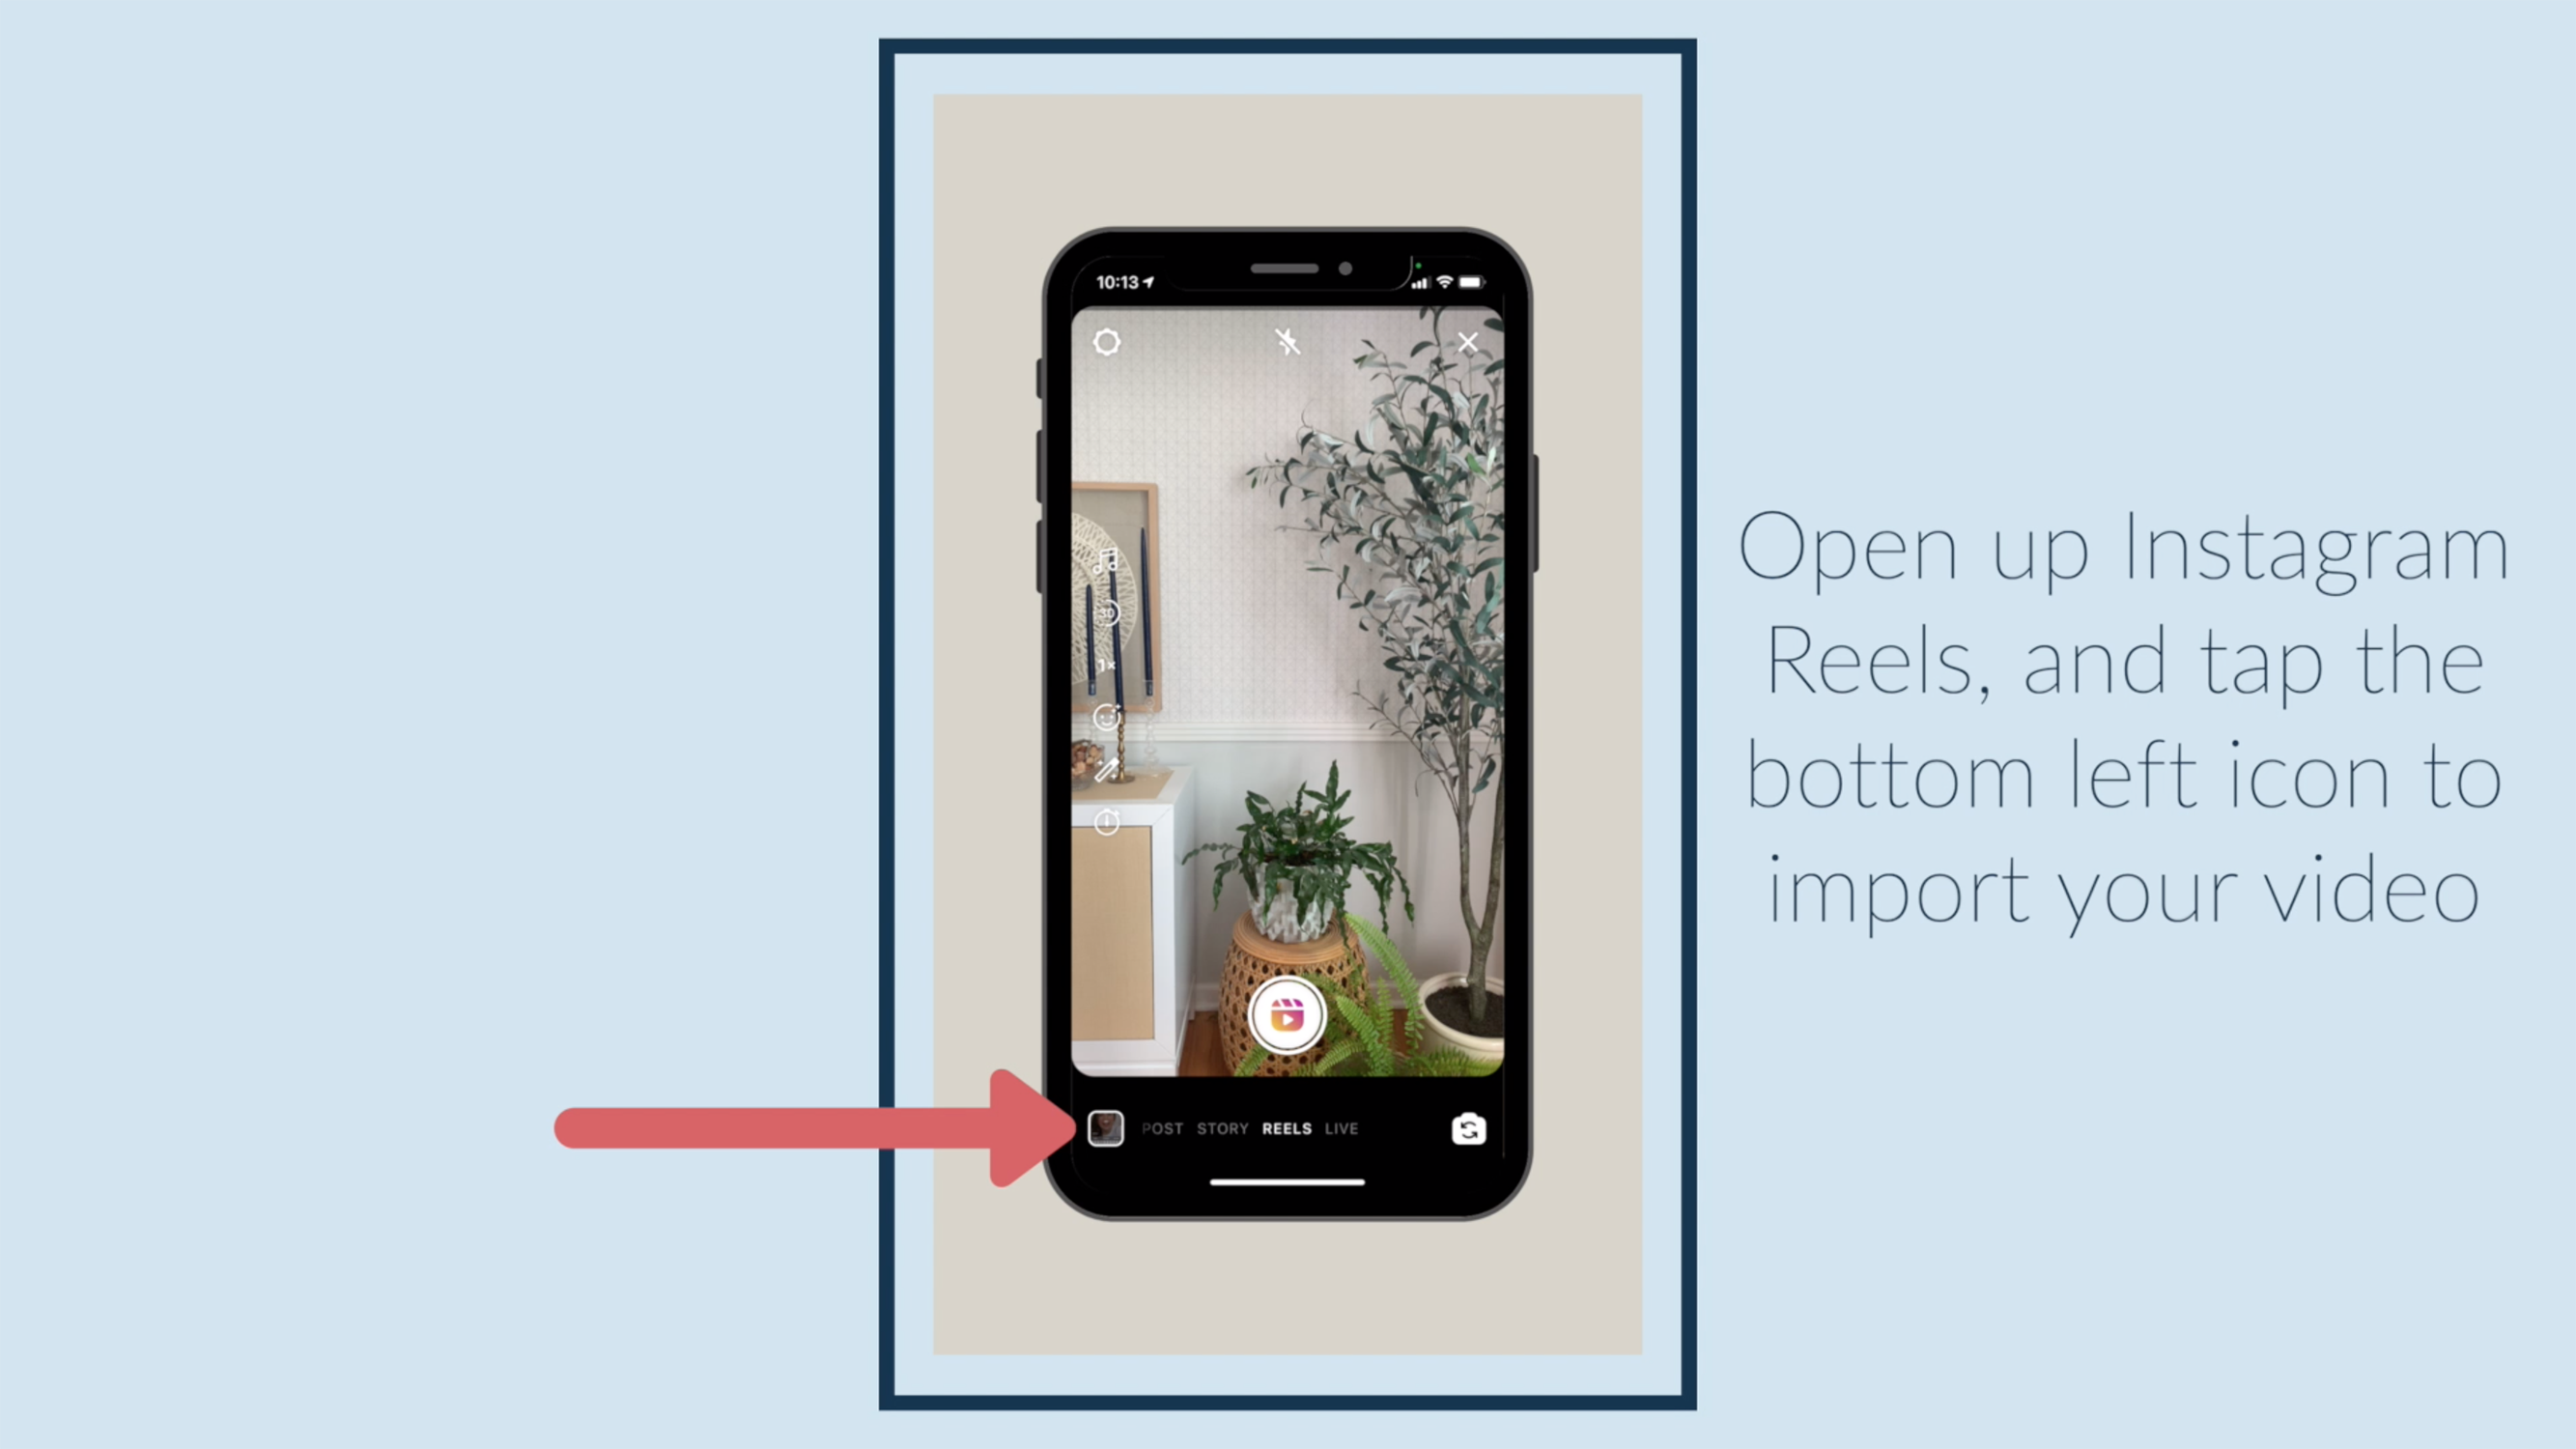
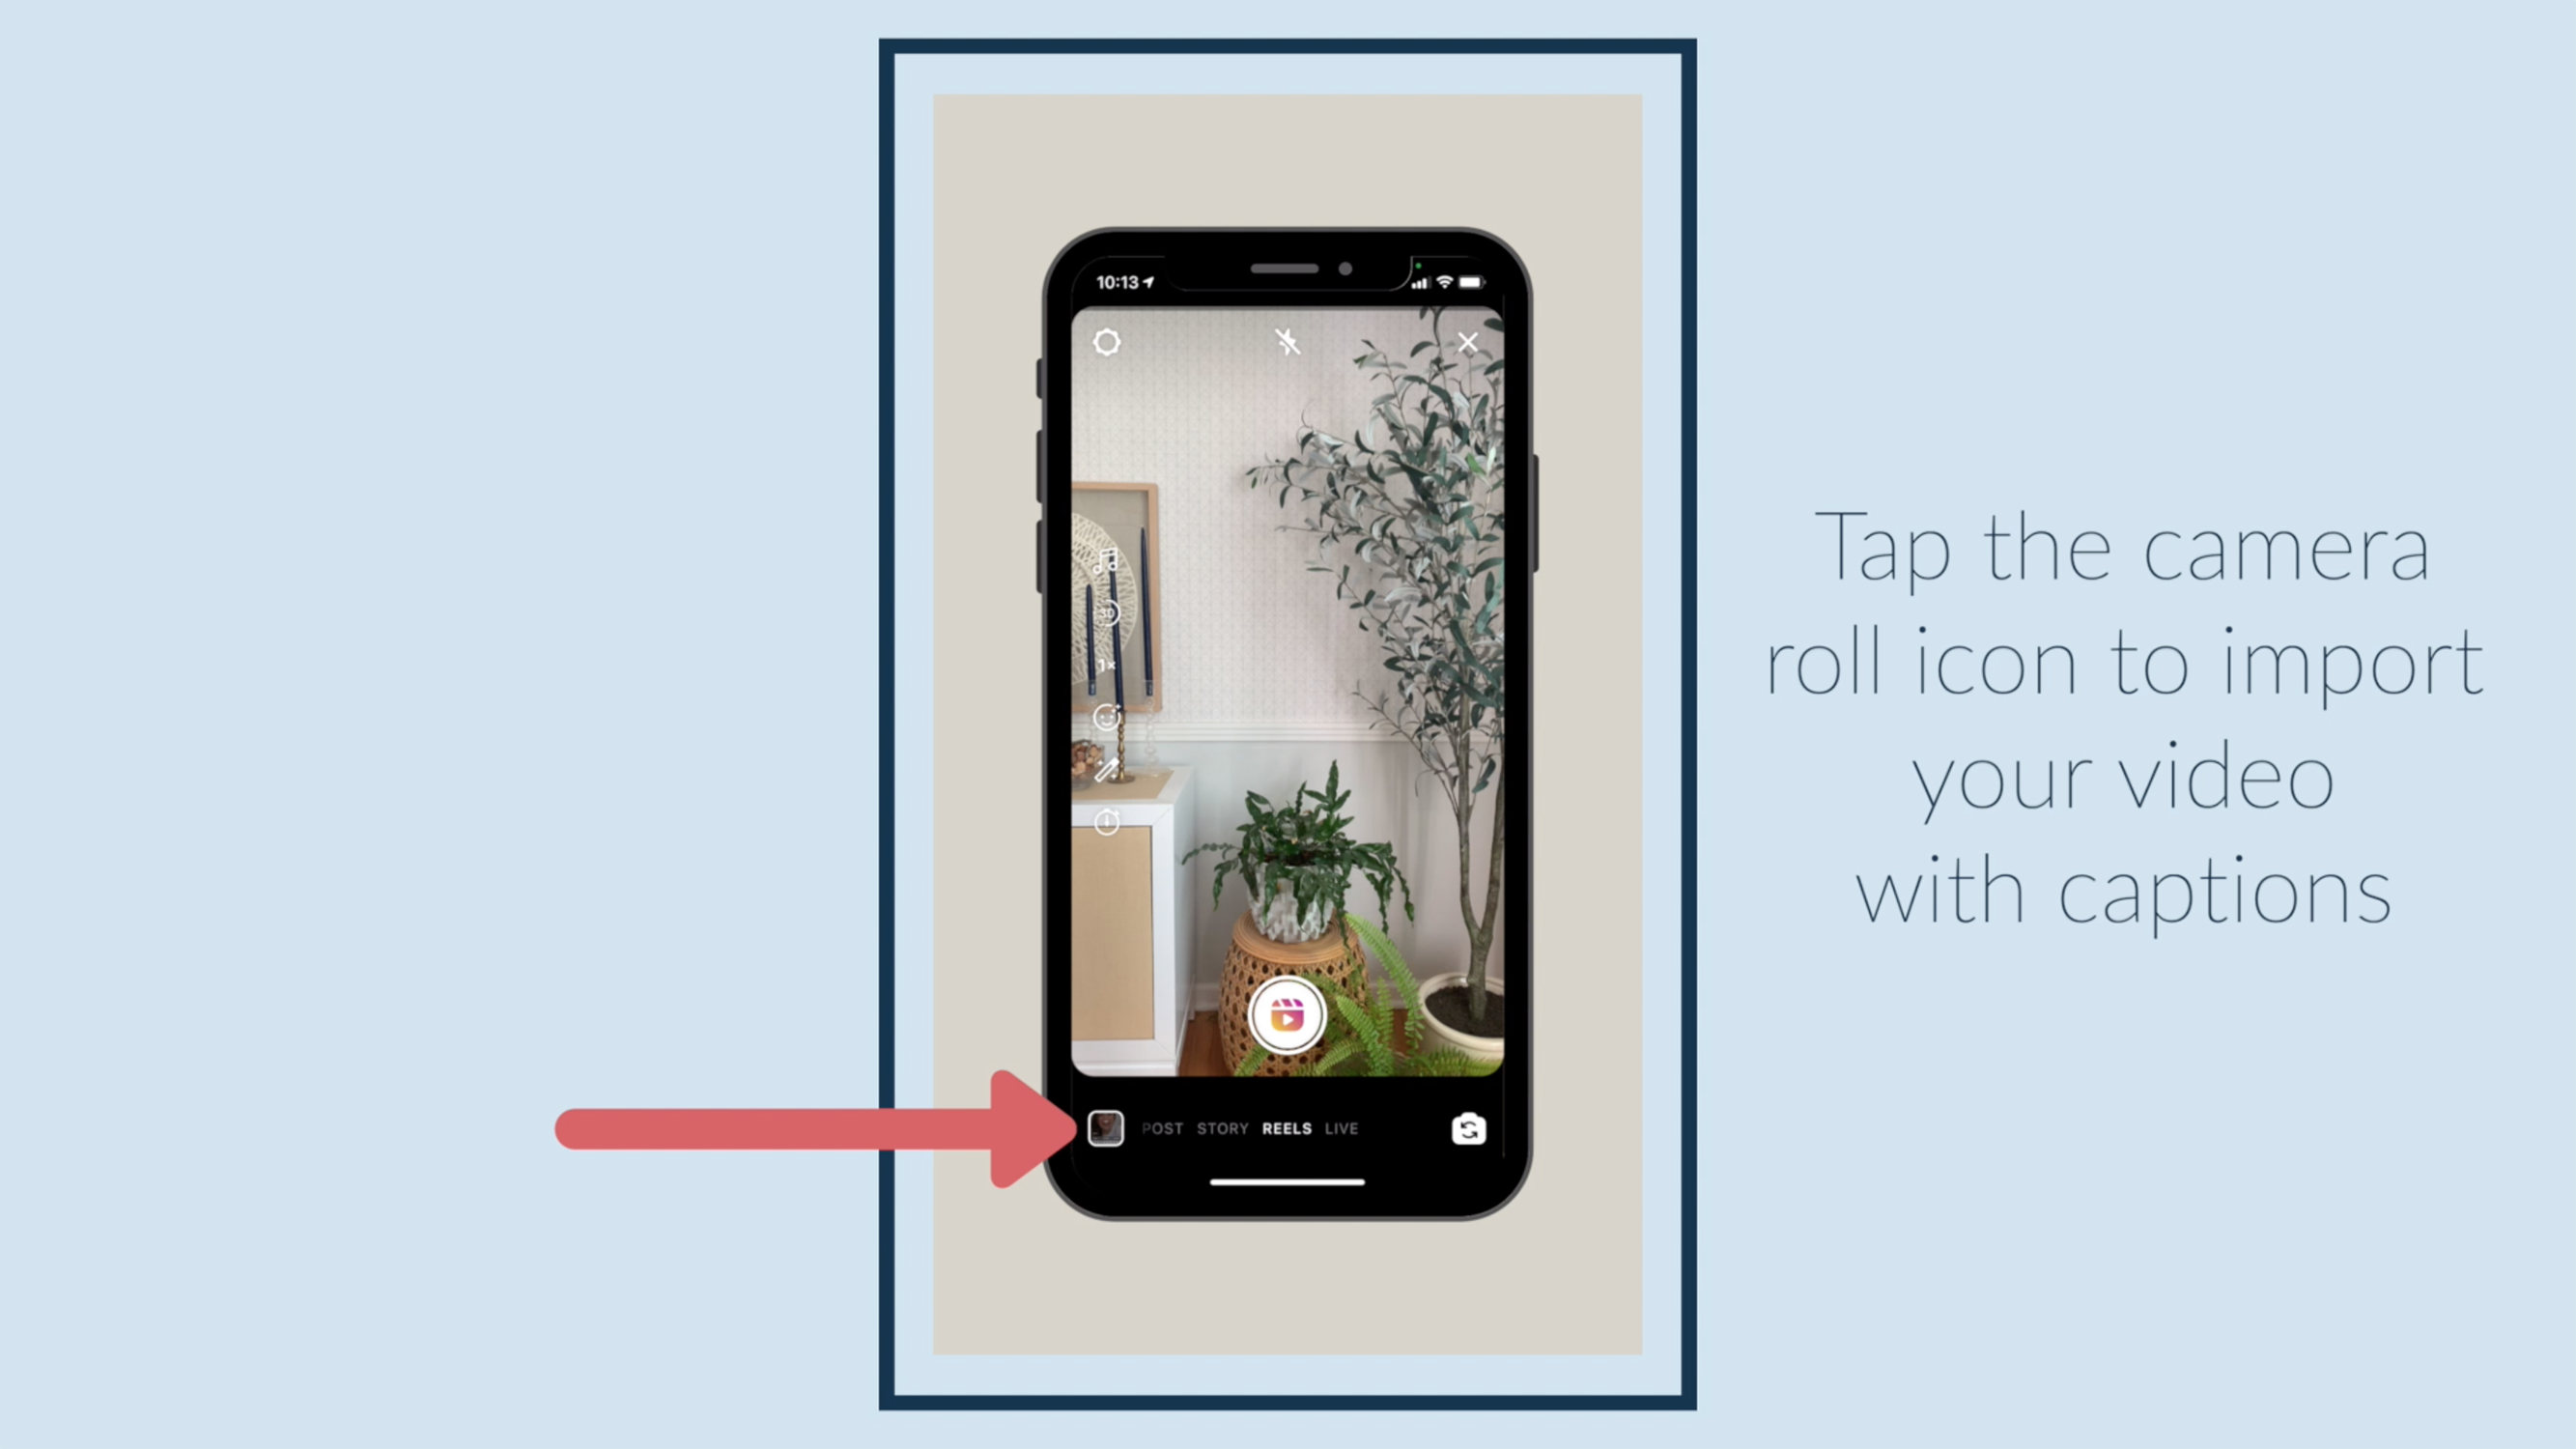
Open up Instagram Reels, and tap the bottom left icon to import your video.

Tap the icon to the right of the record button.
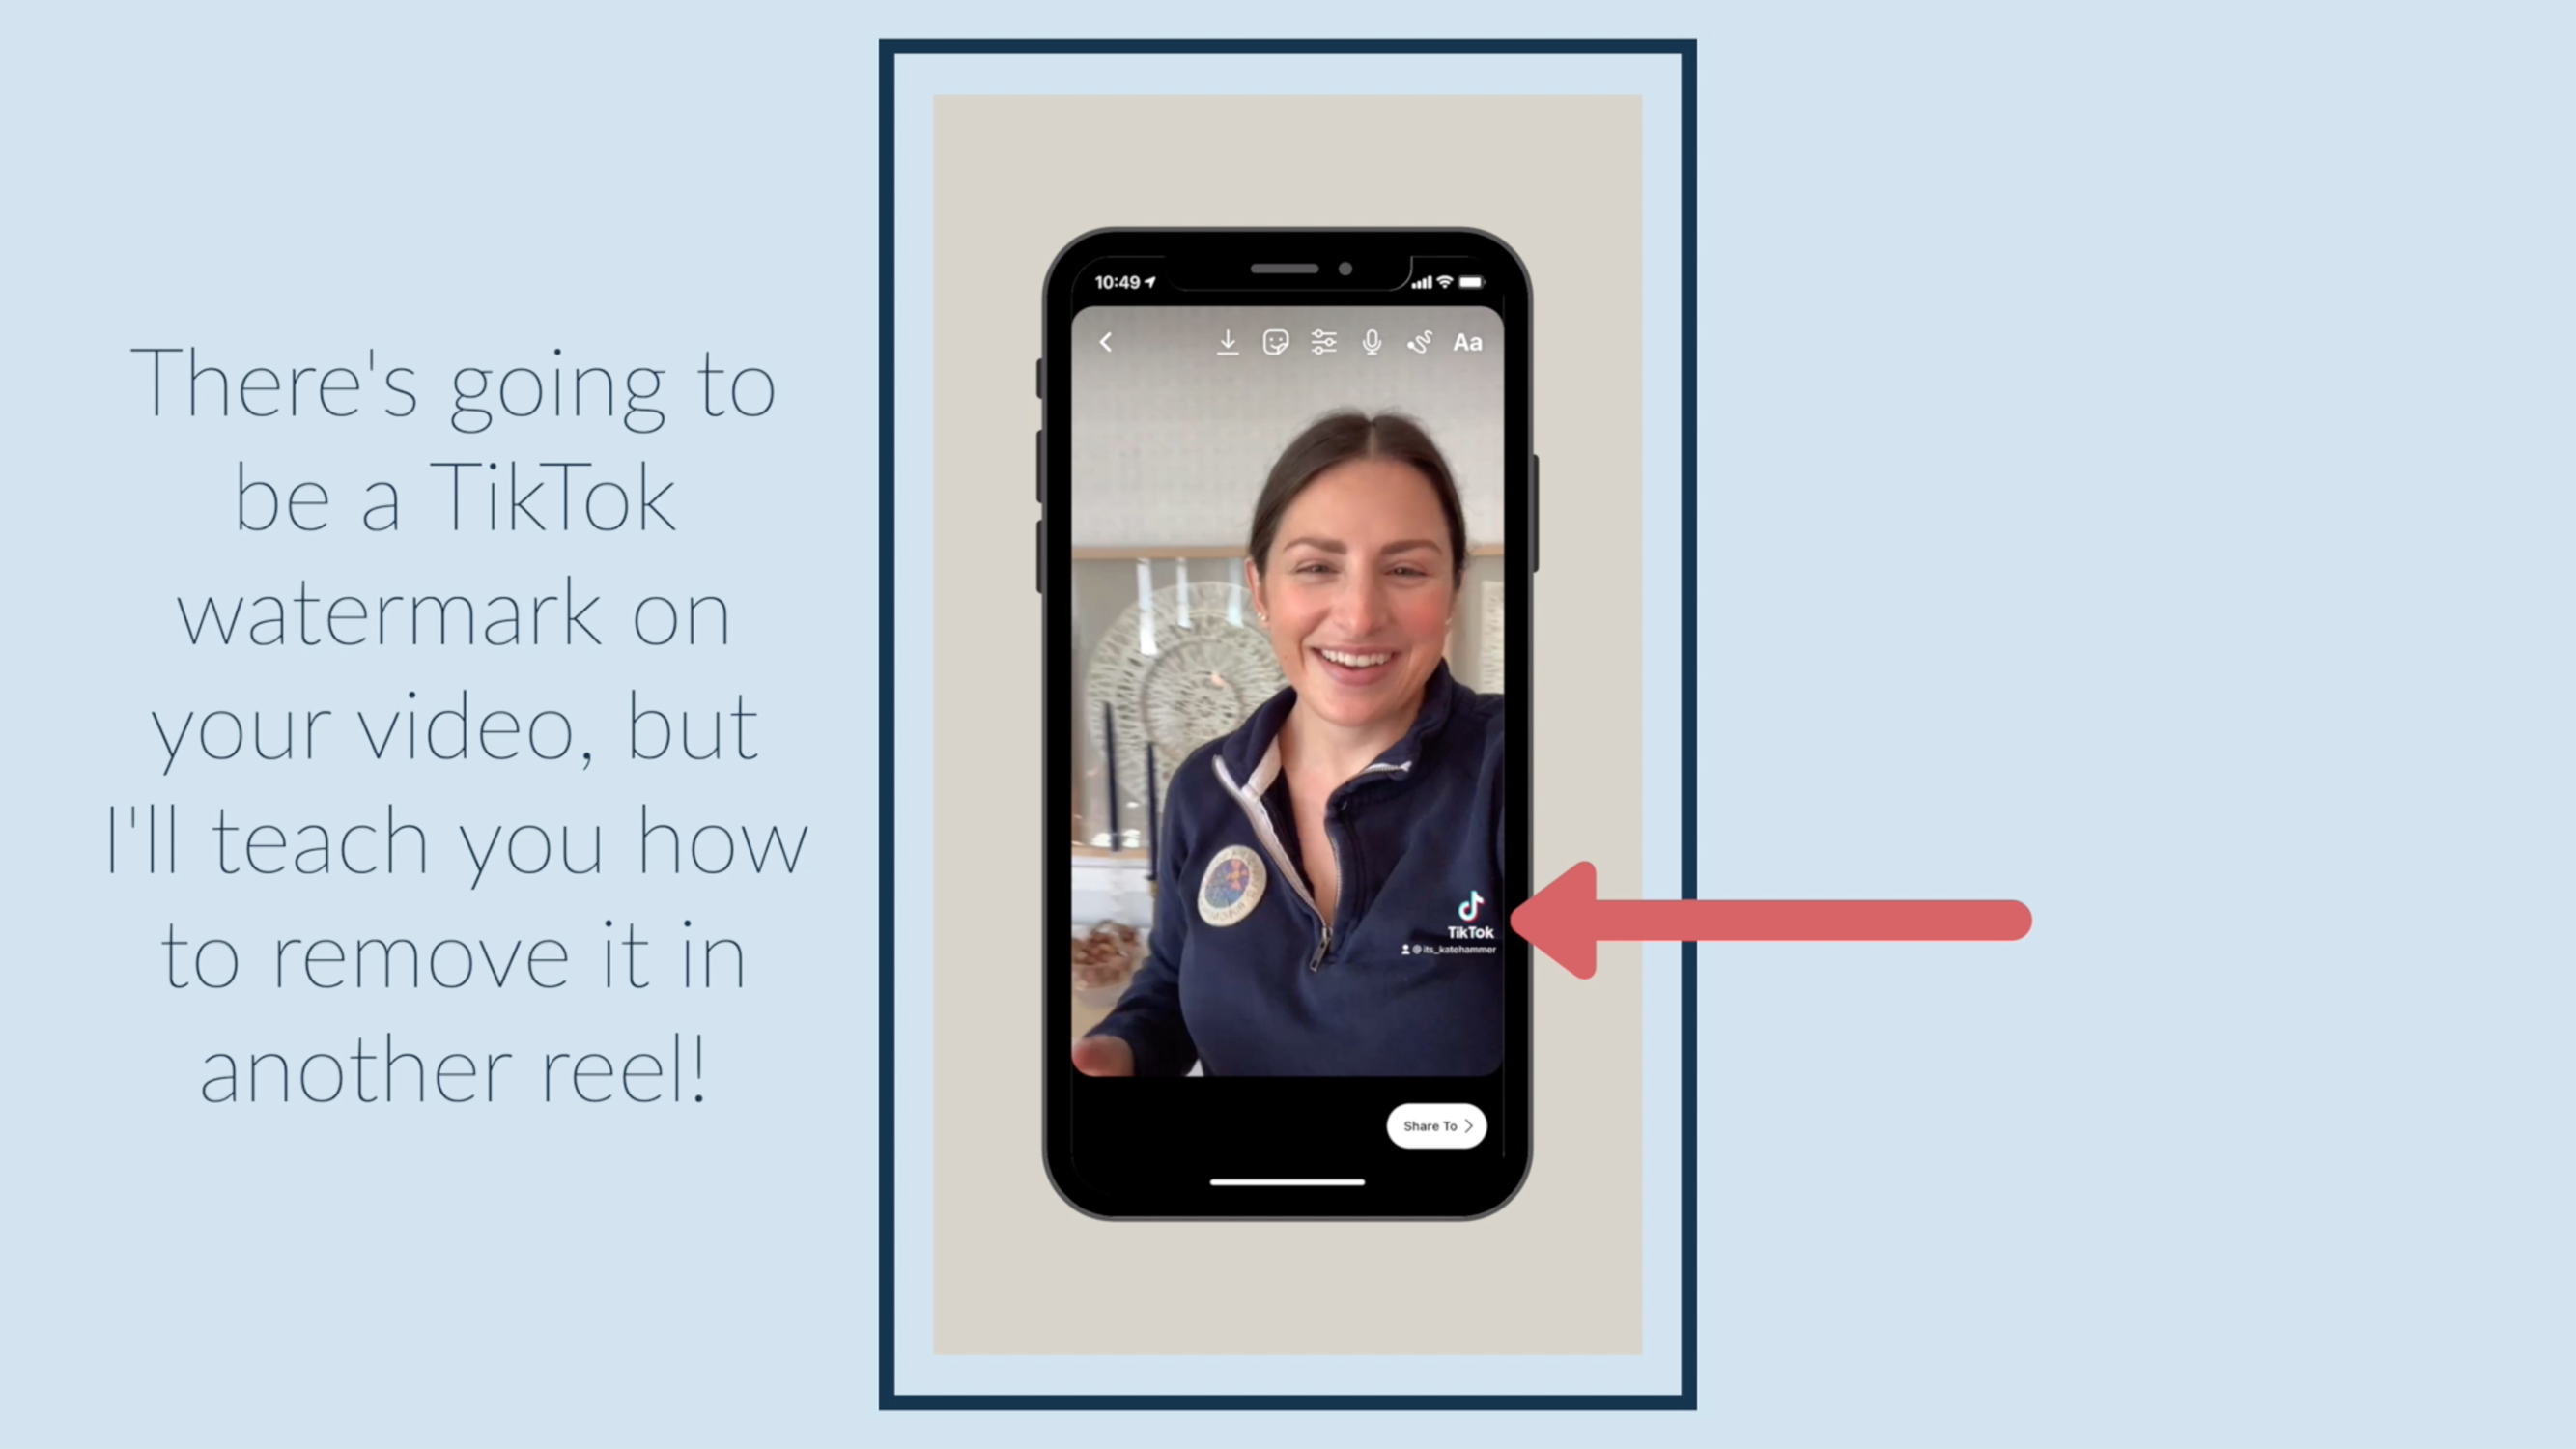
There's going to be a TikTok watermark on your video, but I'll teach you how to remove it in another reel!
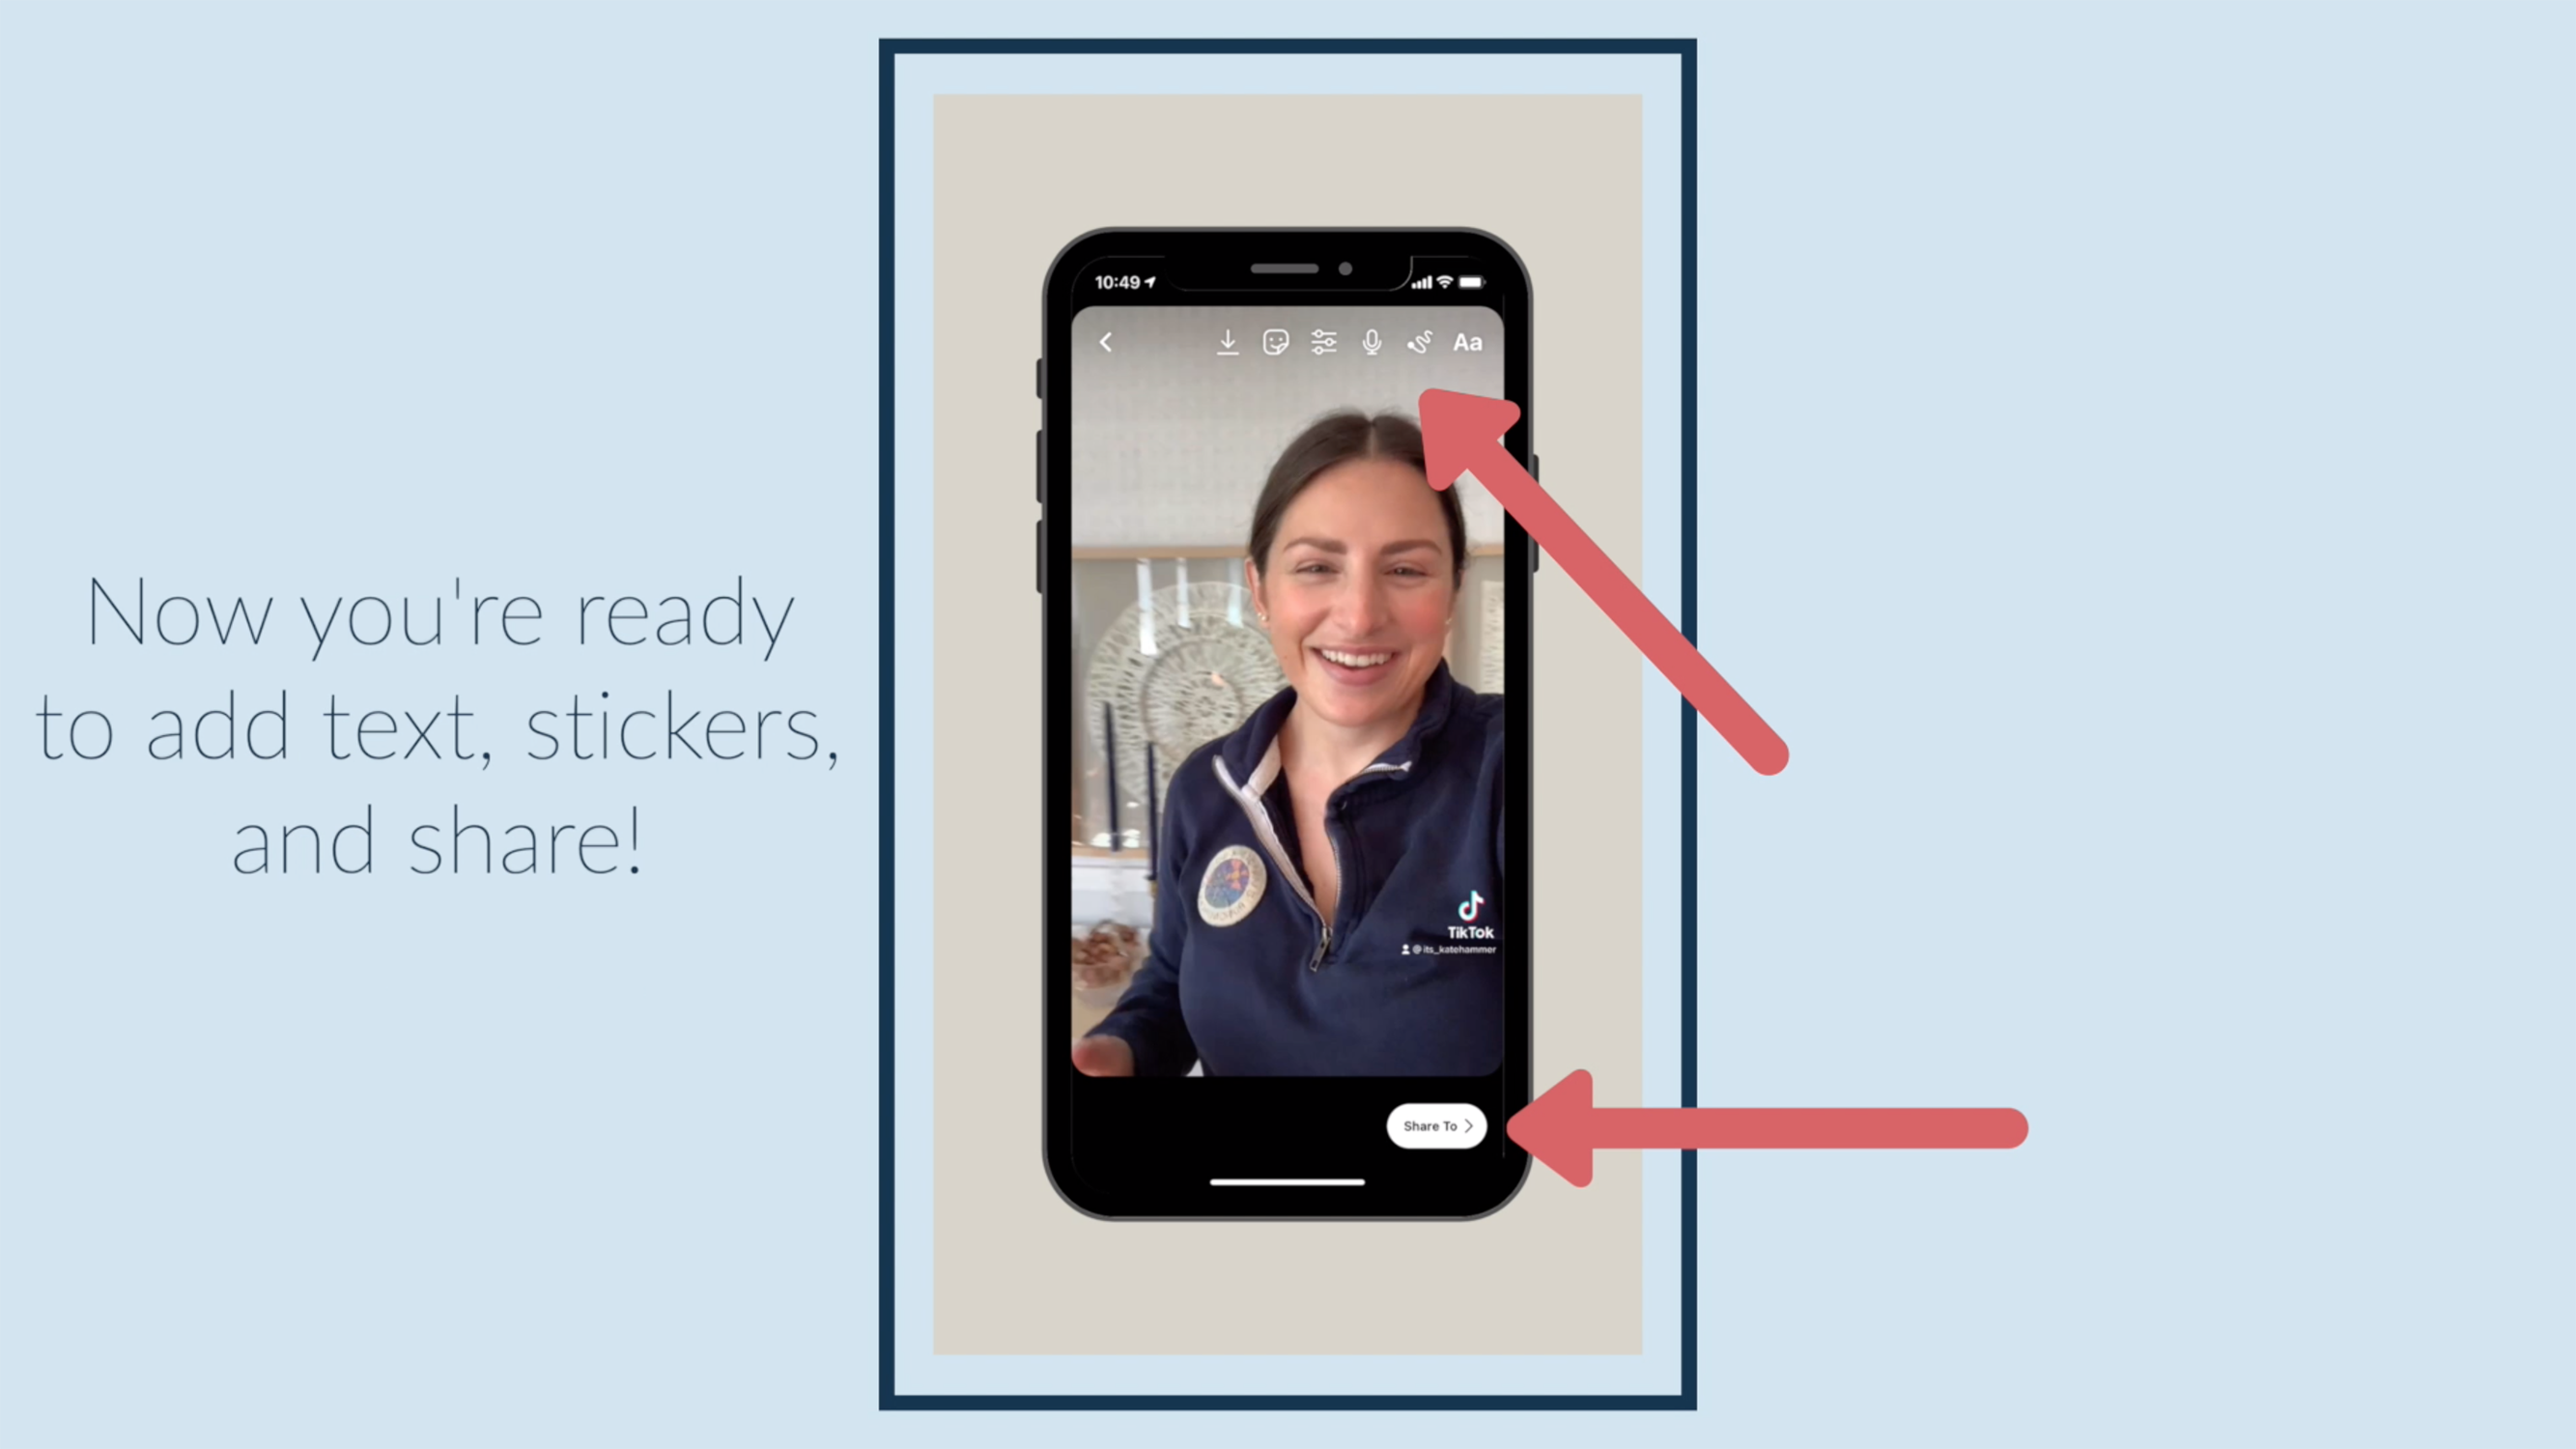
Now you're ready to add text, stickers, and share!
✅ You can also download a FREE copy of my 'Success Capture System' for...
Instagram Reel Tutorial: How to use Speed Settings
Learn how to use speed settings in your Instagram Reels to speed up your videos are you do a tutorial and more! You can learn this feature in under 2 minutes! And if you're tired of tutorials that move too fast and leave you totally confused, this one is different because you get to see frame by frame what to do alongside directions!

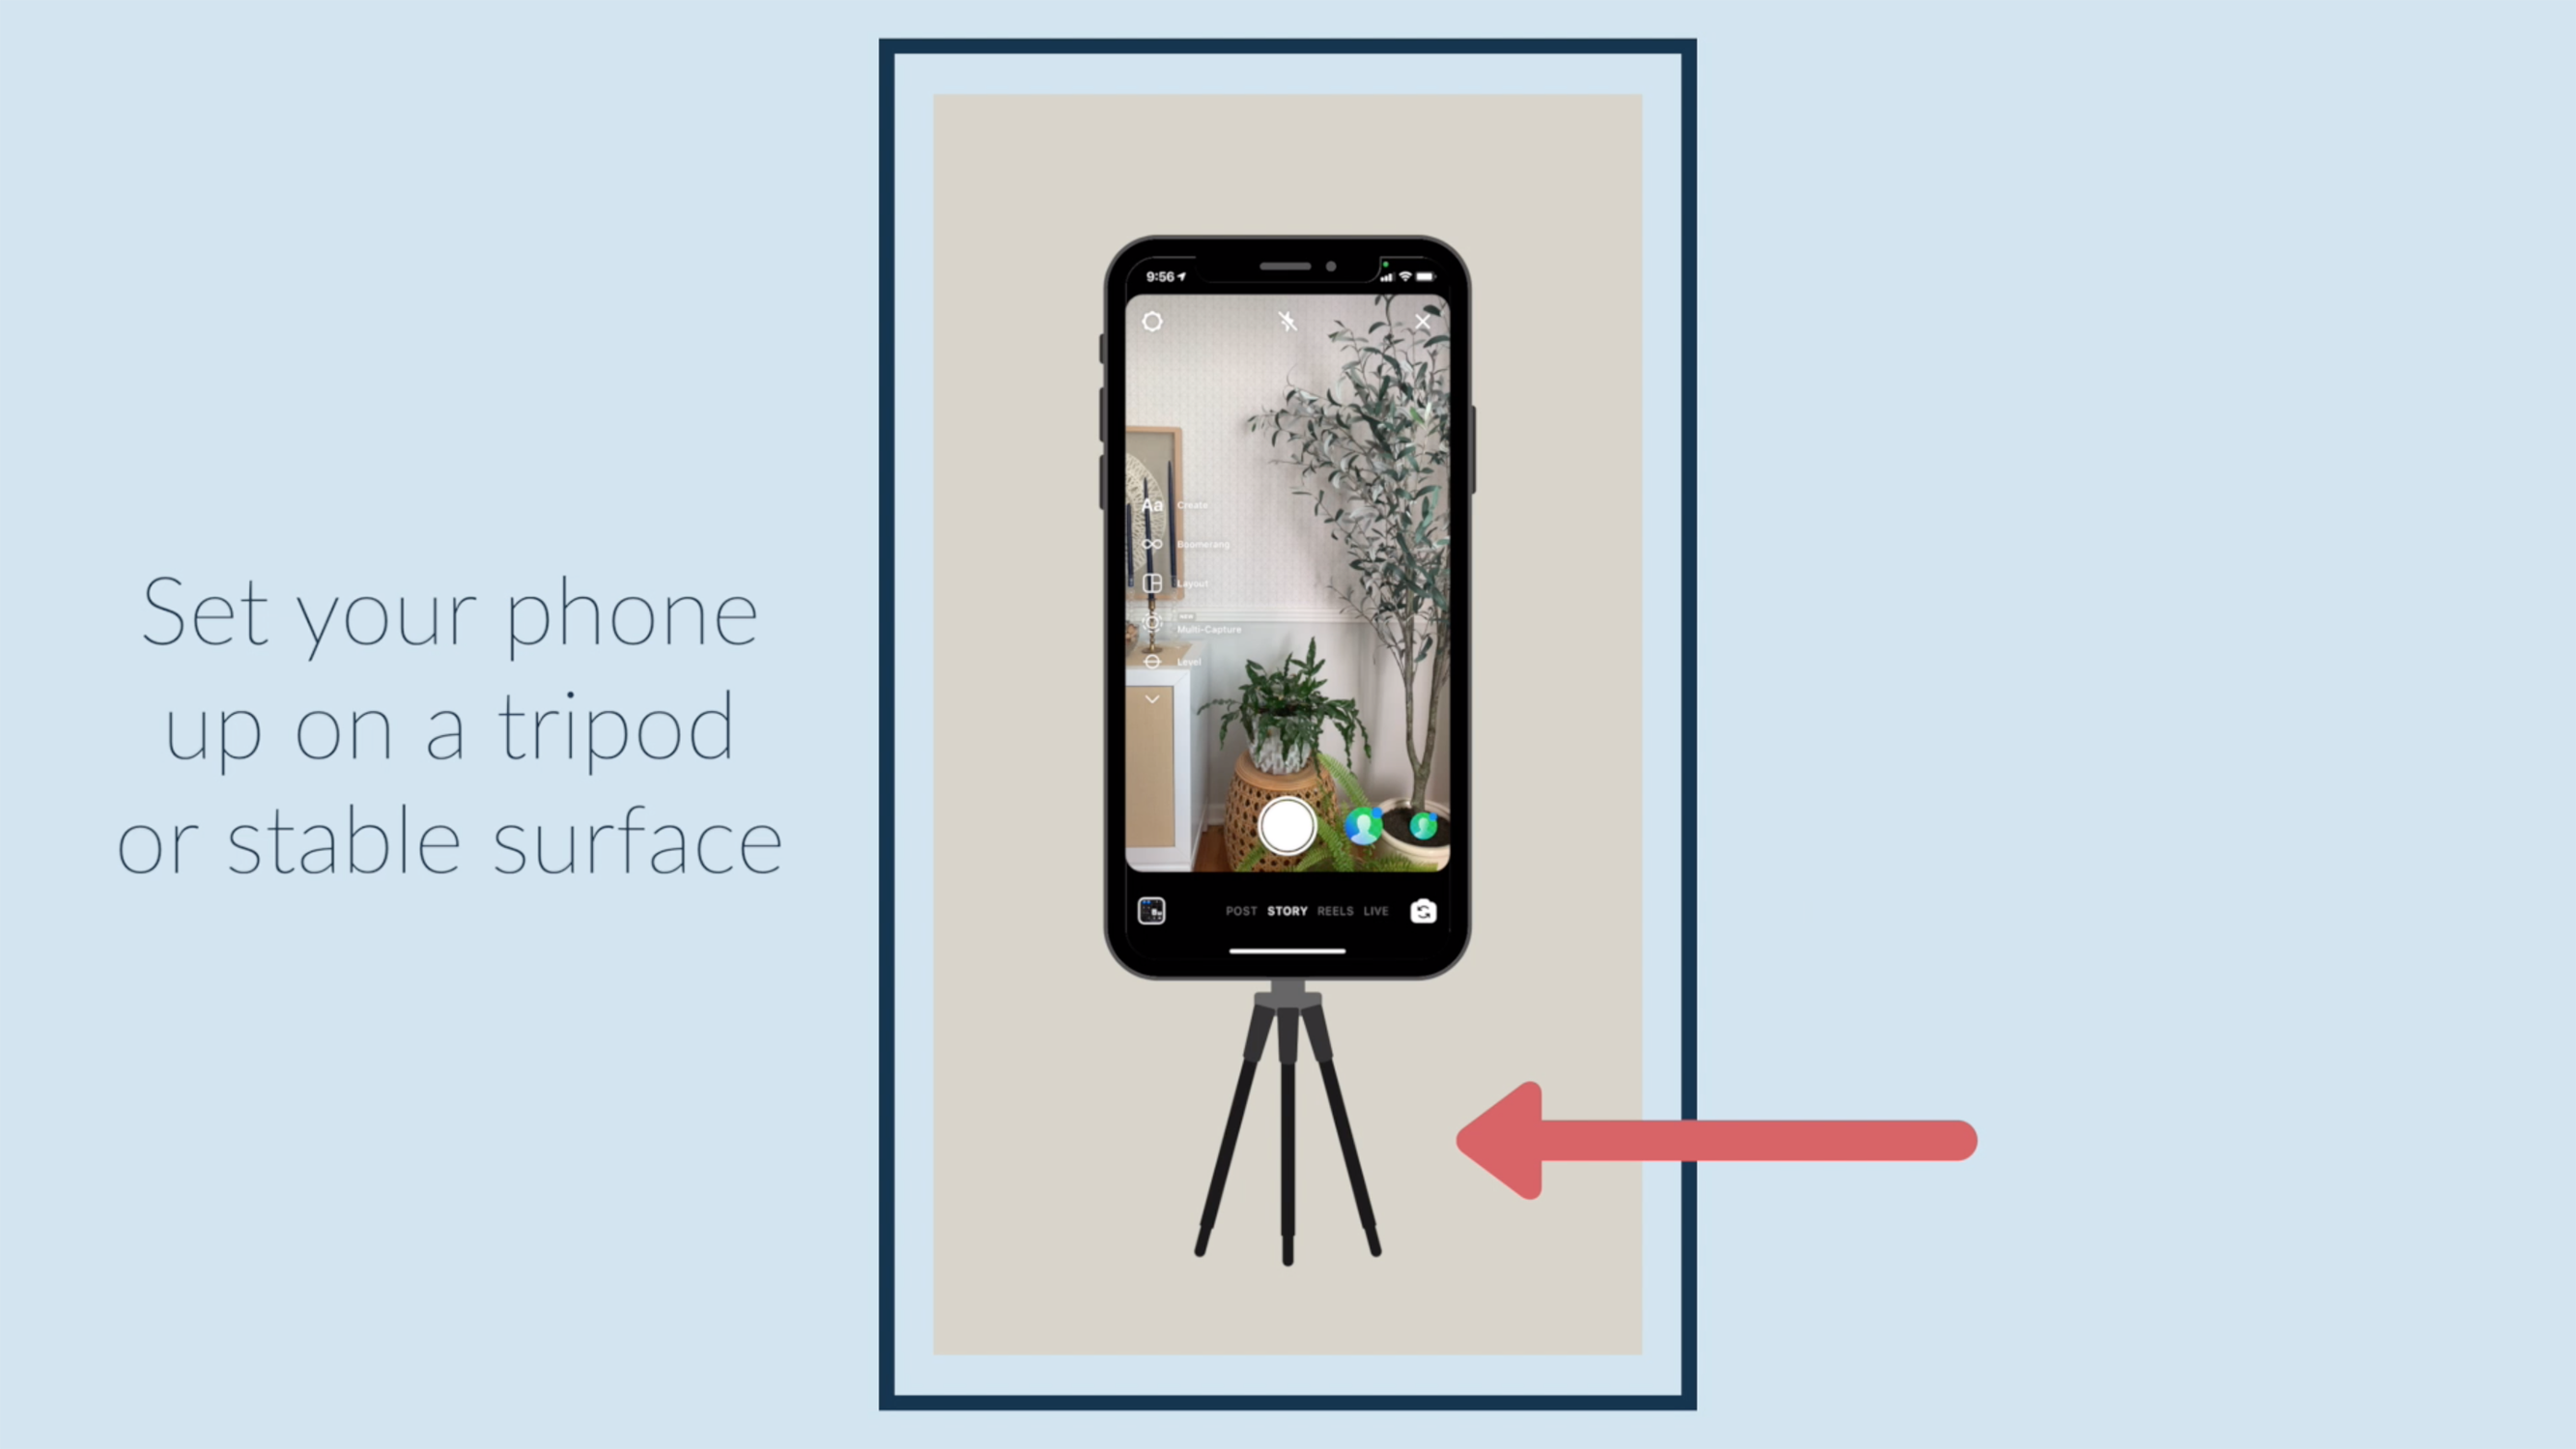
Set your phone up on a tripod or stable surface.

Tap the music icon to choose your song or sound.

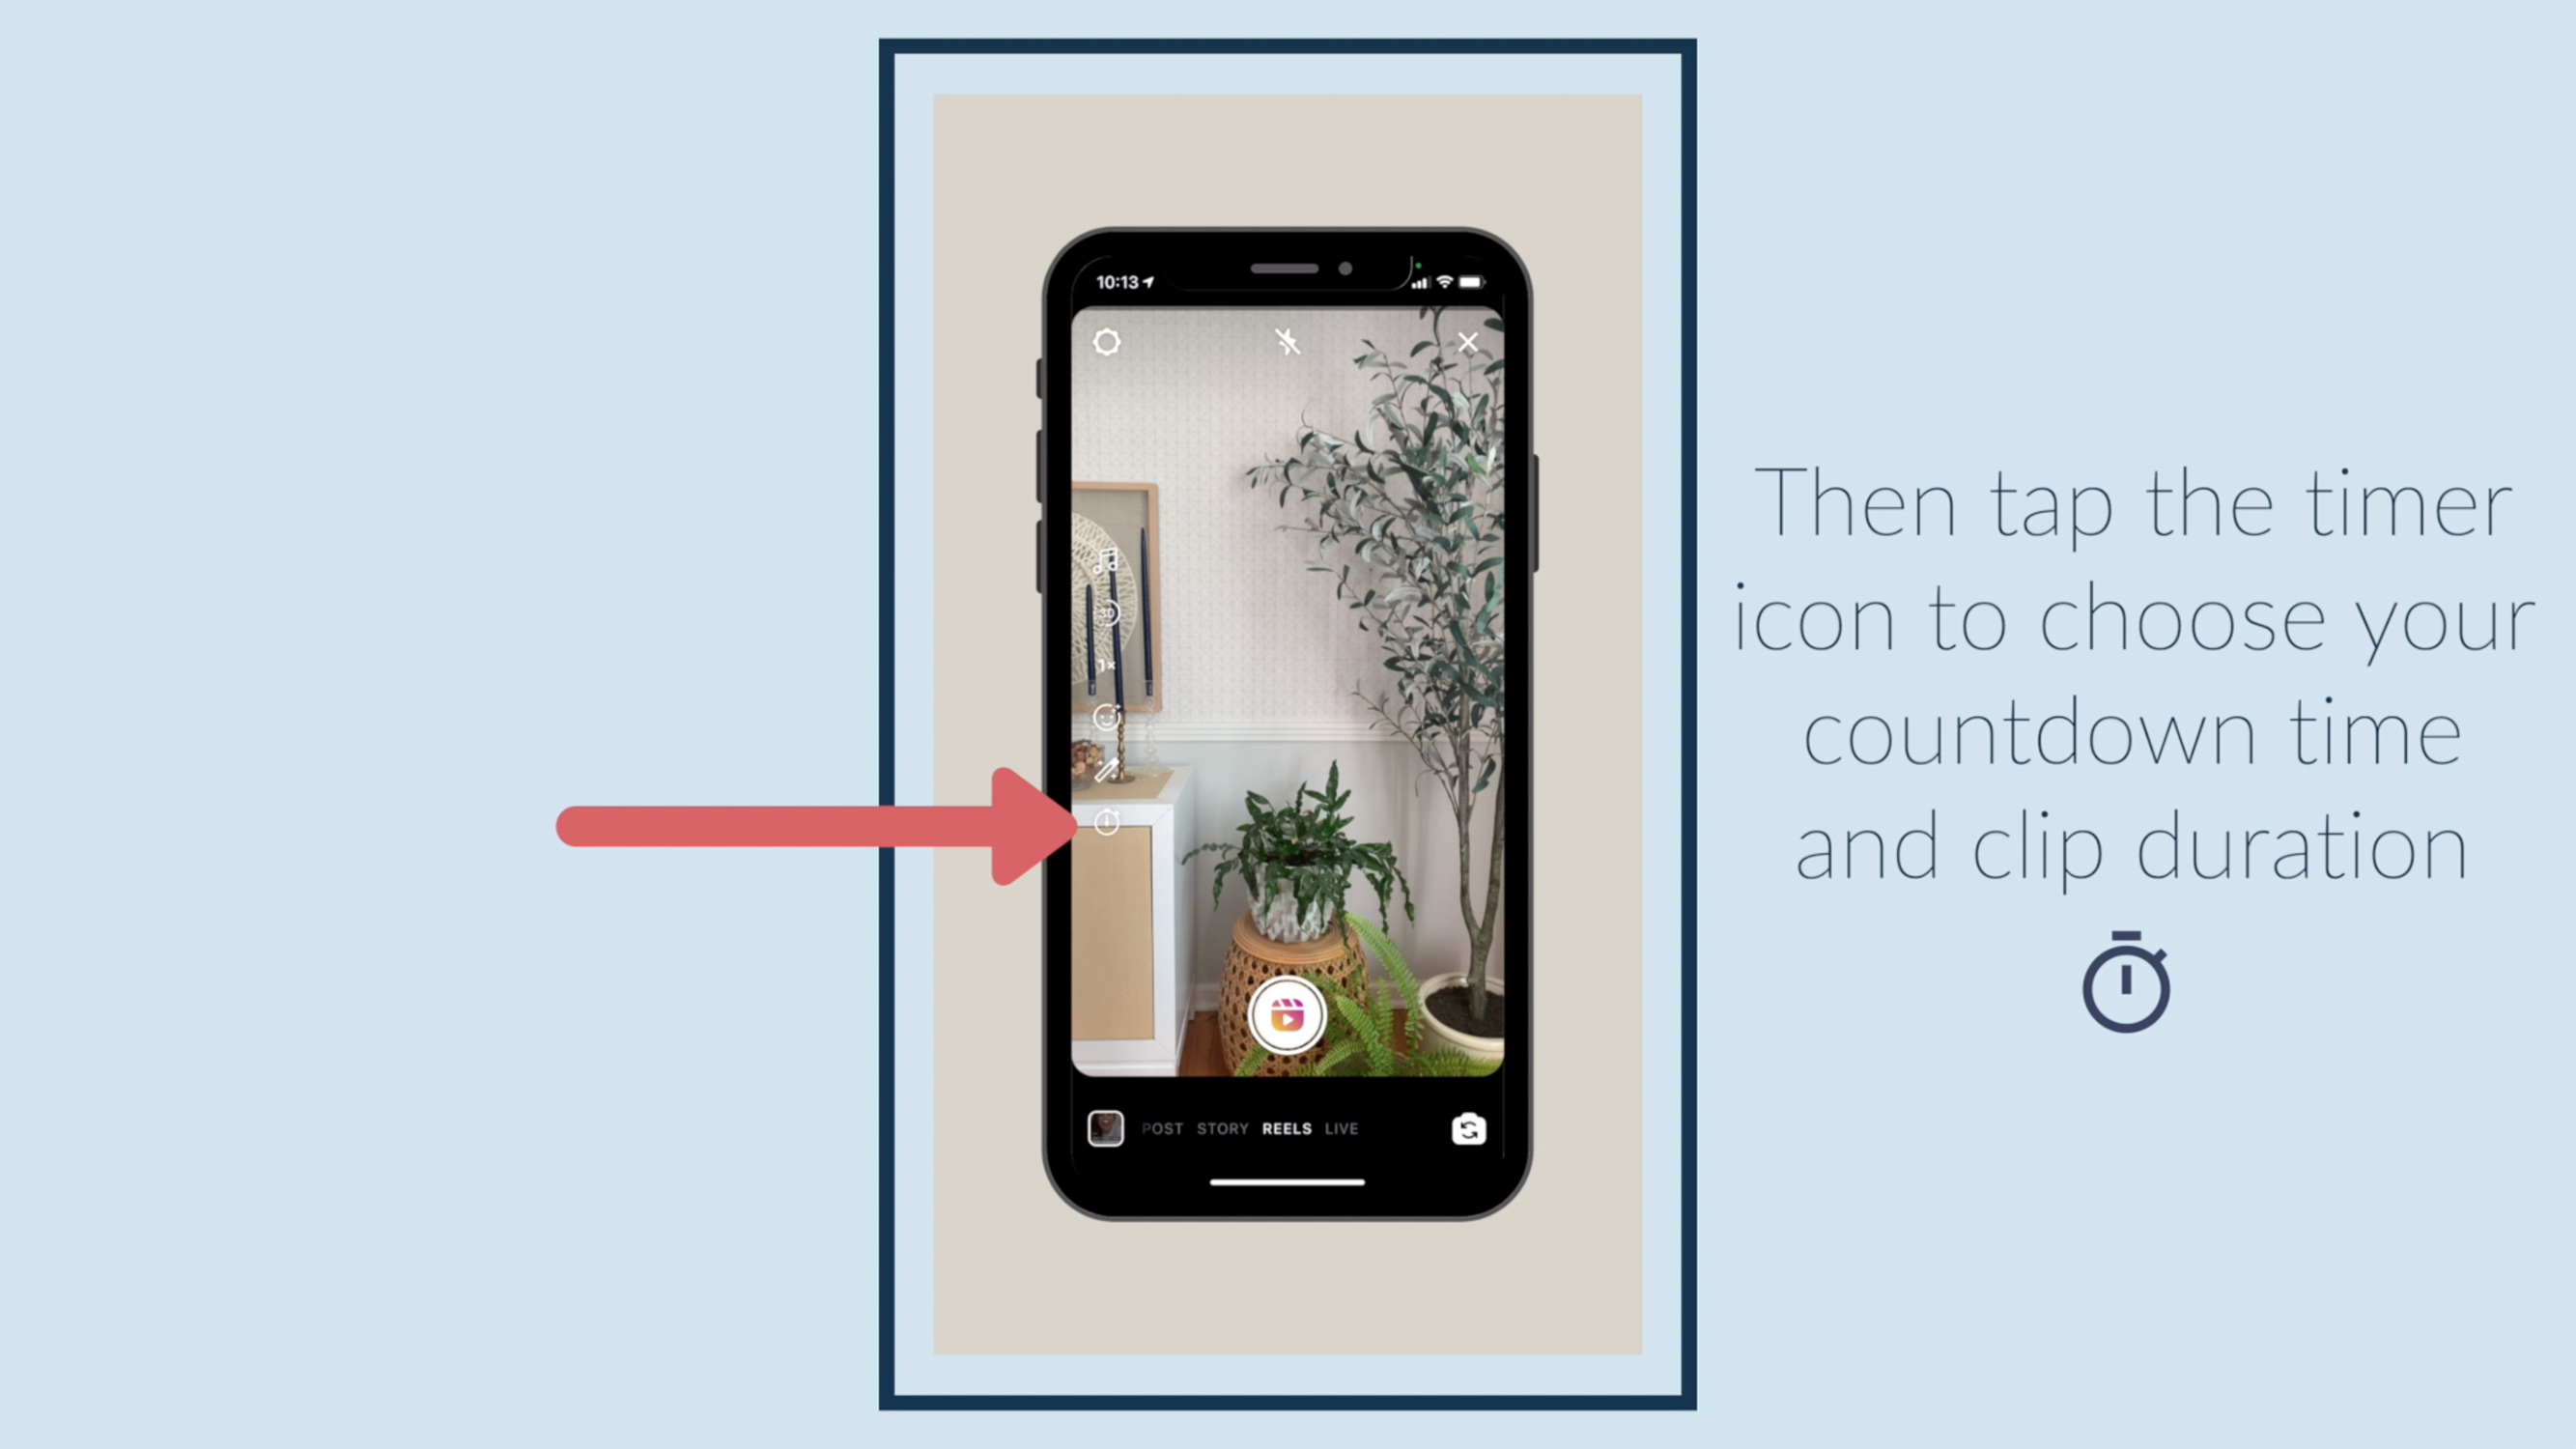
Then tap the timer icon to choose your countdown time and clip duration.

Tap the speed icon.

Choose how much faster or slower you want your final reel to be.

Tap the record button, get into place, and record your reel as you normally would.

Tap the icon to the left of the record icon to see your clip and trim it.

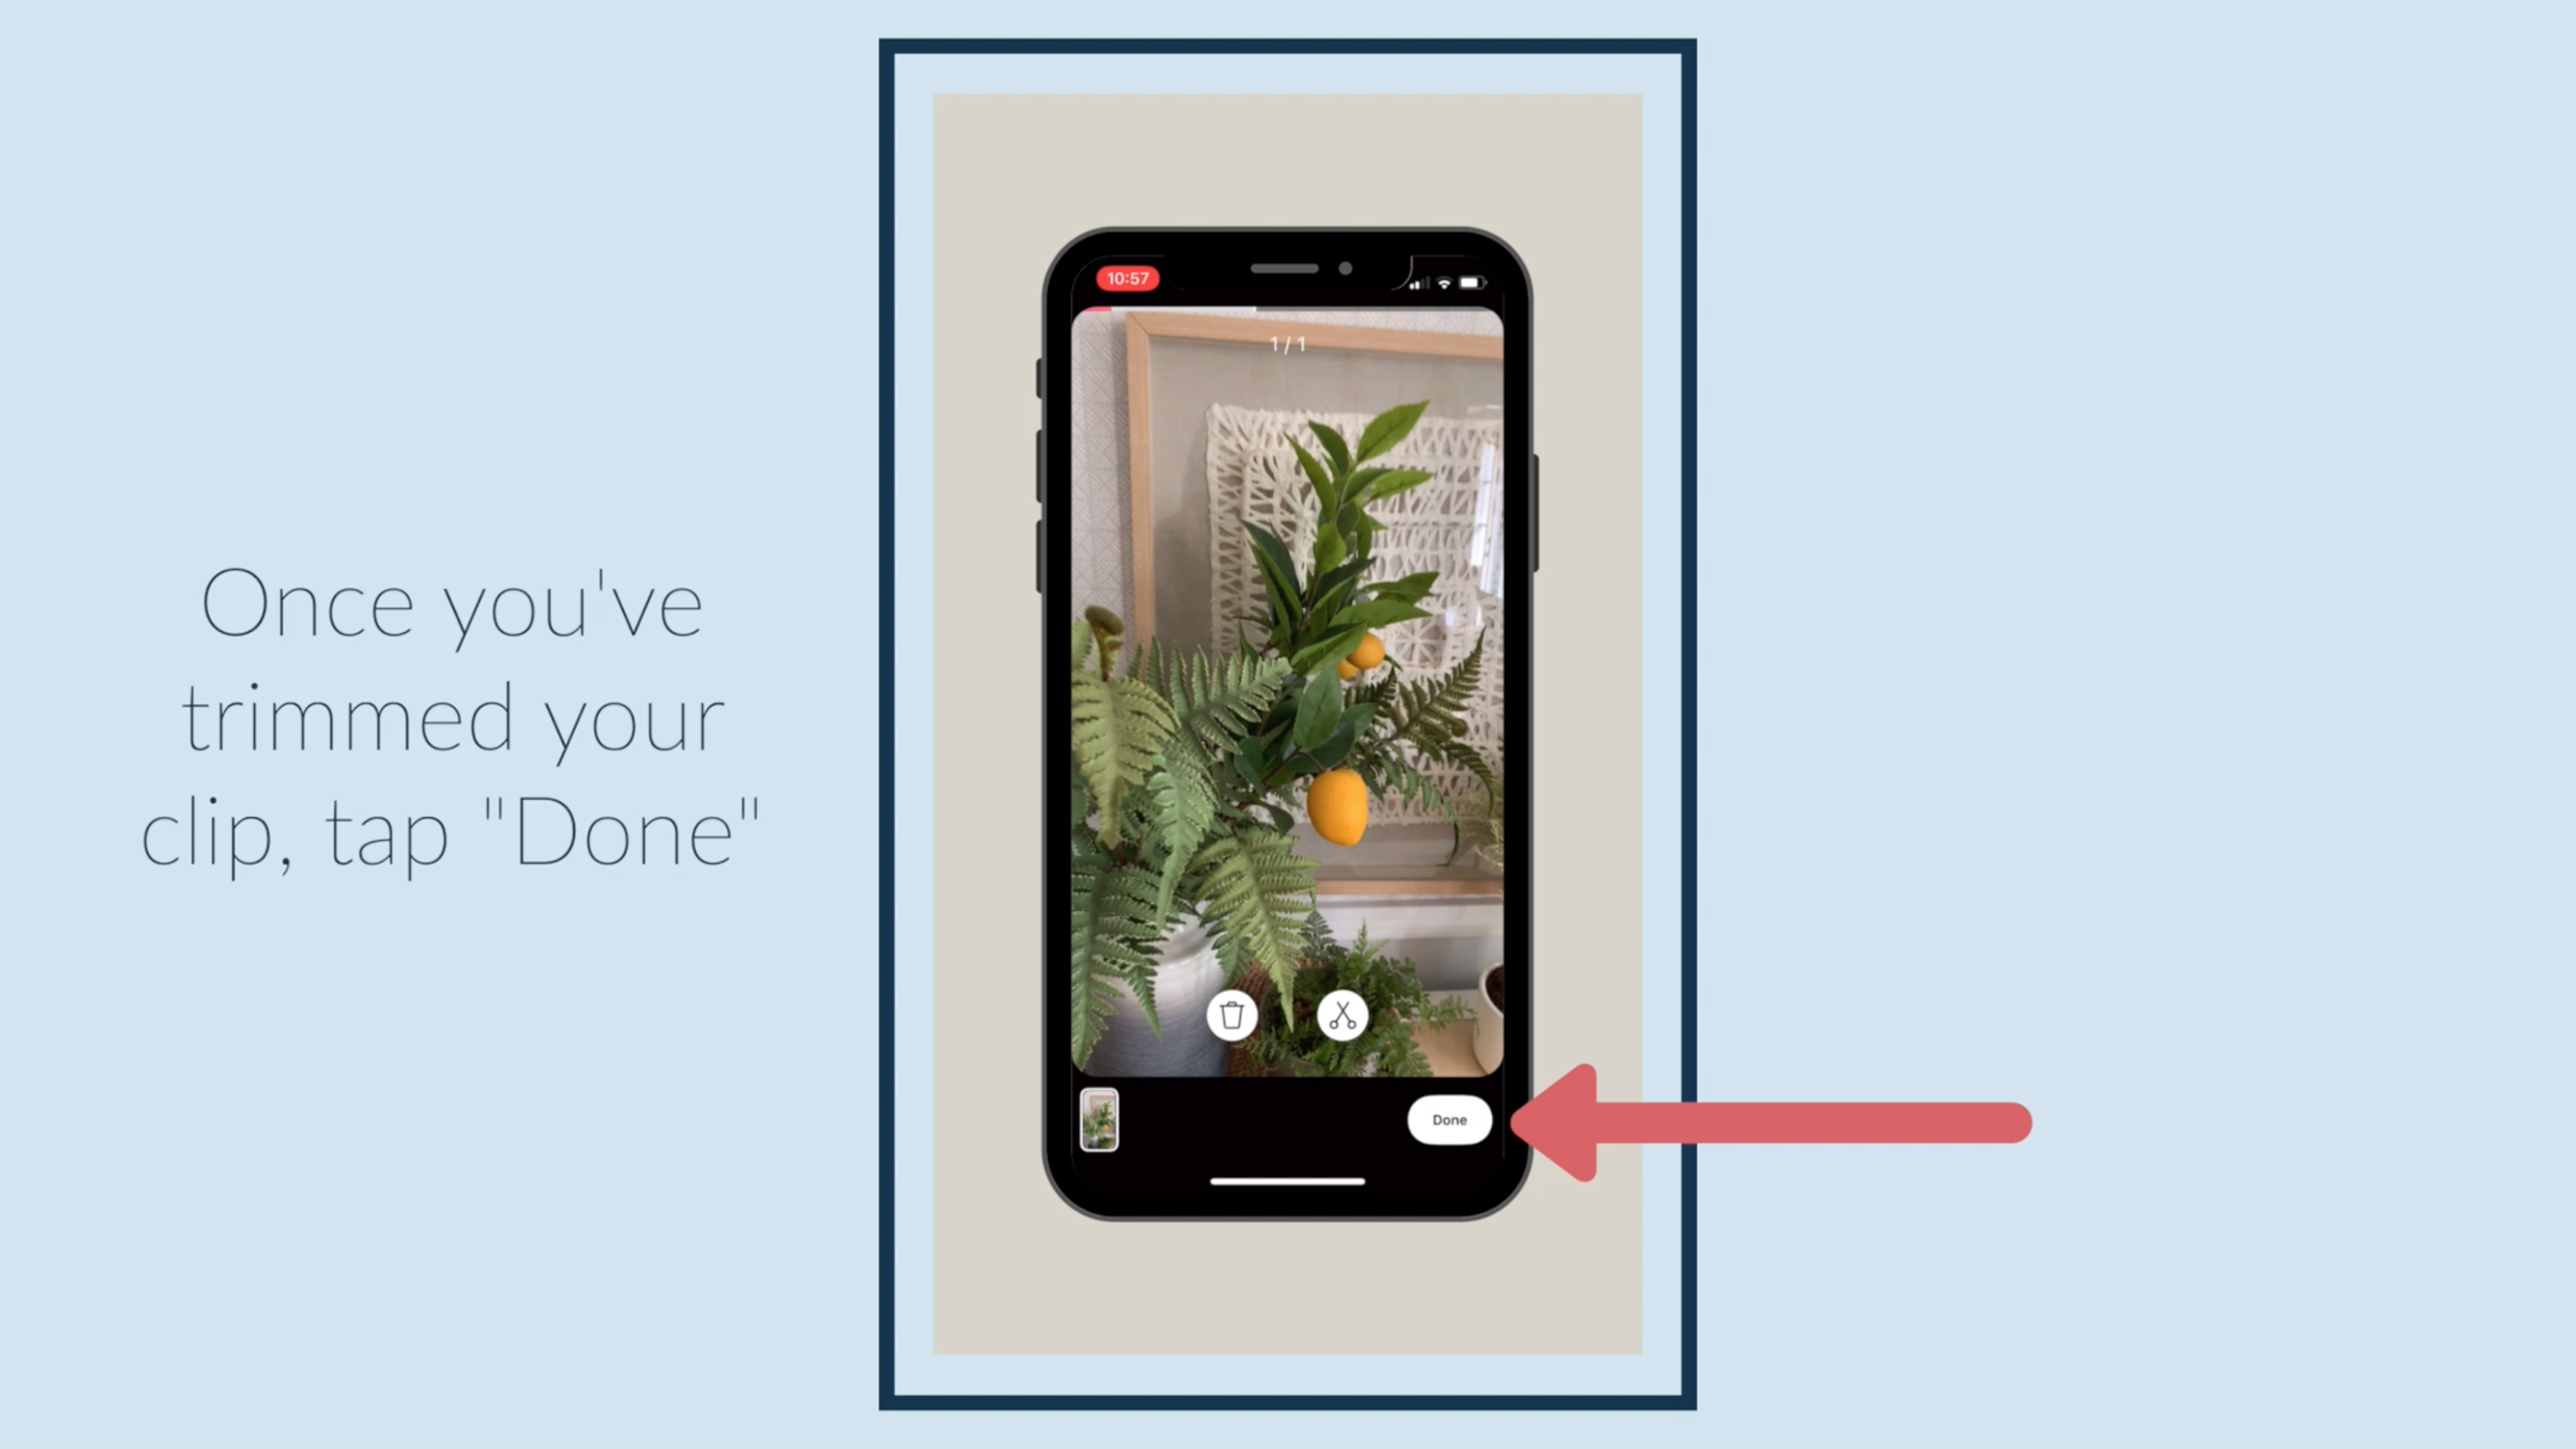
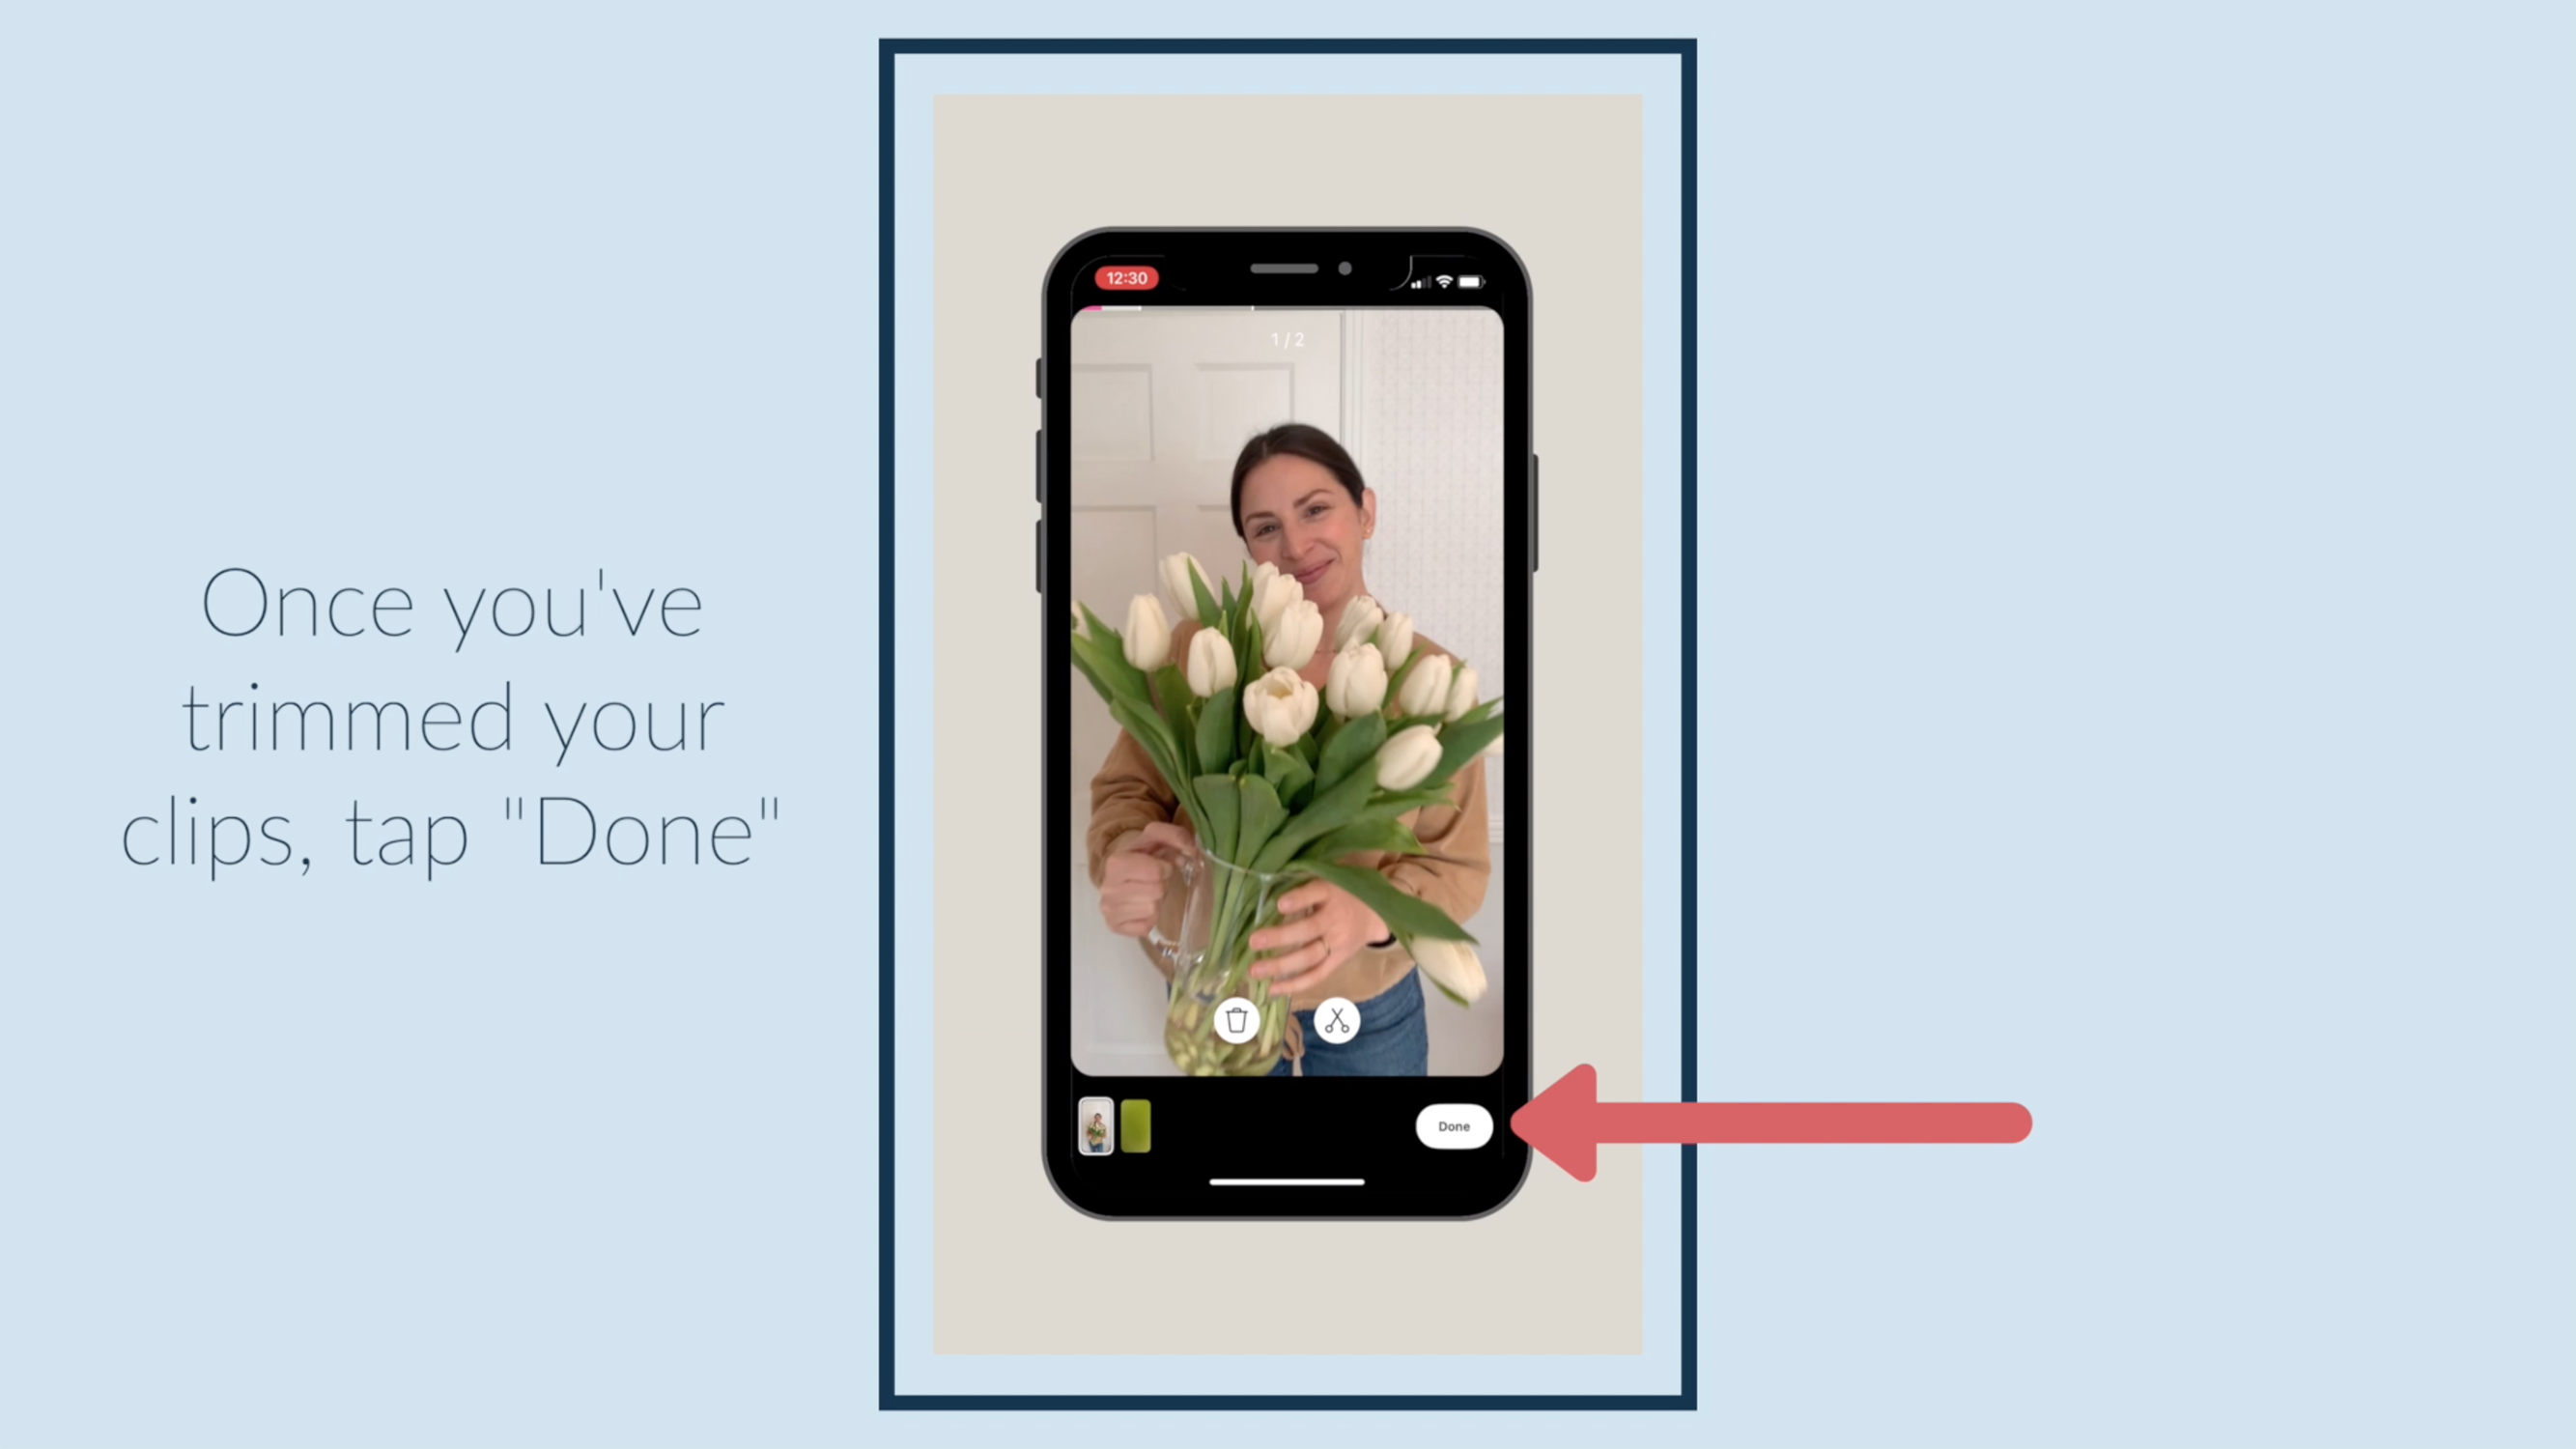
Once you've trimmed your clip, tap "Done."

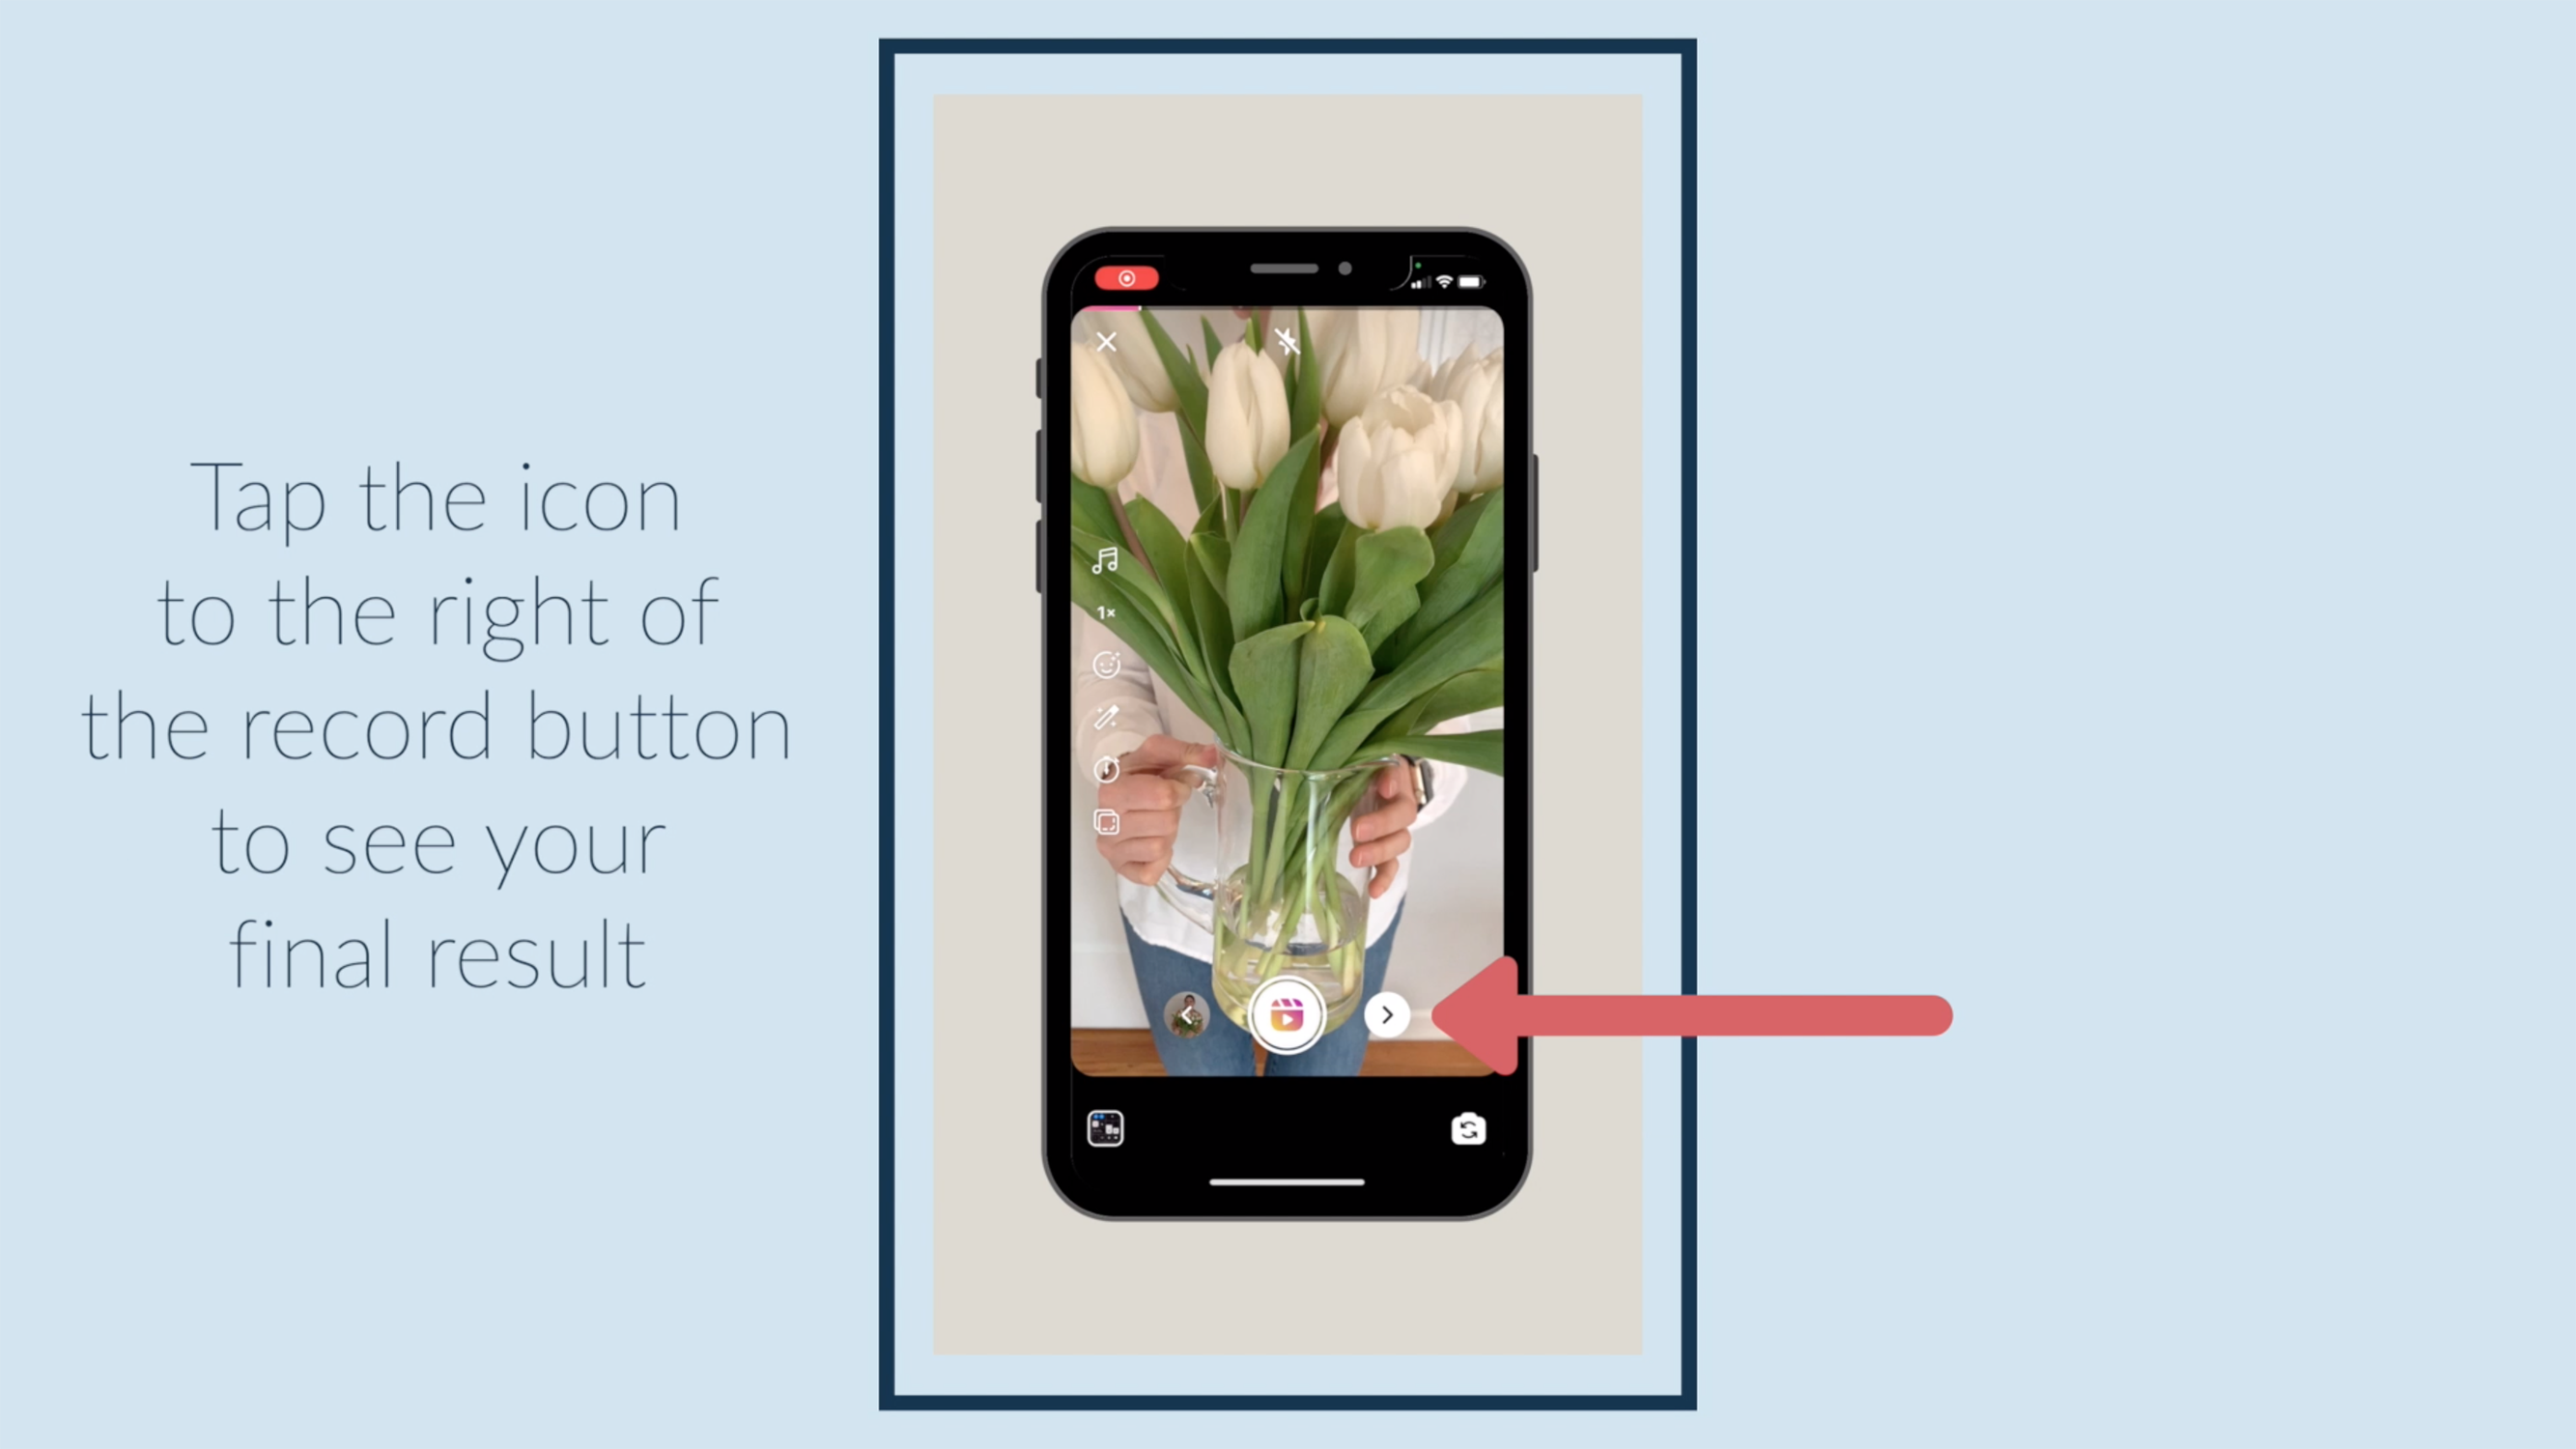
Tap the icon to the right of the record button to see your final result.

Now you're ready to add text, stickers, and share!
✅ You can also download a FR...
Instagram Reel Tutorial: How to do a Side Swipe Transition
Learn a fun transition to use in your Instagram Reels! You can learn this 'side swipe' transition in under 2 minutes! Check out the video above and/or the directions with slides below-- whatever suits you.

Have someone hold your phone for you, because the camera is going to have to move.

Tap the music icon to choose your song or sound.

Then tap the timer icon to choose your countdown time and transition spot.

Tap the record button and get into place while the timer counts down. Record the first half of your transition by swiping the air and having your camera person quickly swing the camera away from you.

Make any post-transition changes you want, then tap the timer icon to set your clip duration and timer again.

Record the next half of your transition by having your camera person quickly pan the camera to you from the opposite direction they panned away in the first half.

Tap the icon to the left of the record icon to see your clips and trim ...
Instagram Reel Tutorial: How to use the Green Screen Filter
Did you know you can use a green screen effect in Instagram Reels? There is an easy way you can learn in here in under 2 minutes! Watch the video above and/or scroll through the directions below. Then, give it a try!

Set your phone up on a tripod or stable surface.

Tap the music icon to choose your song or sound.

Then tap the timer icon to choose your countdown time and clip duration.

Tap the filters icon.

Swipe through all the filters to the search icon at the very end.

Tap the search icon.

Search "green screen," and choose the first option.

Tap "Try It."

To add a photo or video as your background, tap "Add Media."

Adjust how large you appear in front of the background by pinching the screen.

Tap the record button, get into place while the timer counts down, and record your reel.

Tap the icon to the left of the record icon to see your clip and trim it.

Once you've trimmed your clip, tap "Done."

Tap the i...
Instagram Reel Tutorial: How to Edit Sound
Editing sound in your Instagram reels can be really important when you want to balance music with Voiceover. Learn how to make it happen in just a couple of minutes!
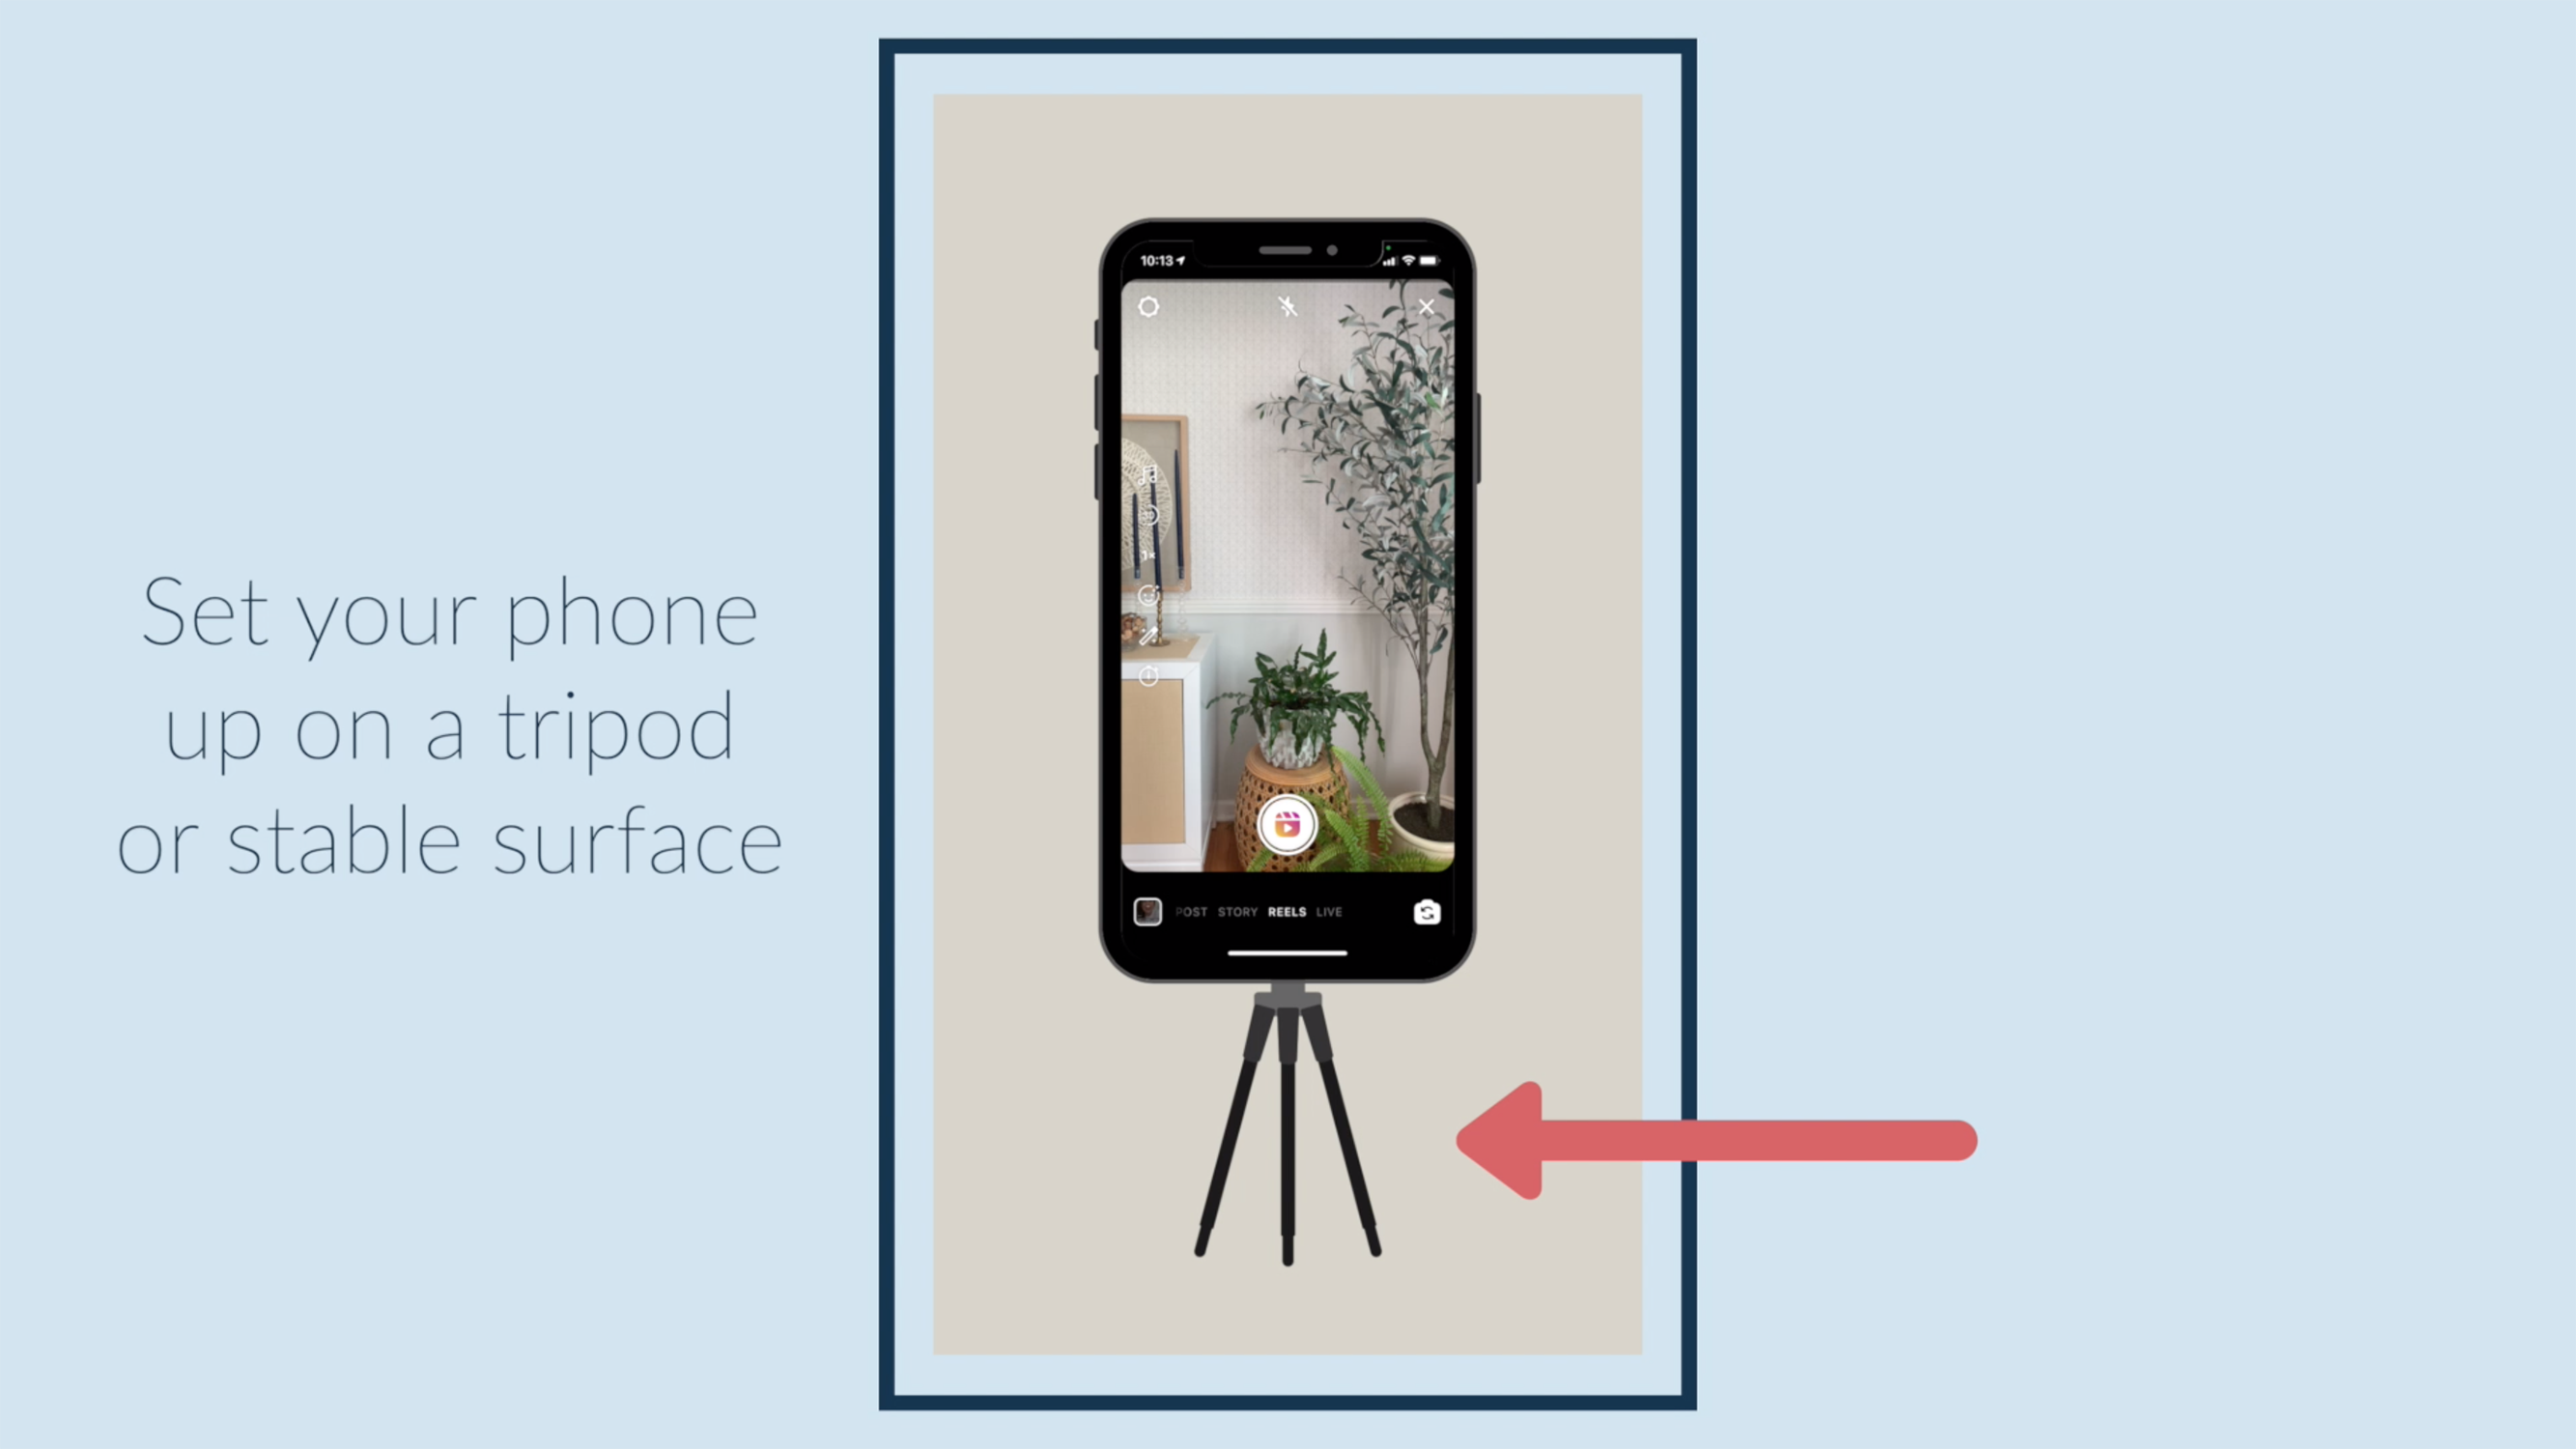 Set your phone up on a tripod or stable surface.
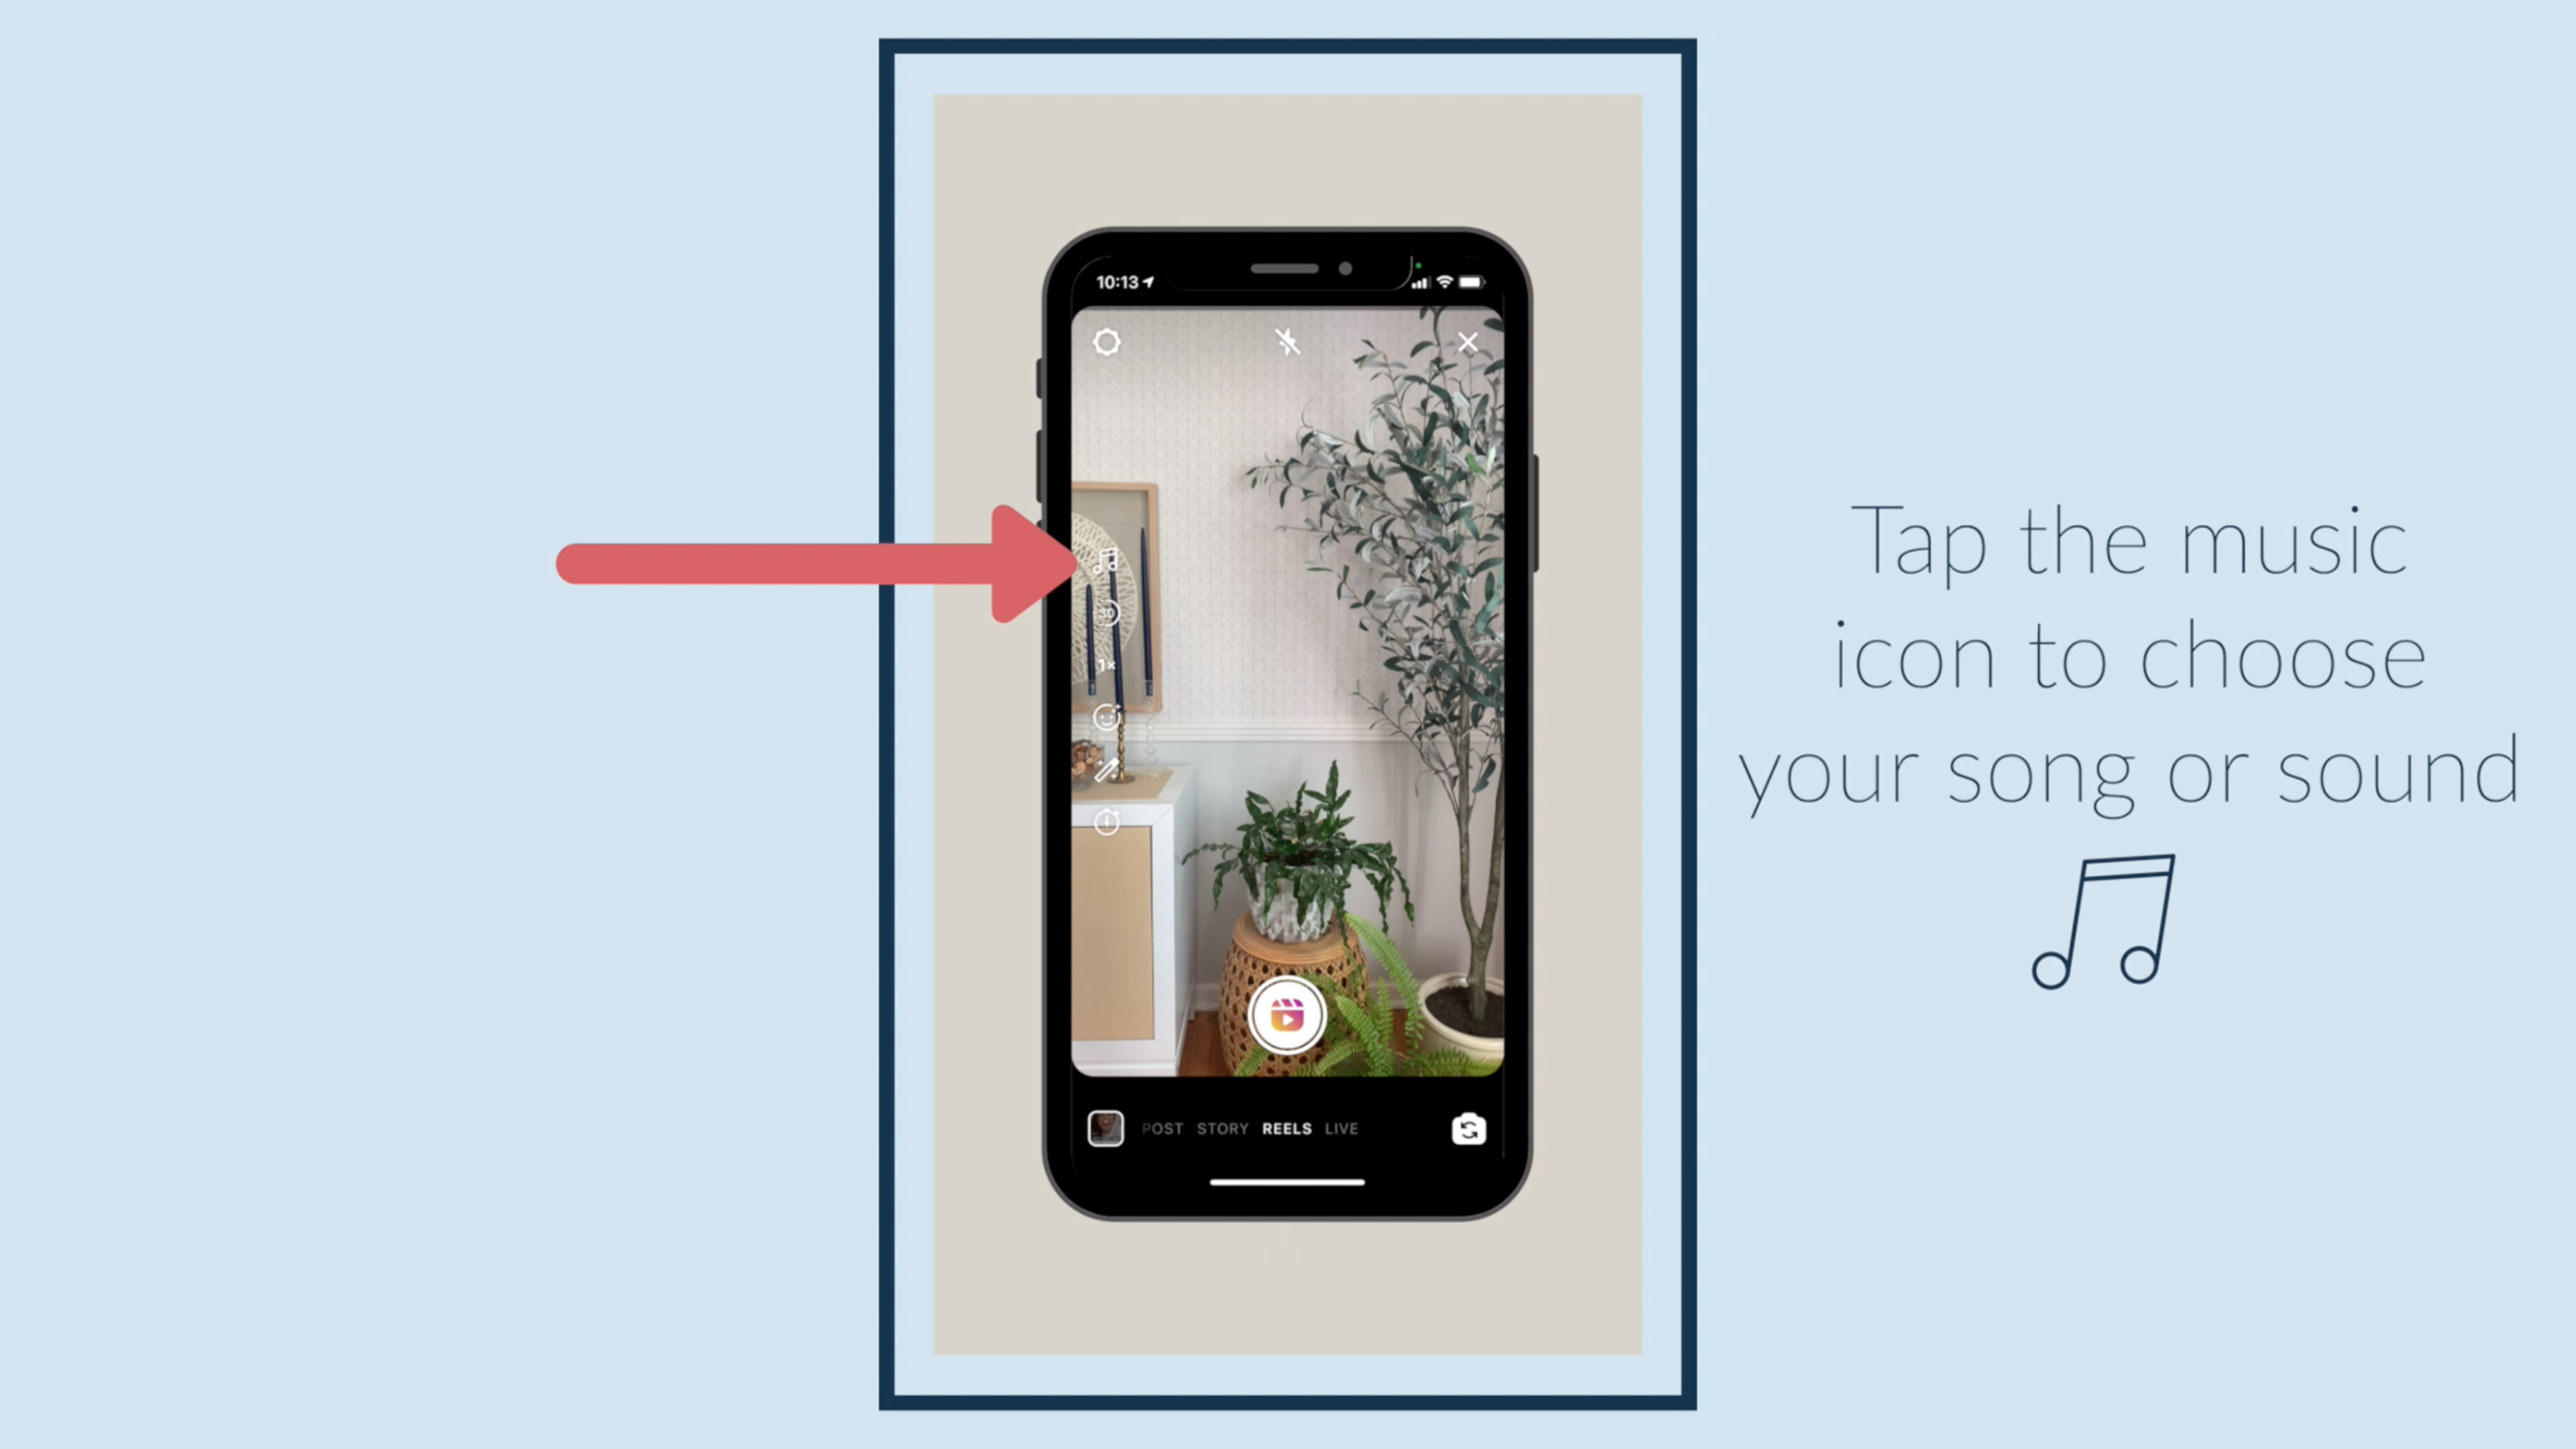
Tap the music icon to choose your song or sound.
Then tap the timer icon to choose your countdown time and clip duration.
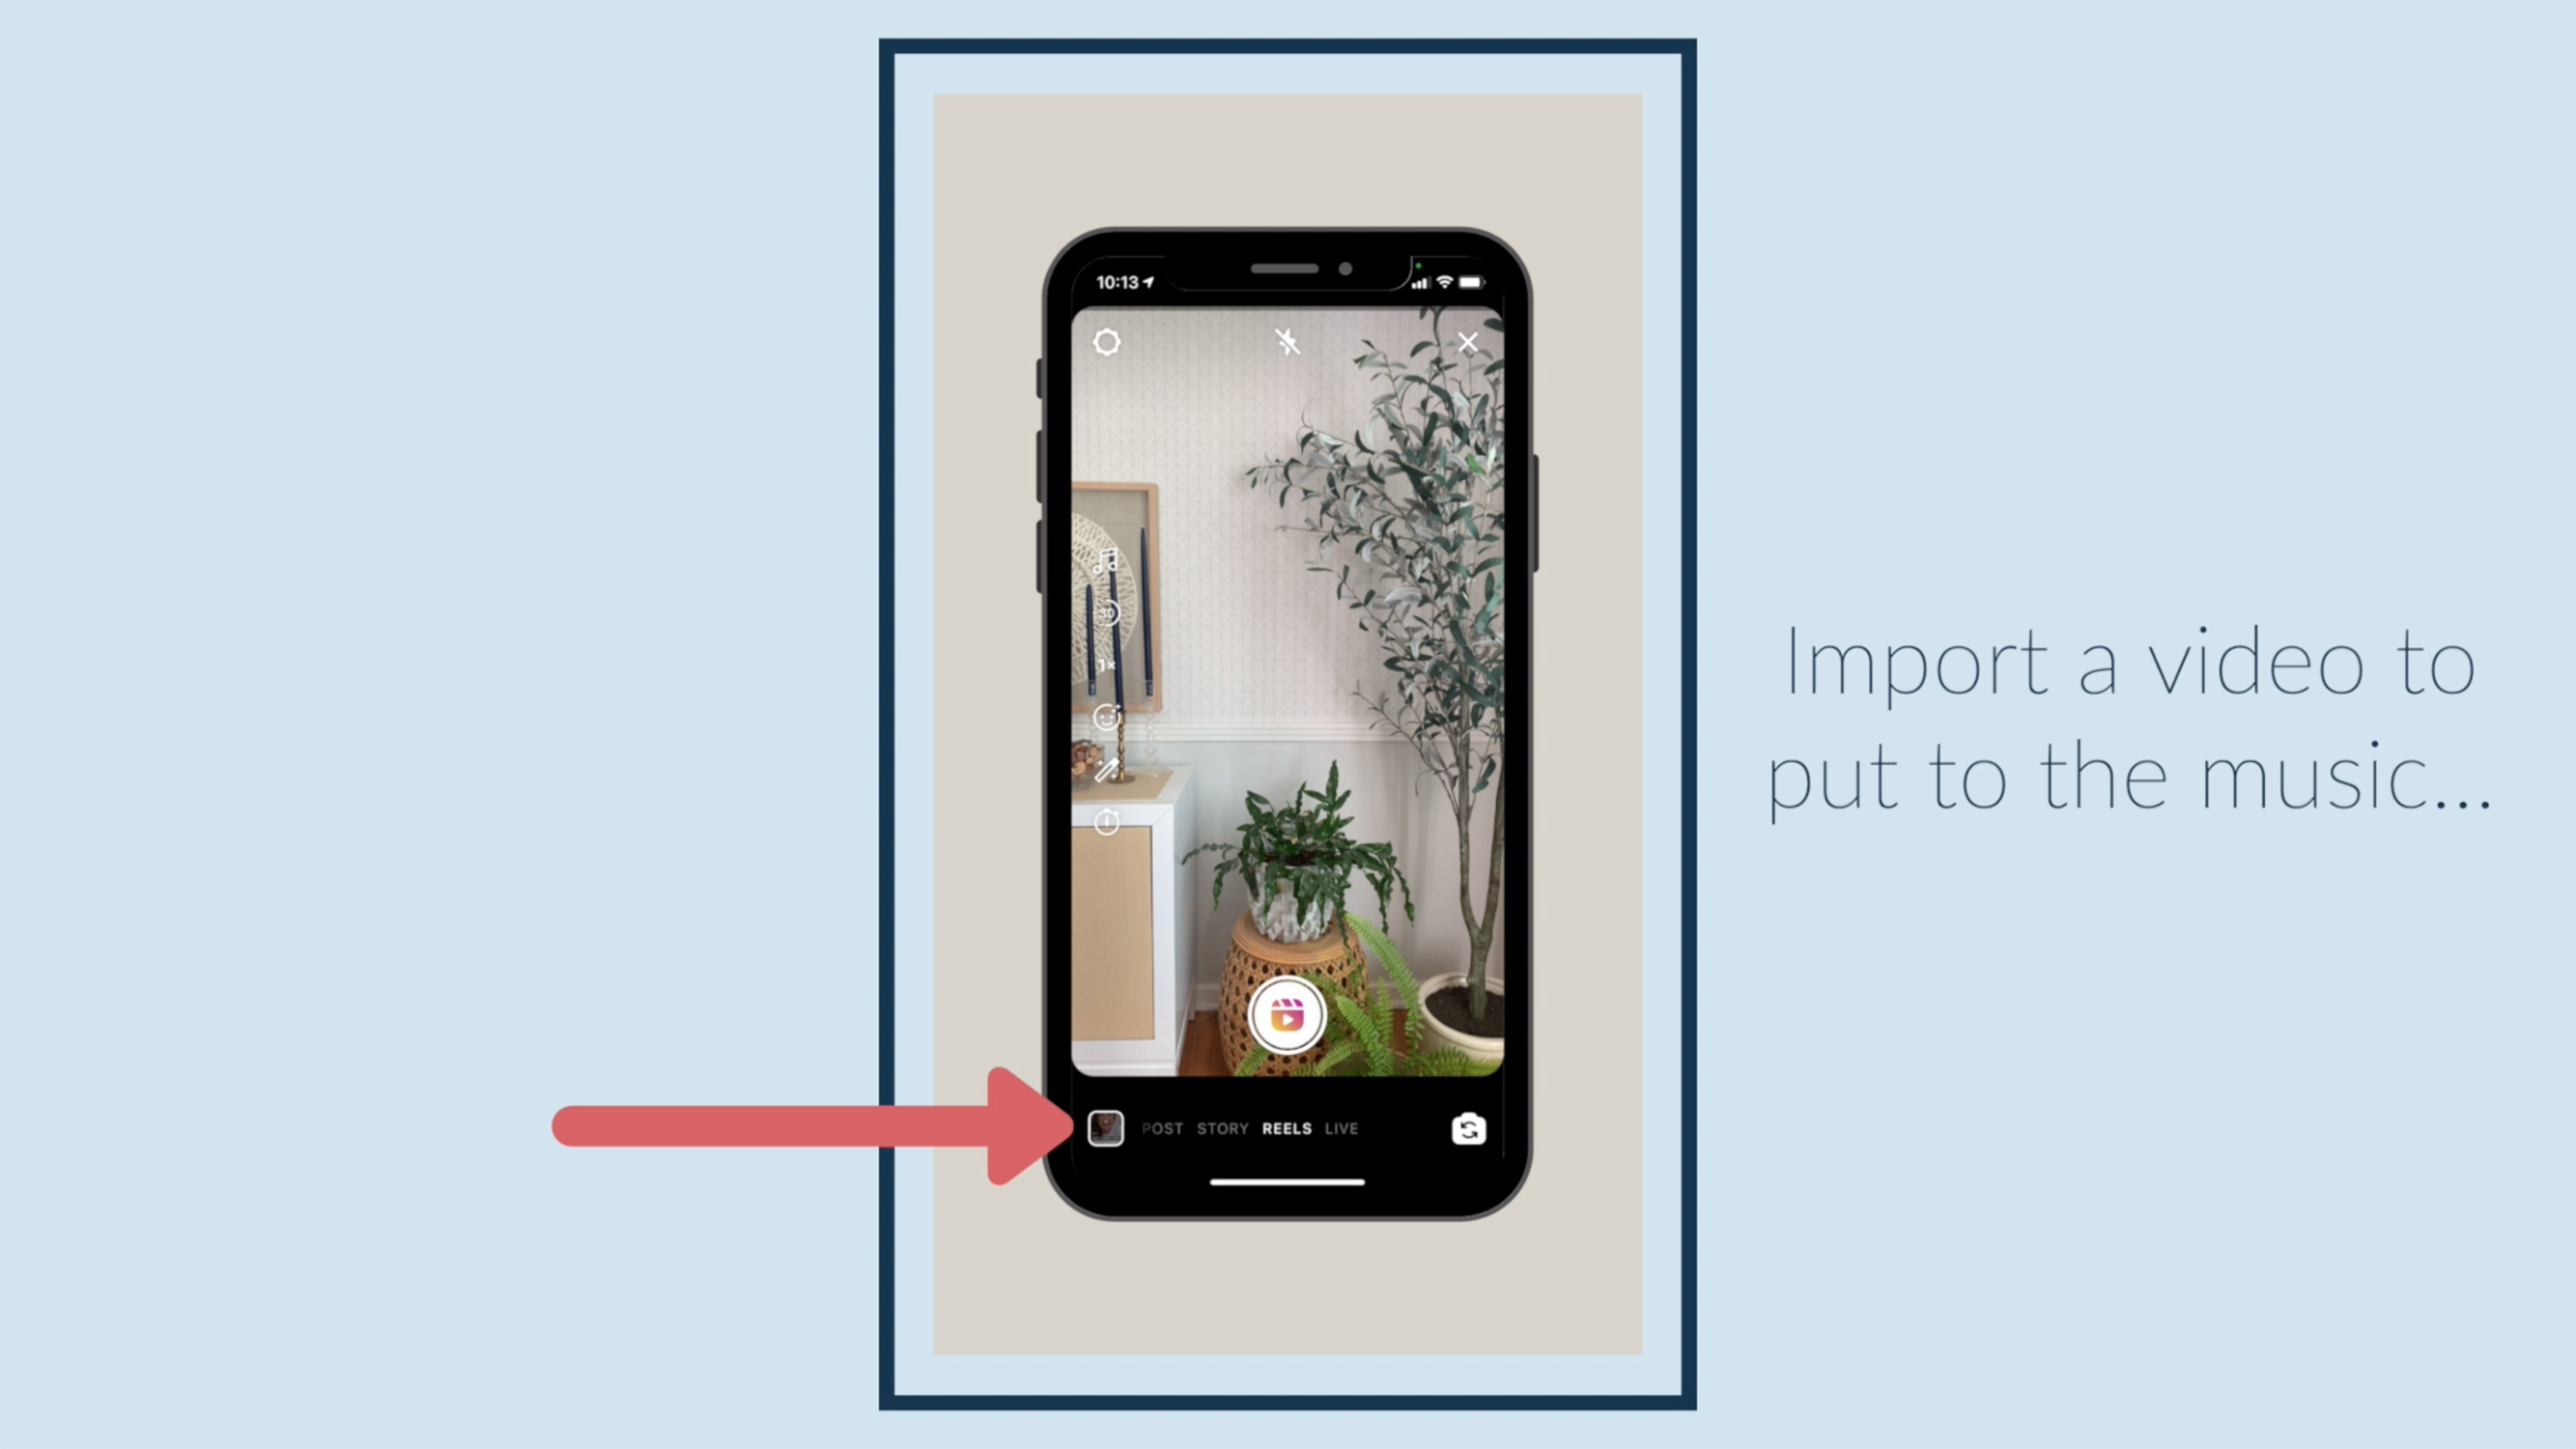
Import a video to put to the music...
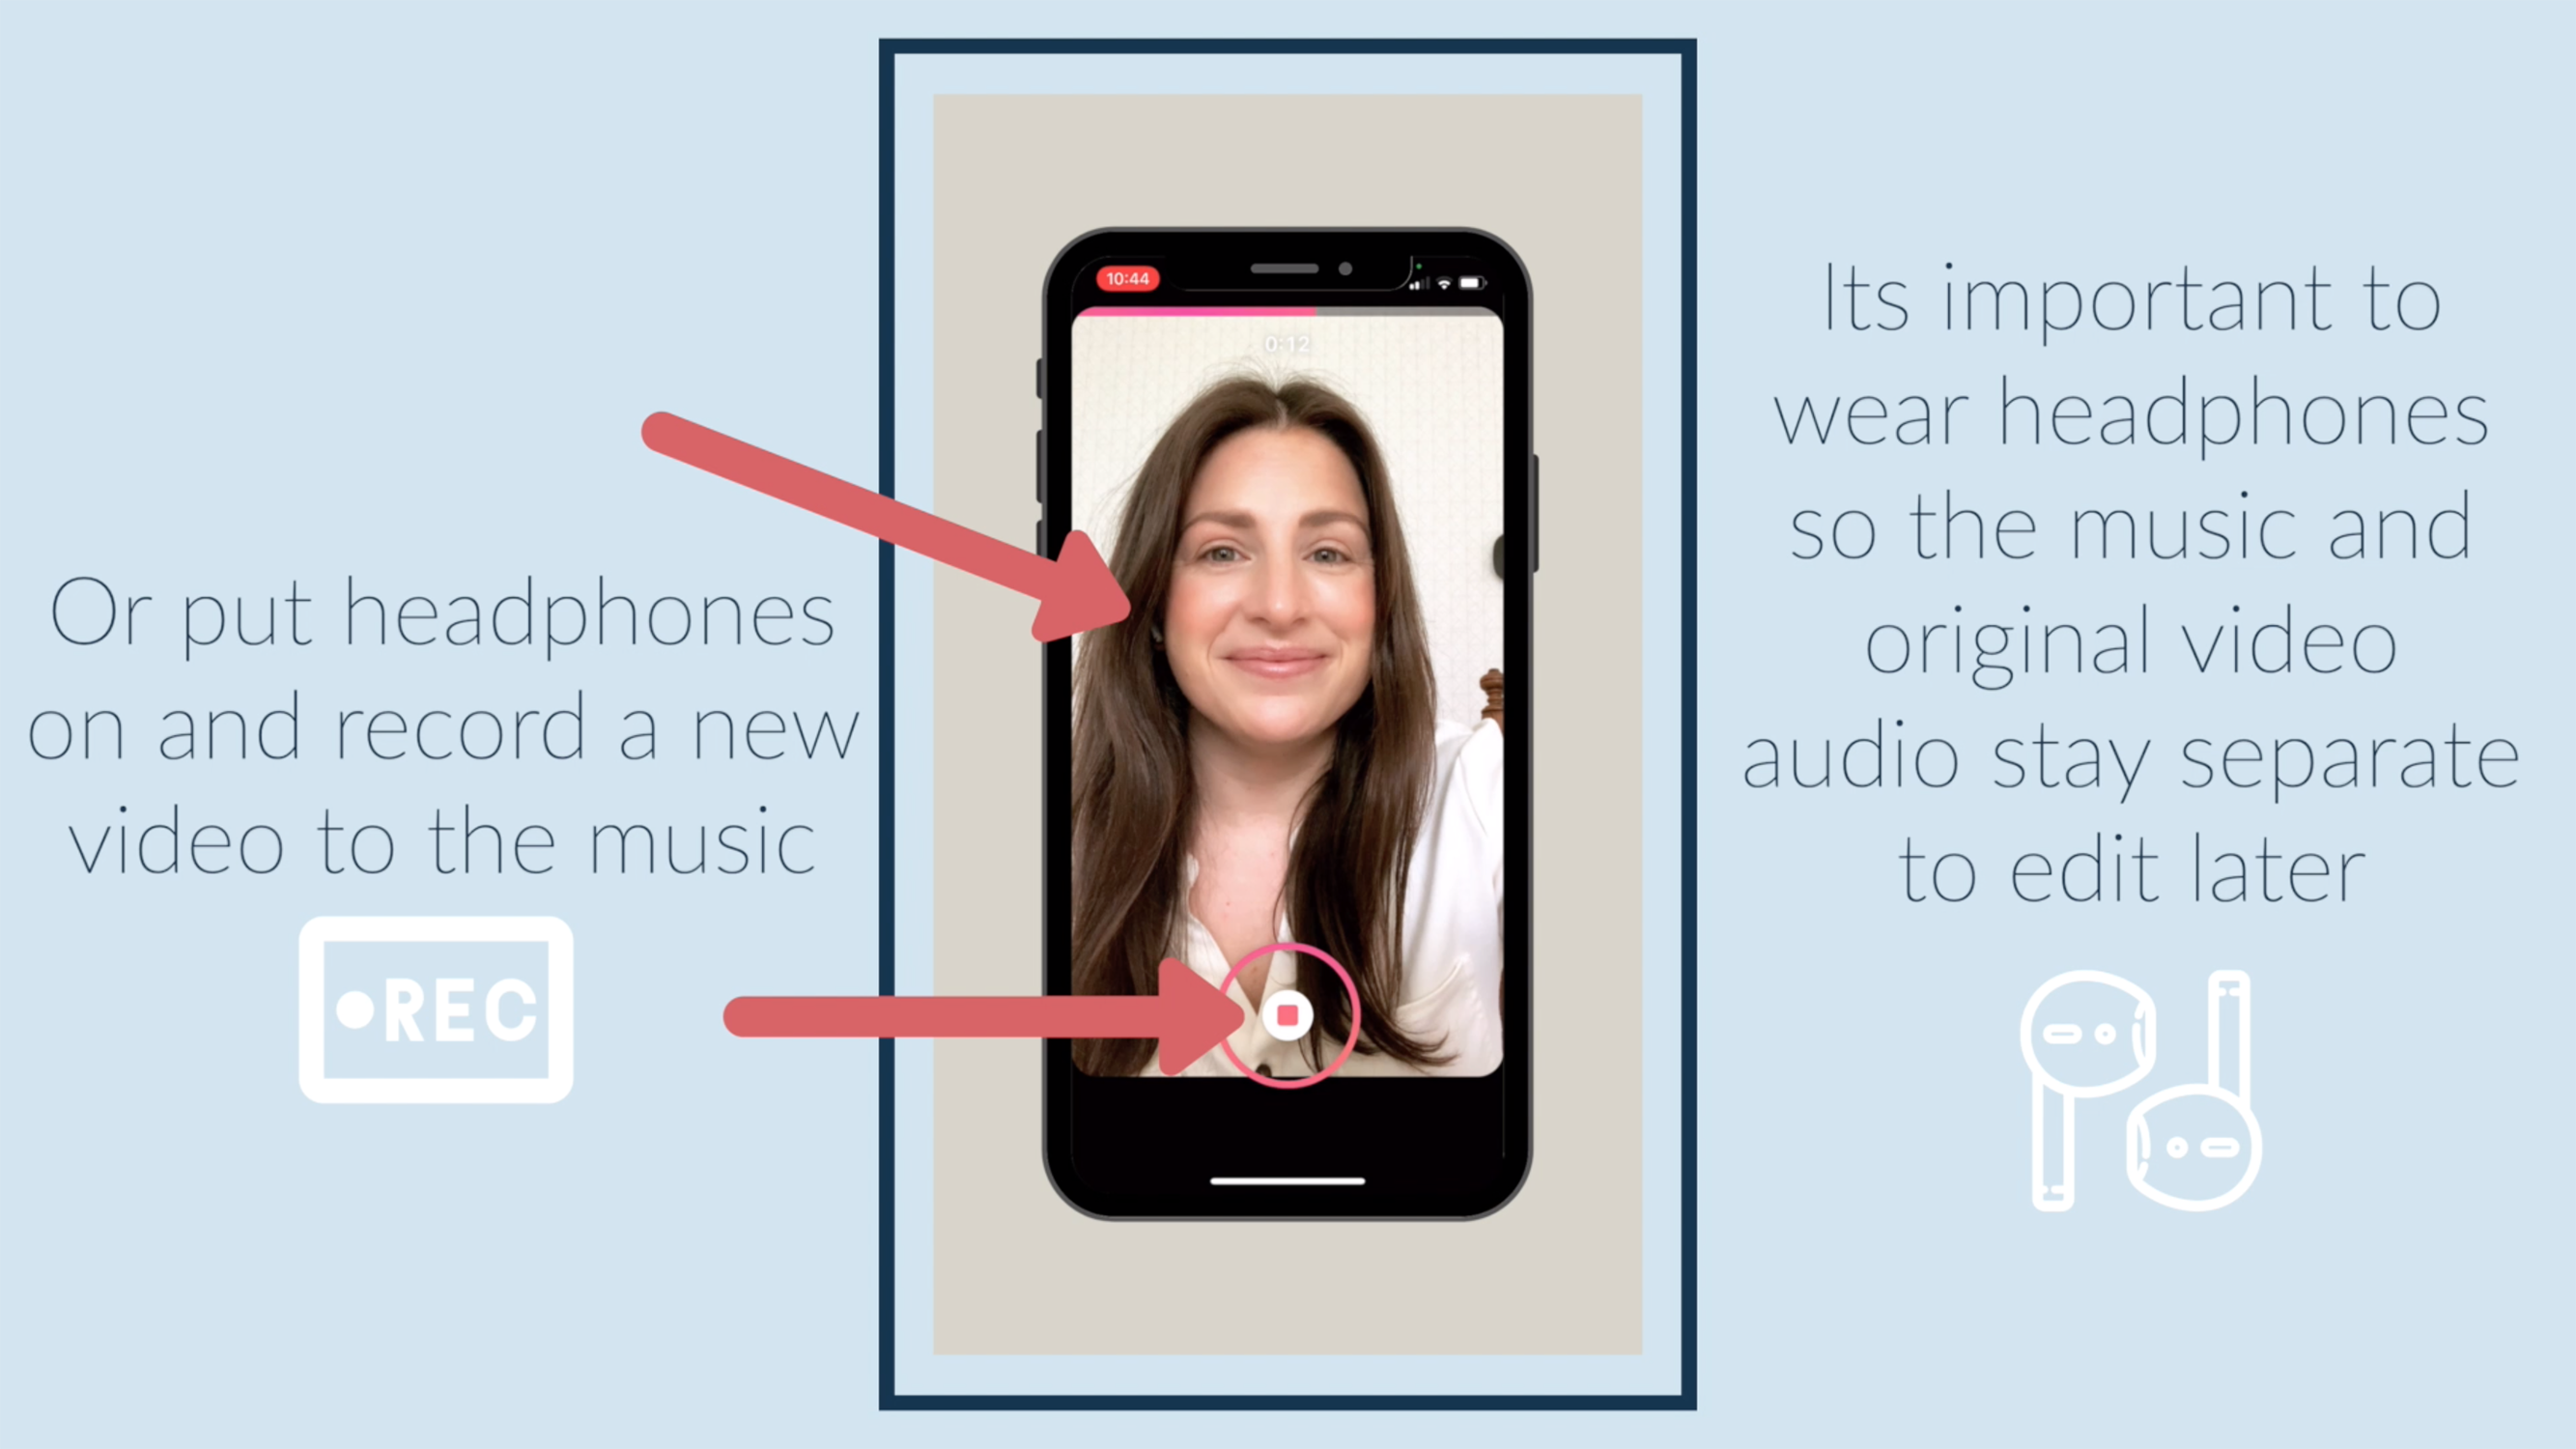
Or put headphones on and record a new video to the music. Its important to wear headphones so the music and original video audio stay separate to edit later.

Tap the icon to the left of the record icon to see your clip and trim it.
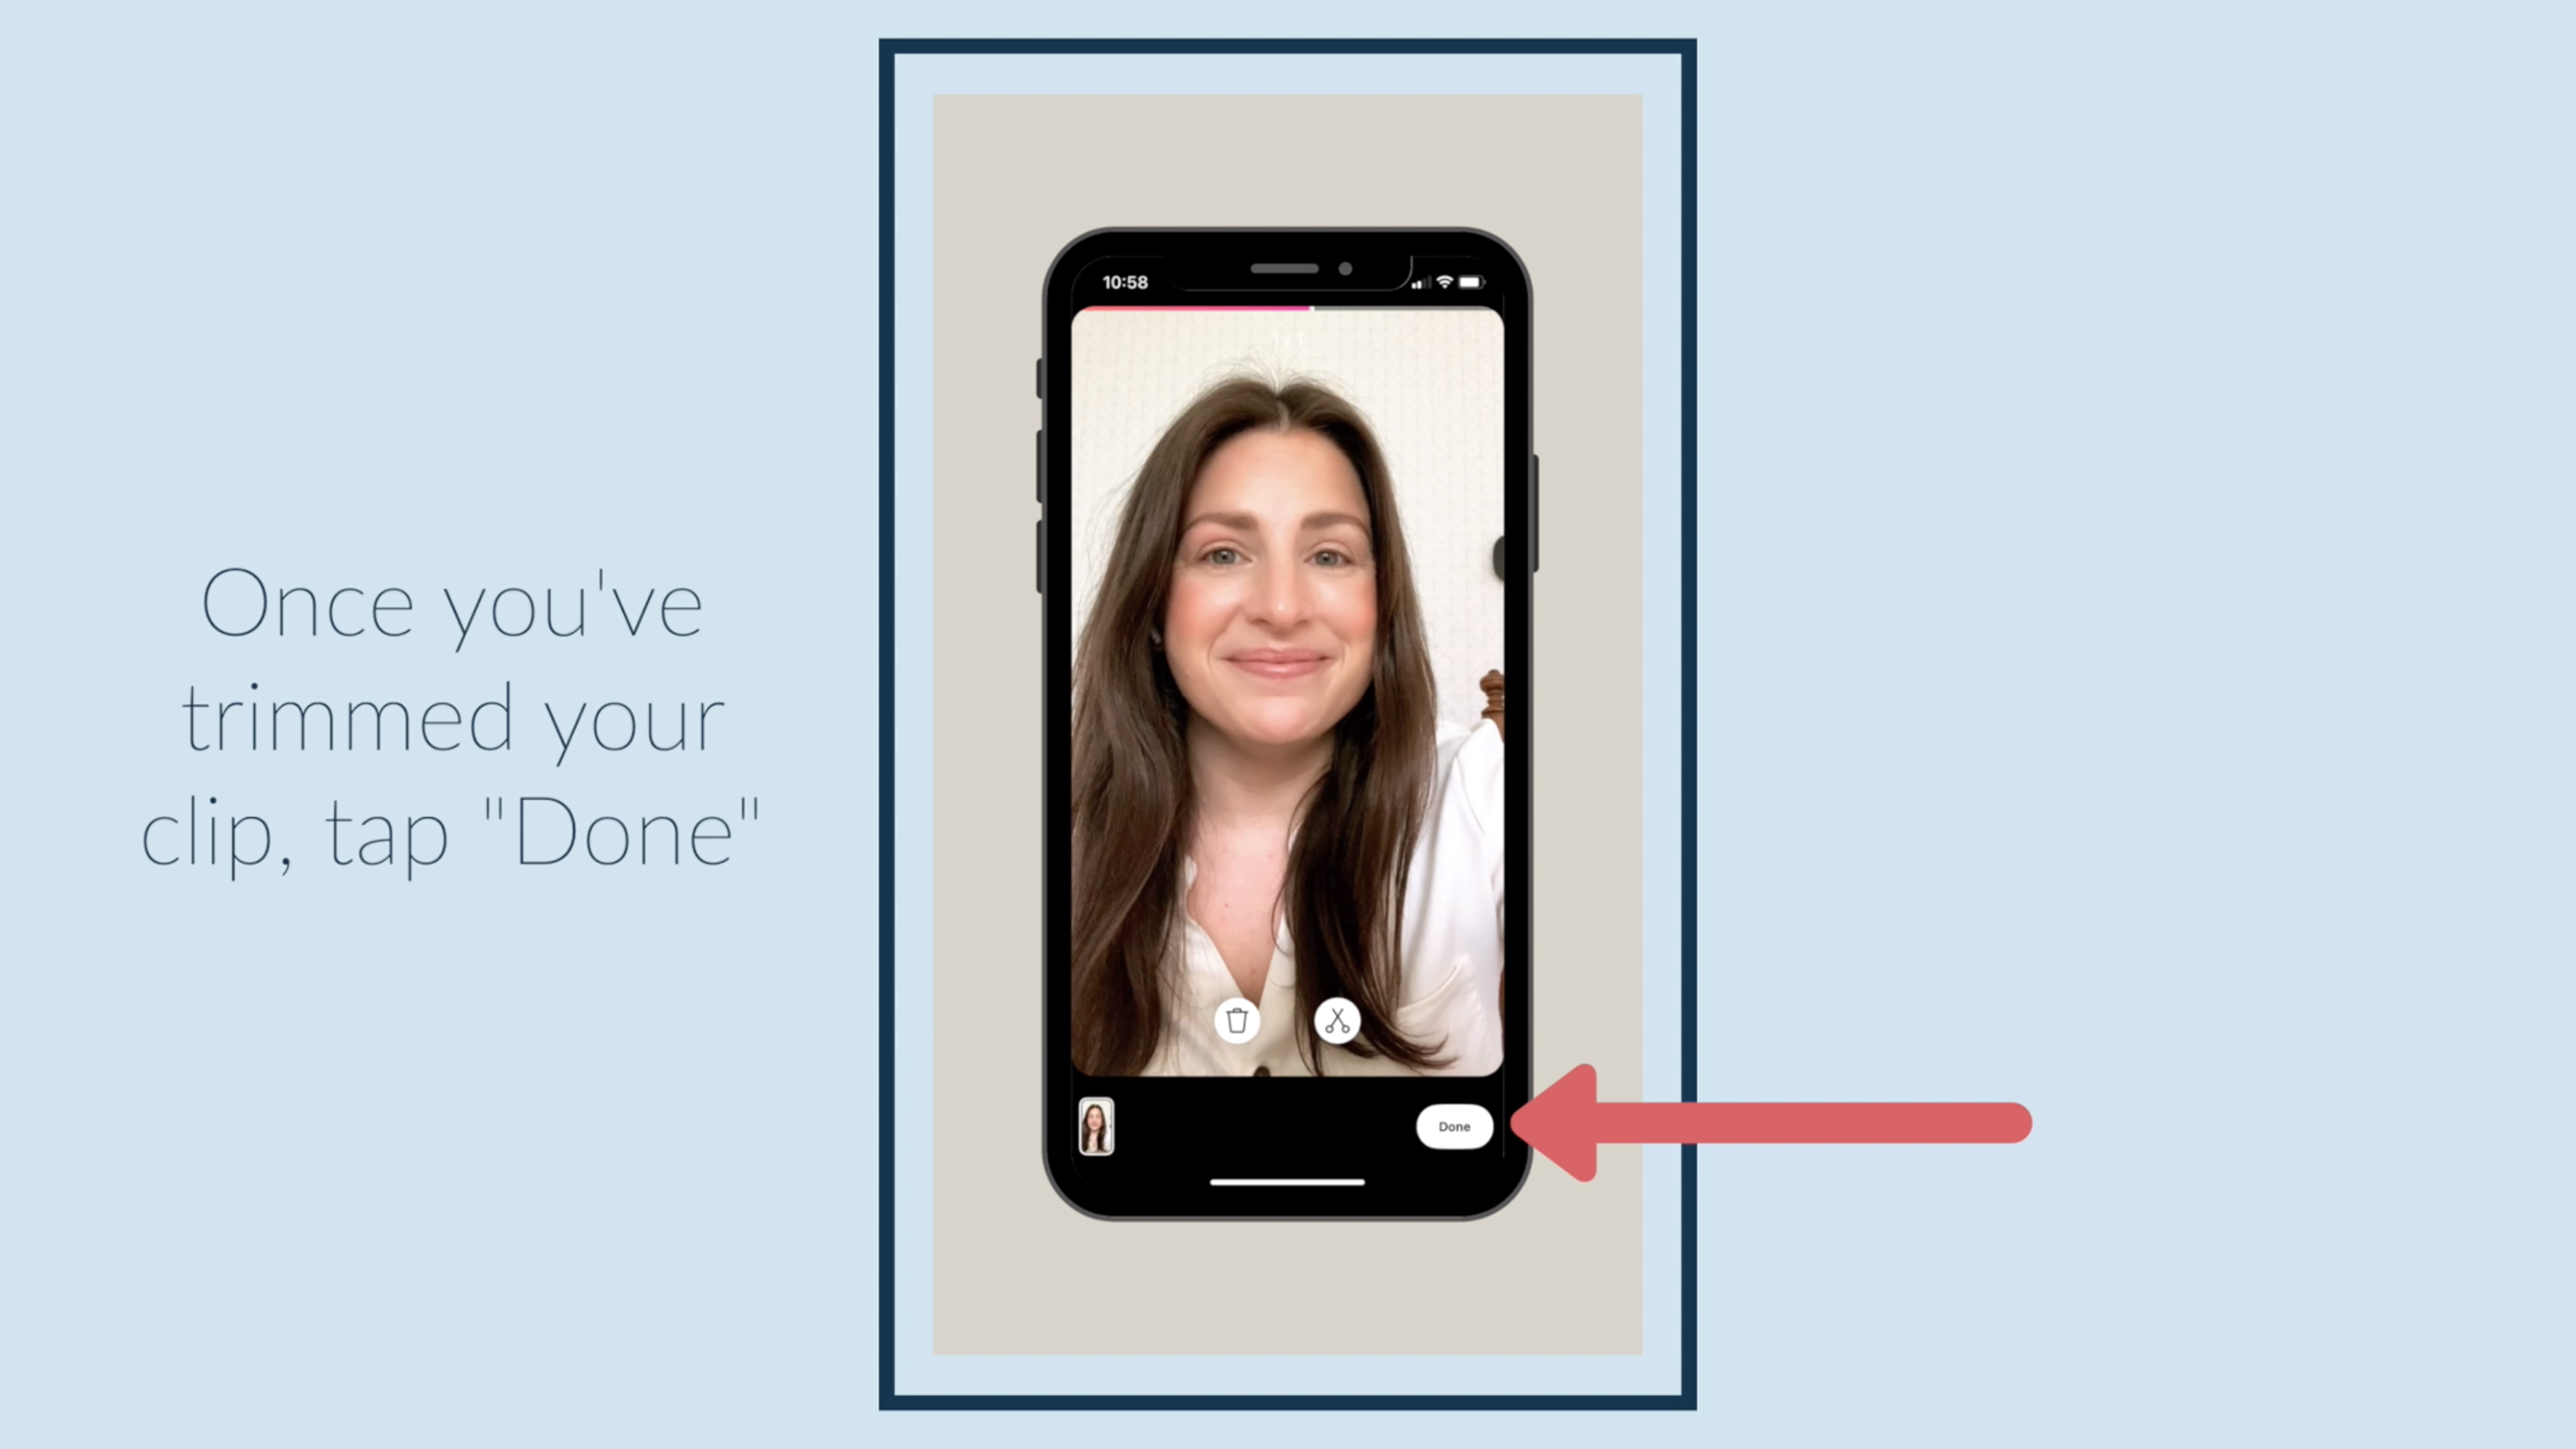
Once you've trimmed your clip, tap "Done."

Tap the icon to the right of the record button.

Tap the sound mixing icon.
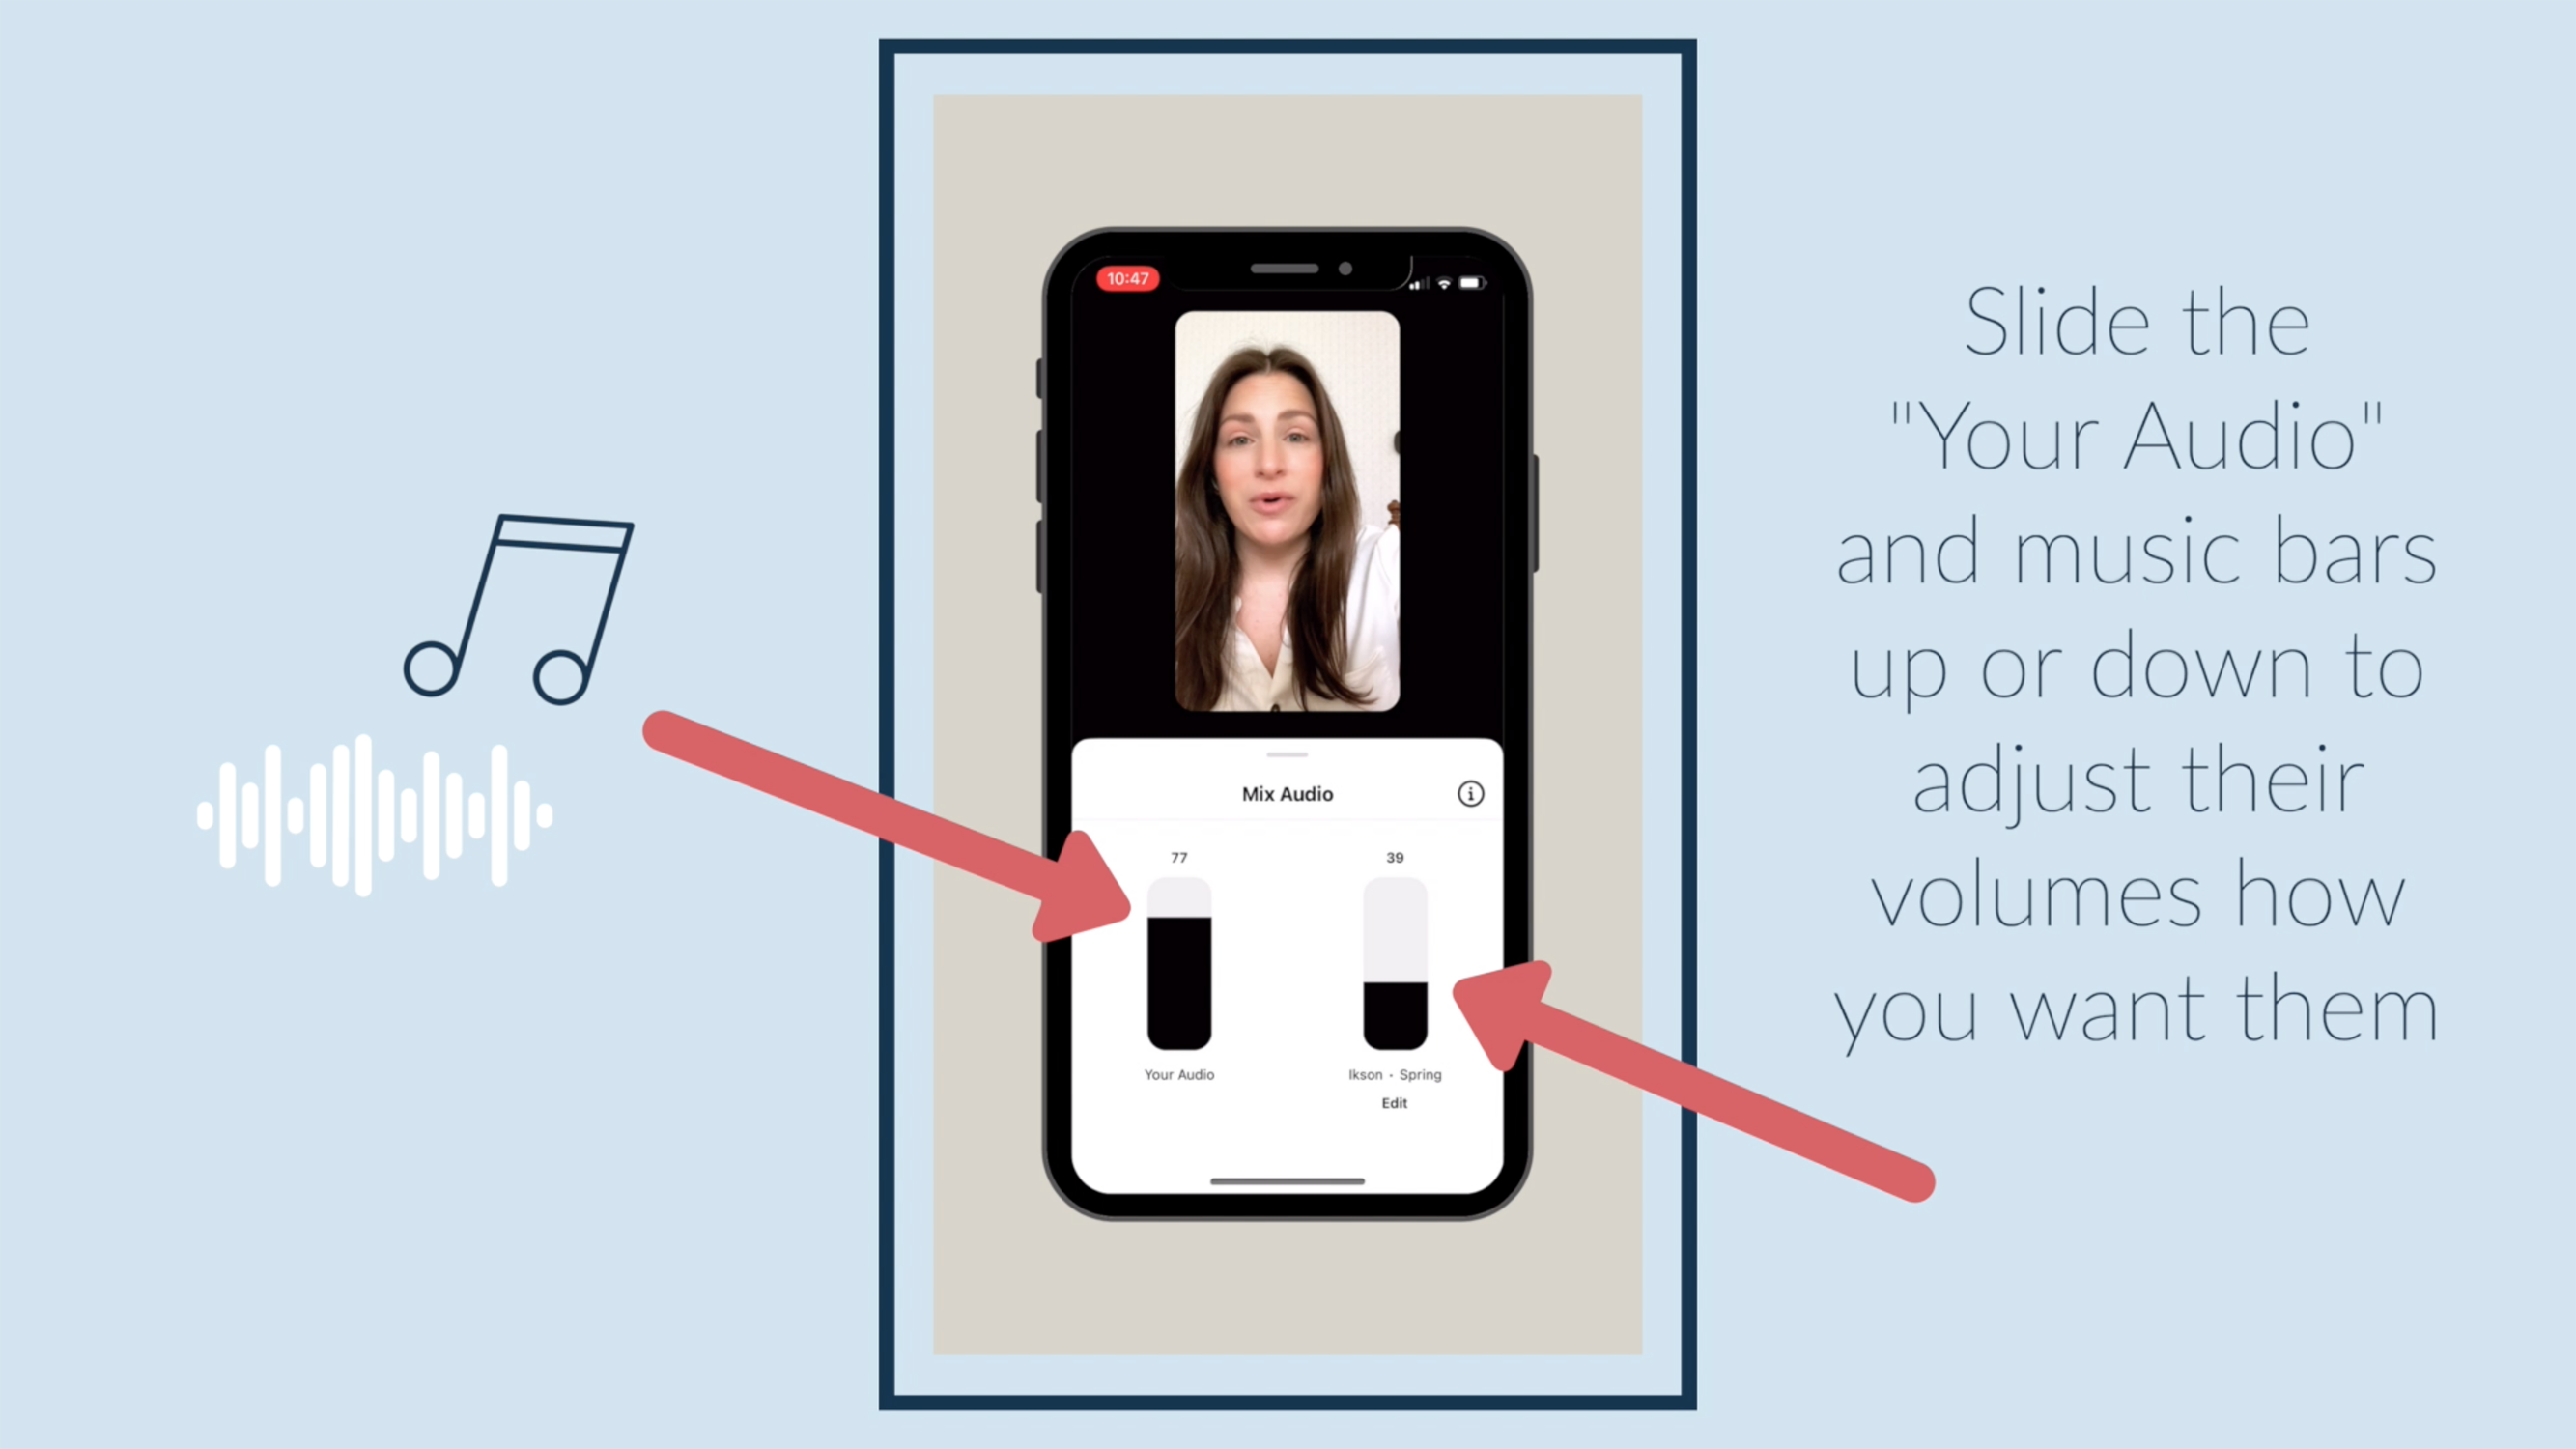
Slide the "Your Audio" and music bars up or down to adjust their volumes how you want them.

Tap your video to leave the sound mixer once you're done.

Now you're ready to add text, stickers, and share!
✅ ...
Instagram Reel Tutorial: How to do a Voiceover

Adding a Voiceover to your Instagram reels is a great option and can be done in conjunction with music. Learning how only takes a few minutes-- ready??
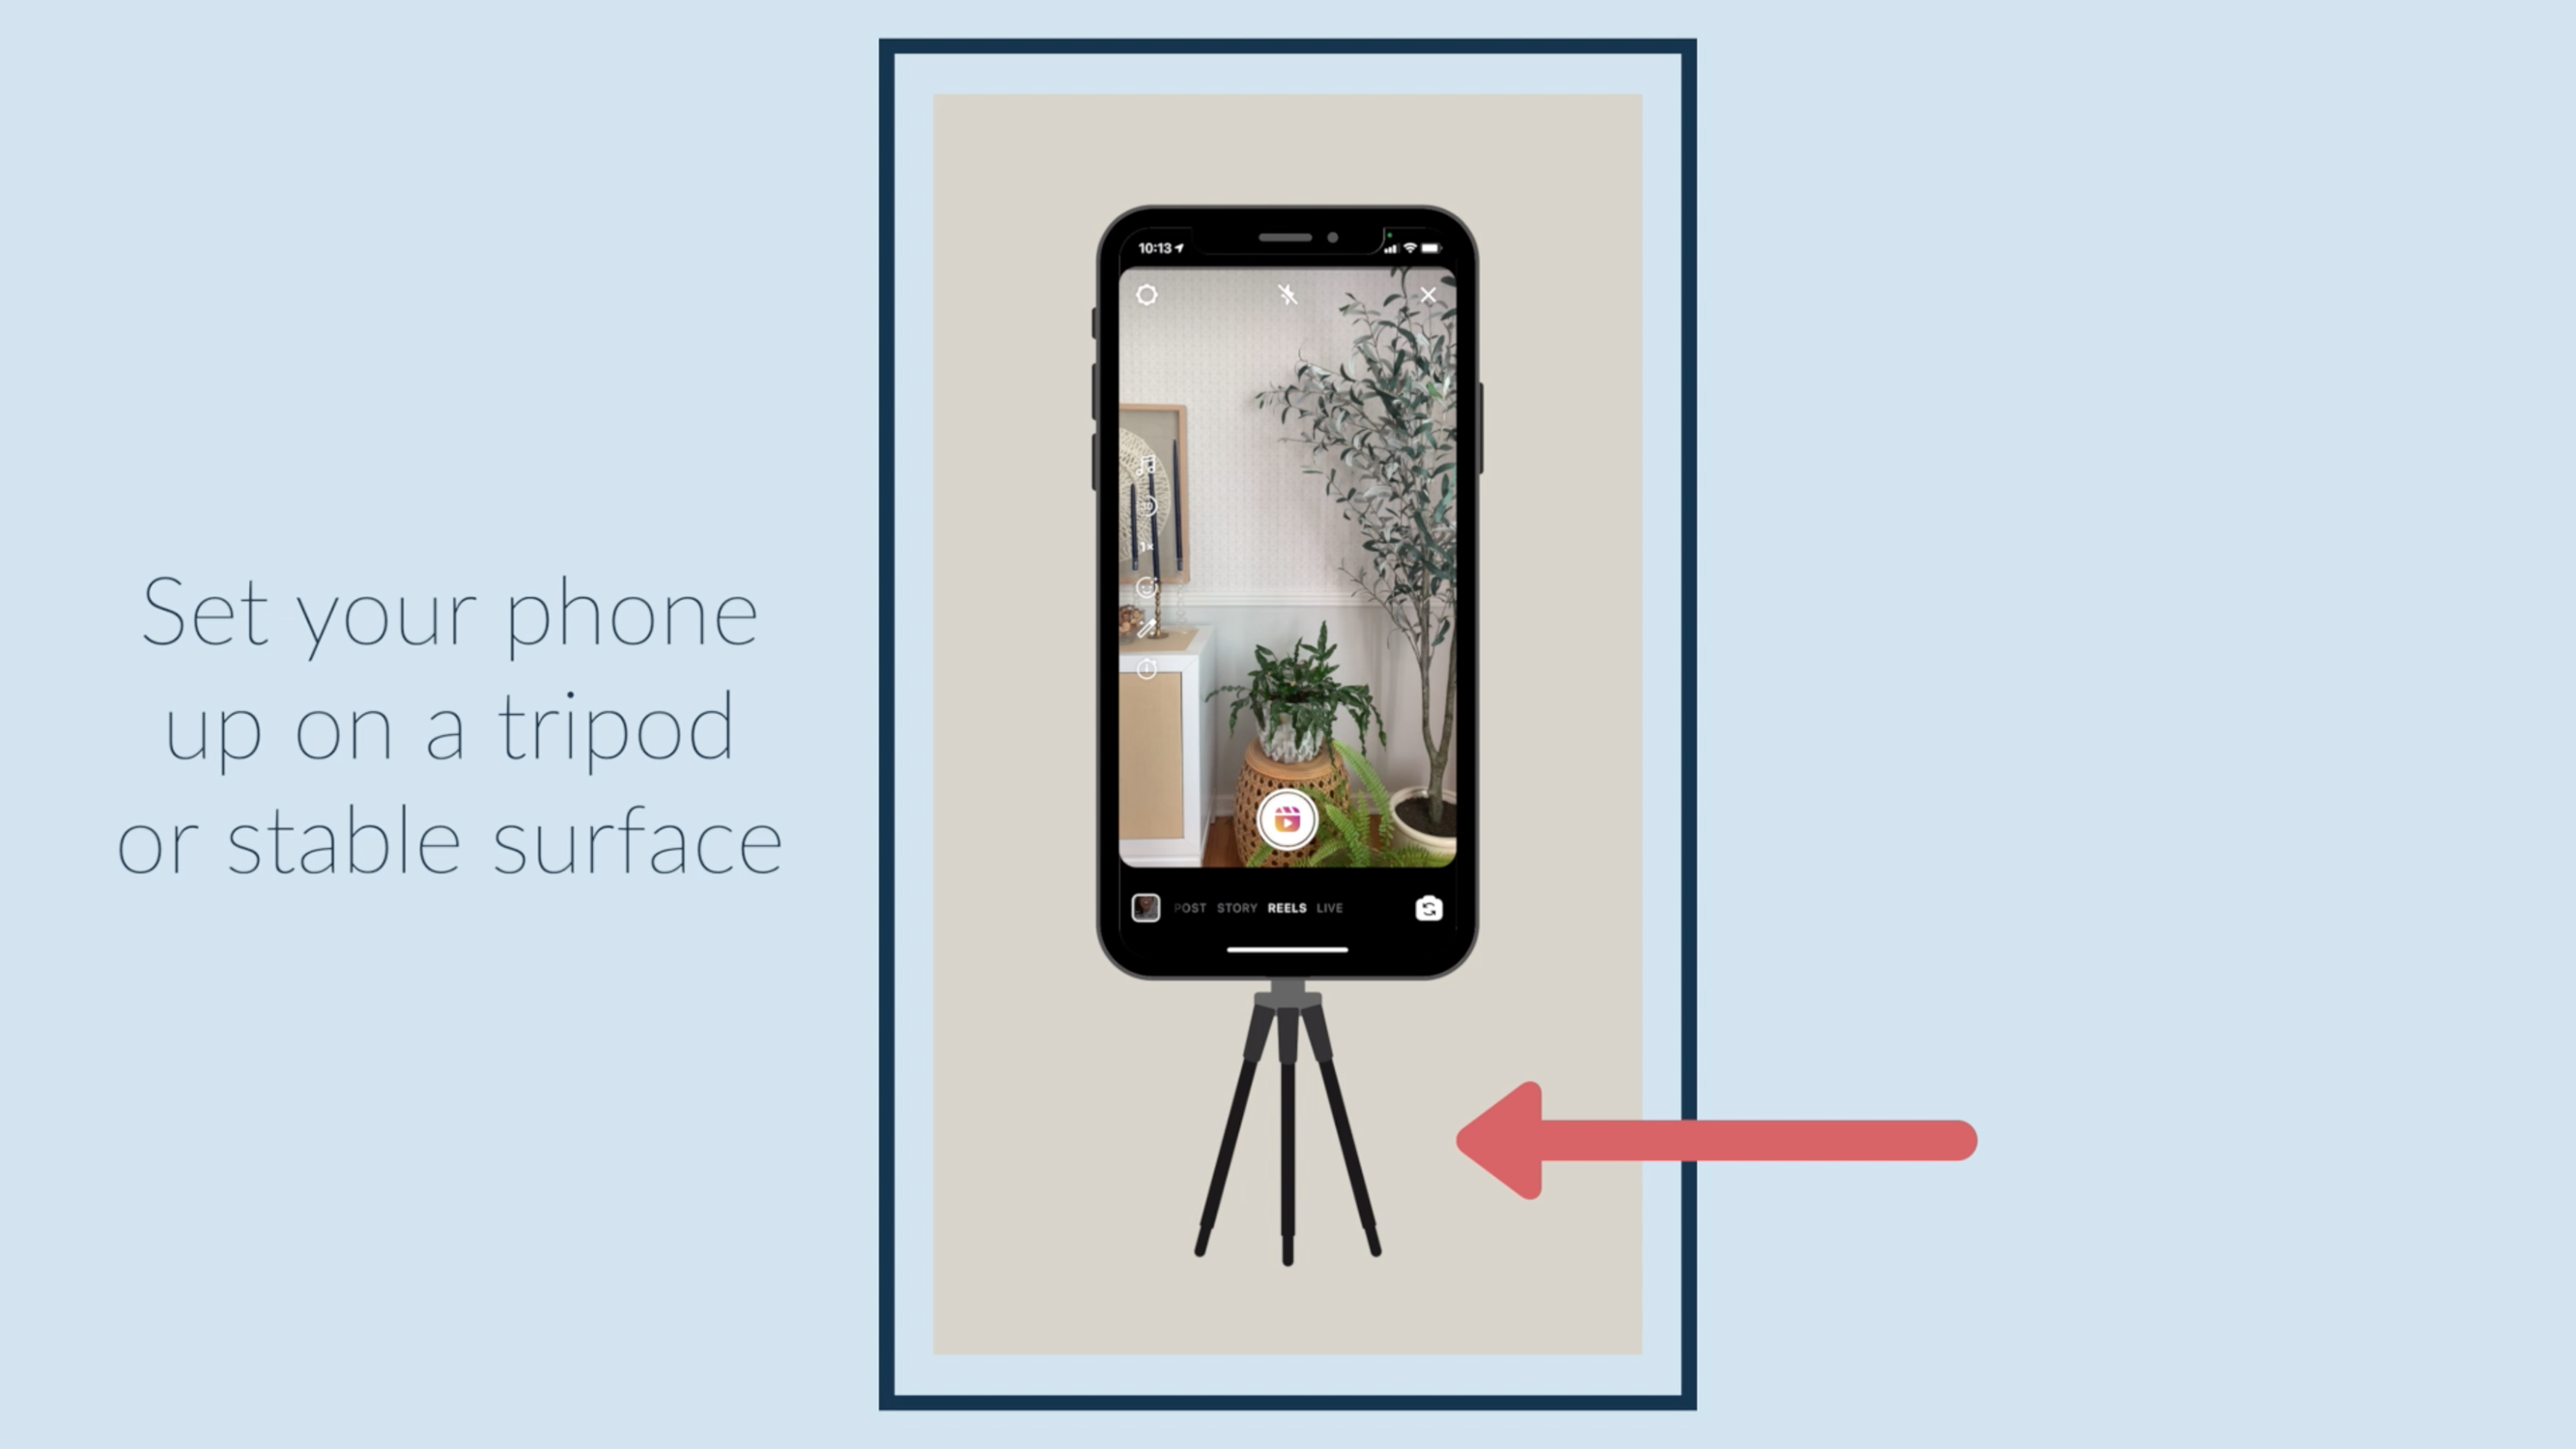
Set your phone up on a tripod or stable surface.

Tap the music icon to choose your song or sound.

Then tap the timer icon to choose your countdown time and clip duration.
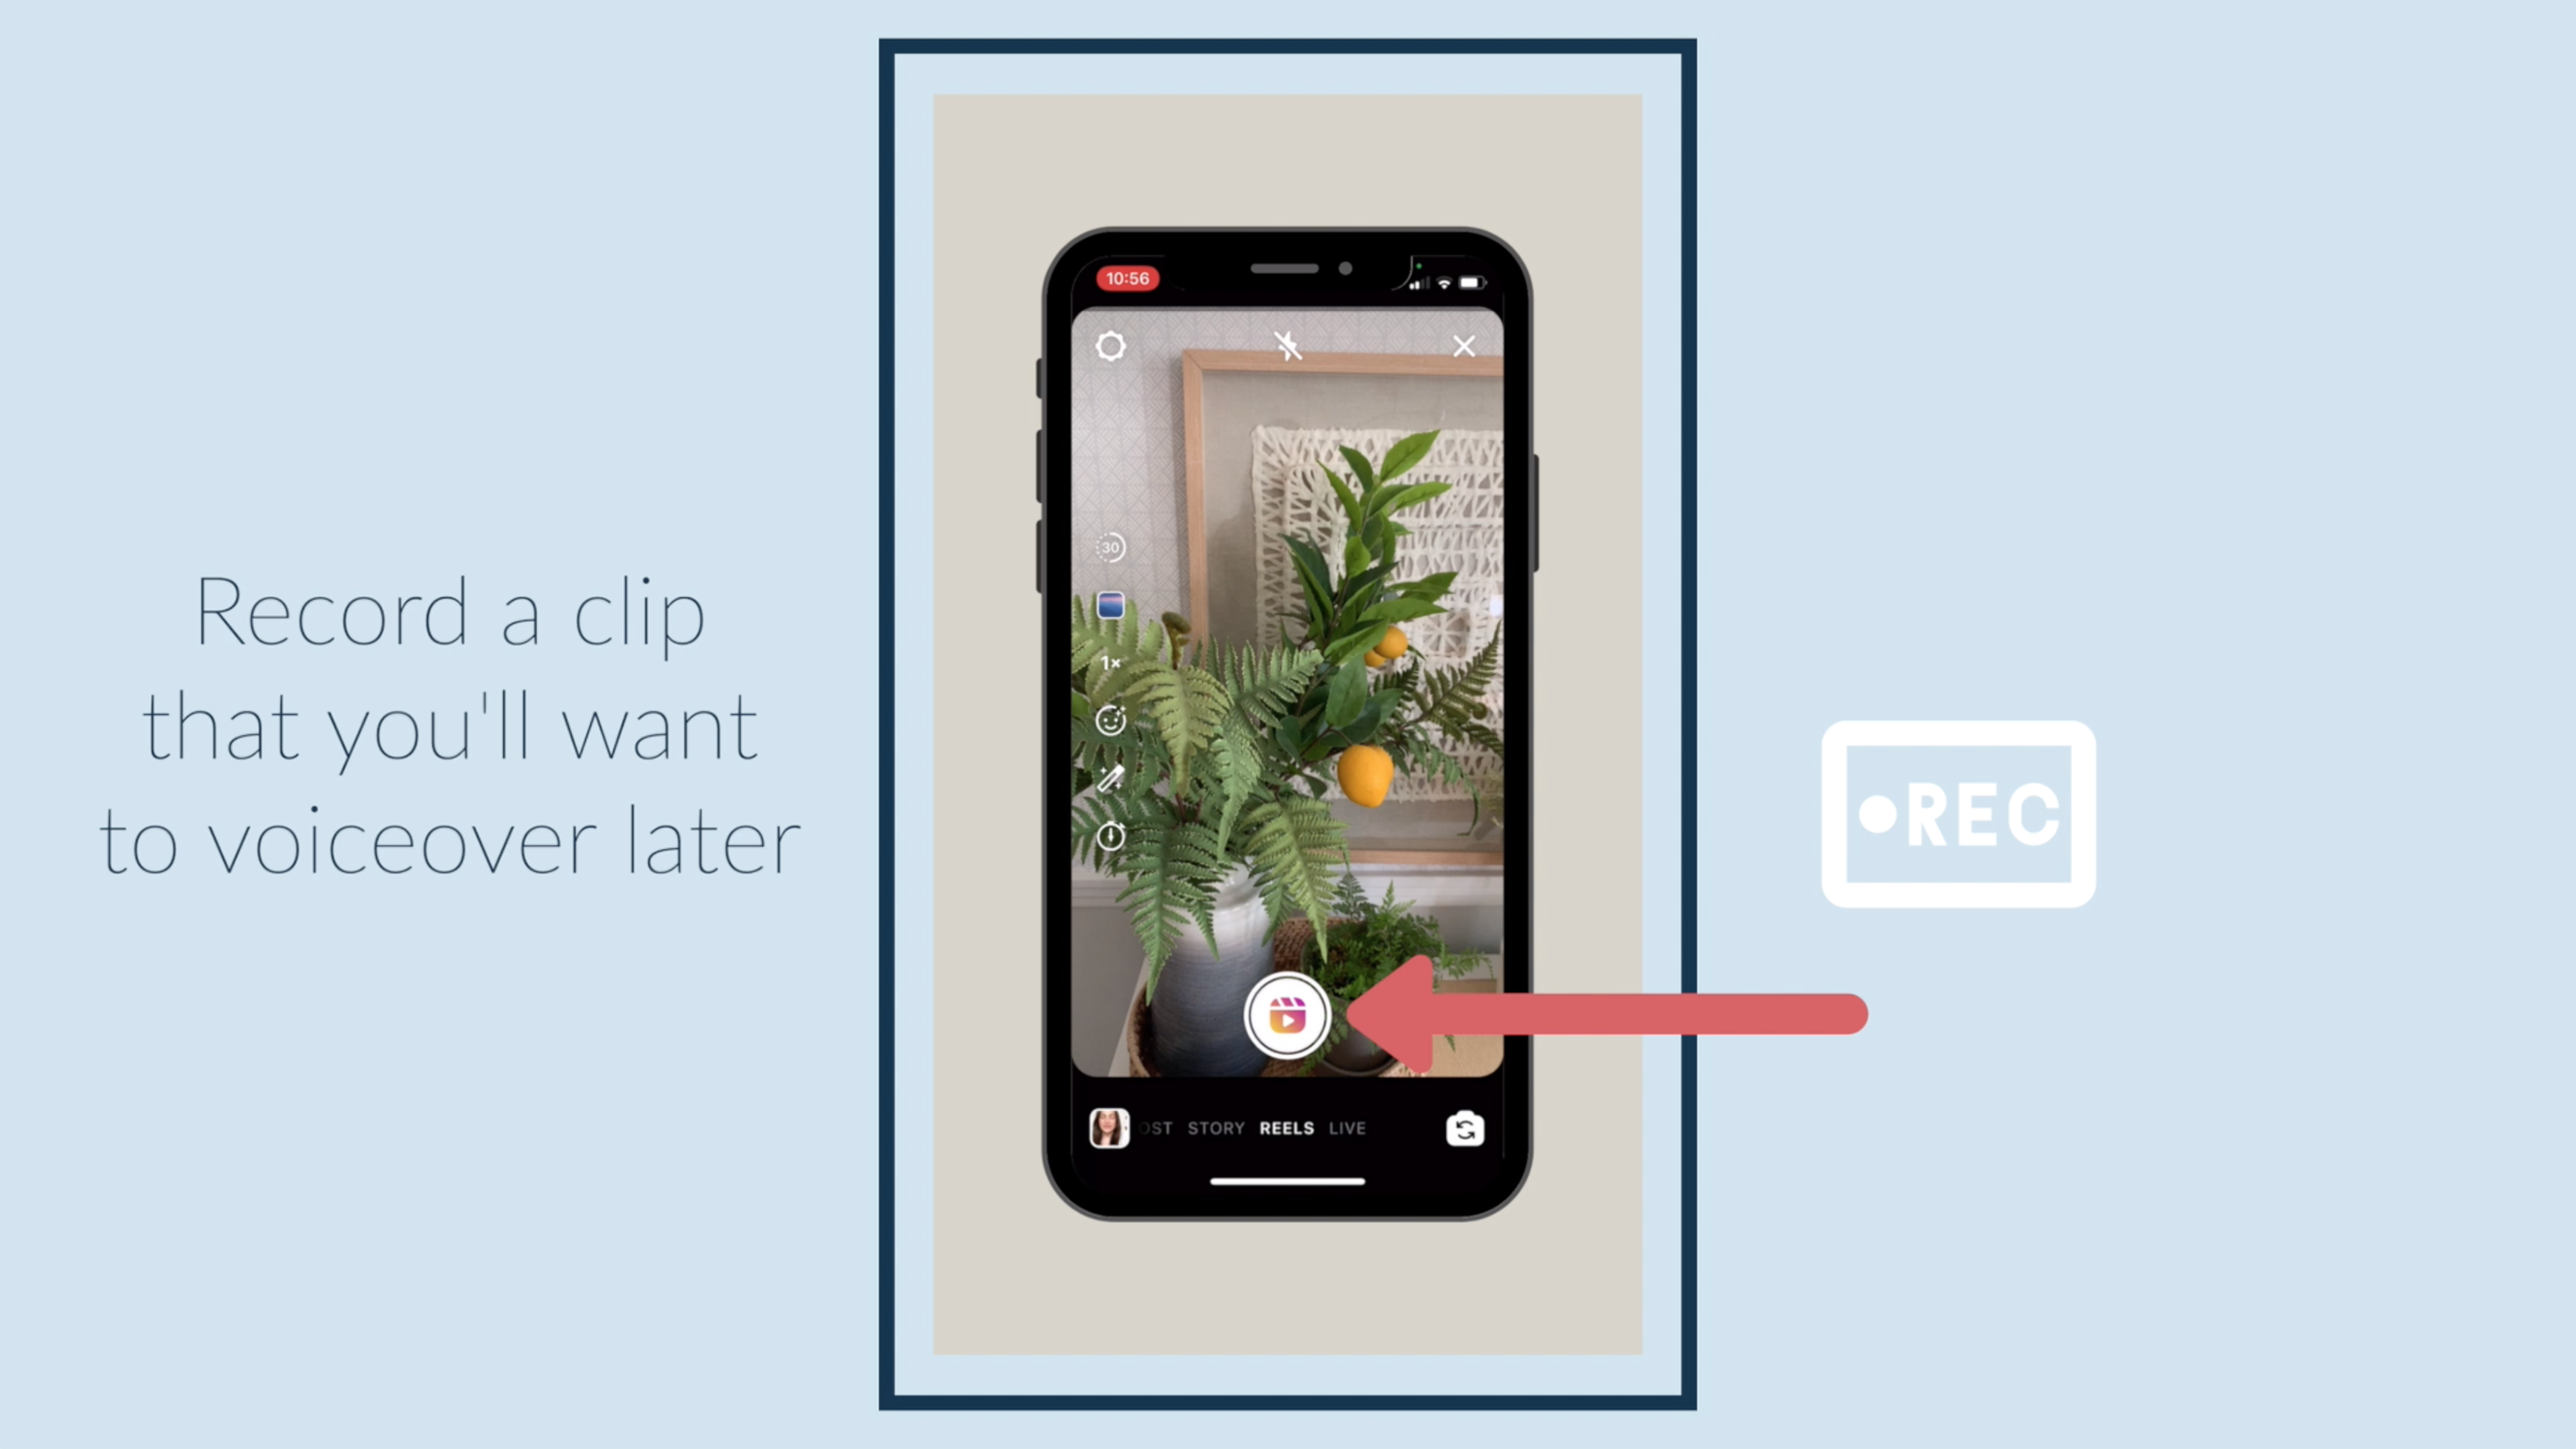
Record a clip that you'll want to voiceover later.
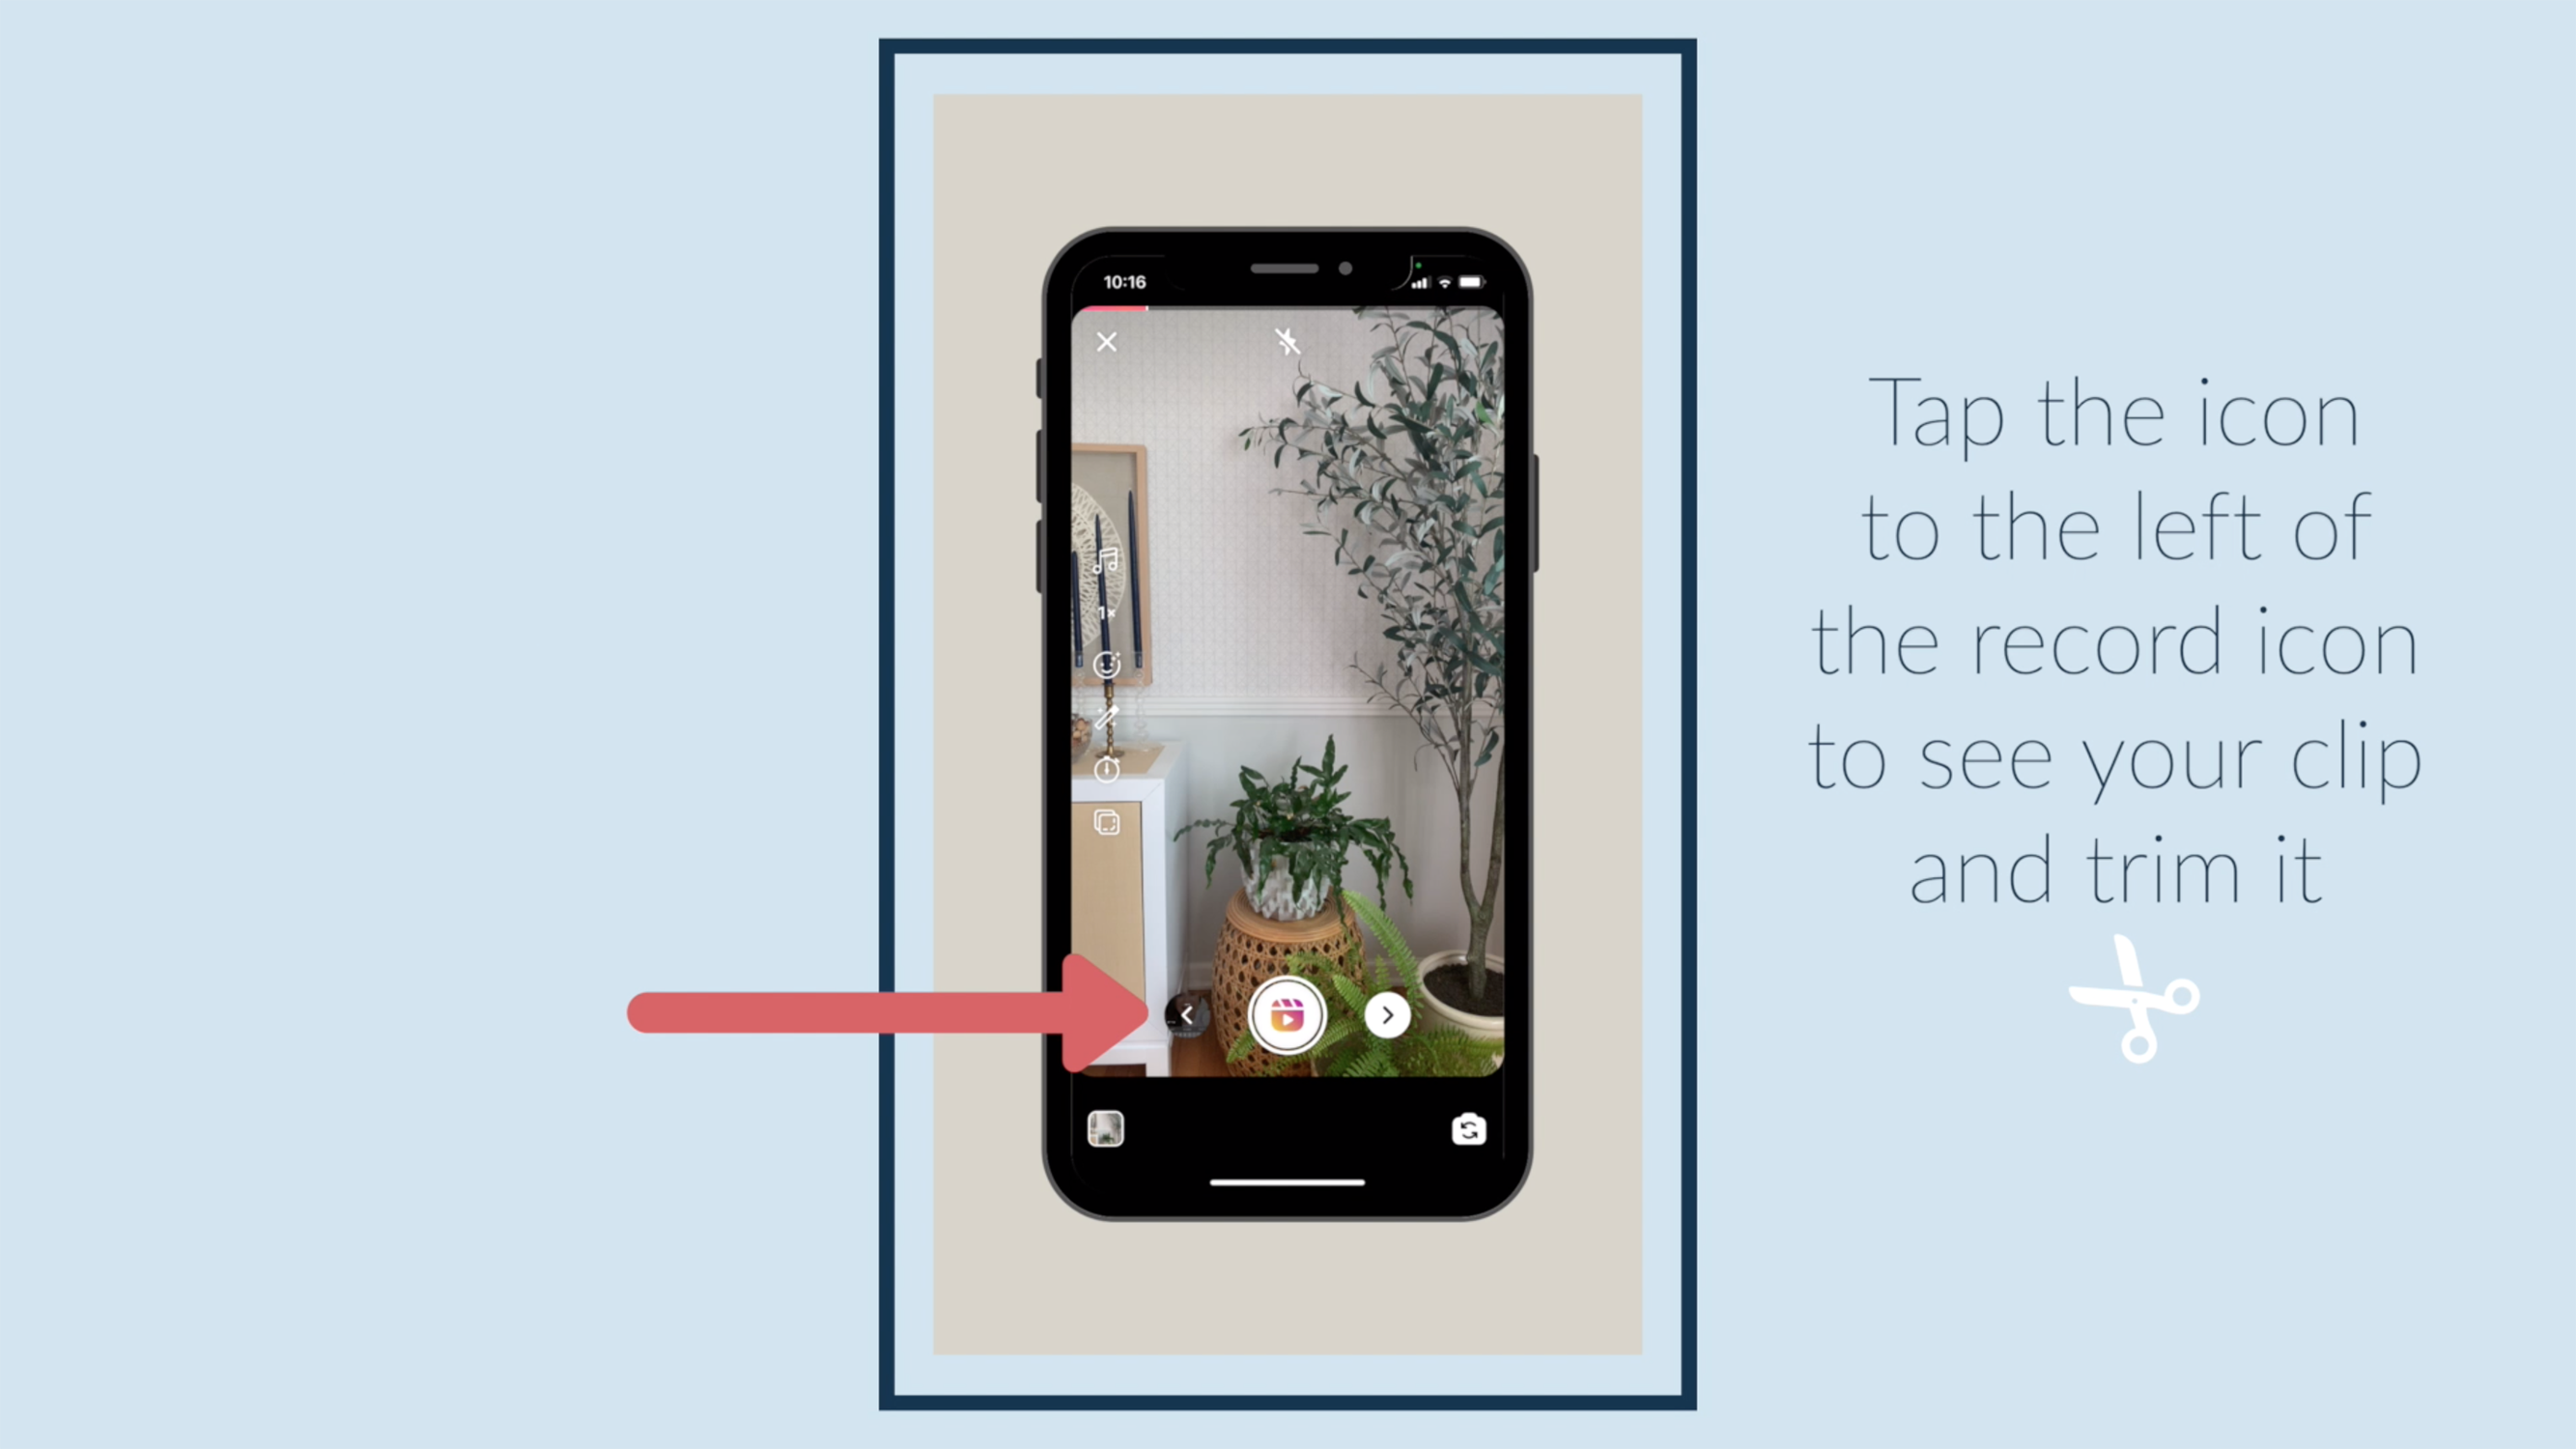
Tap the icon to the left of the record icon to see your clip and trim it.
Once you've trimmed your clip, tap "Done."
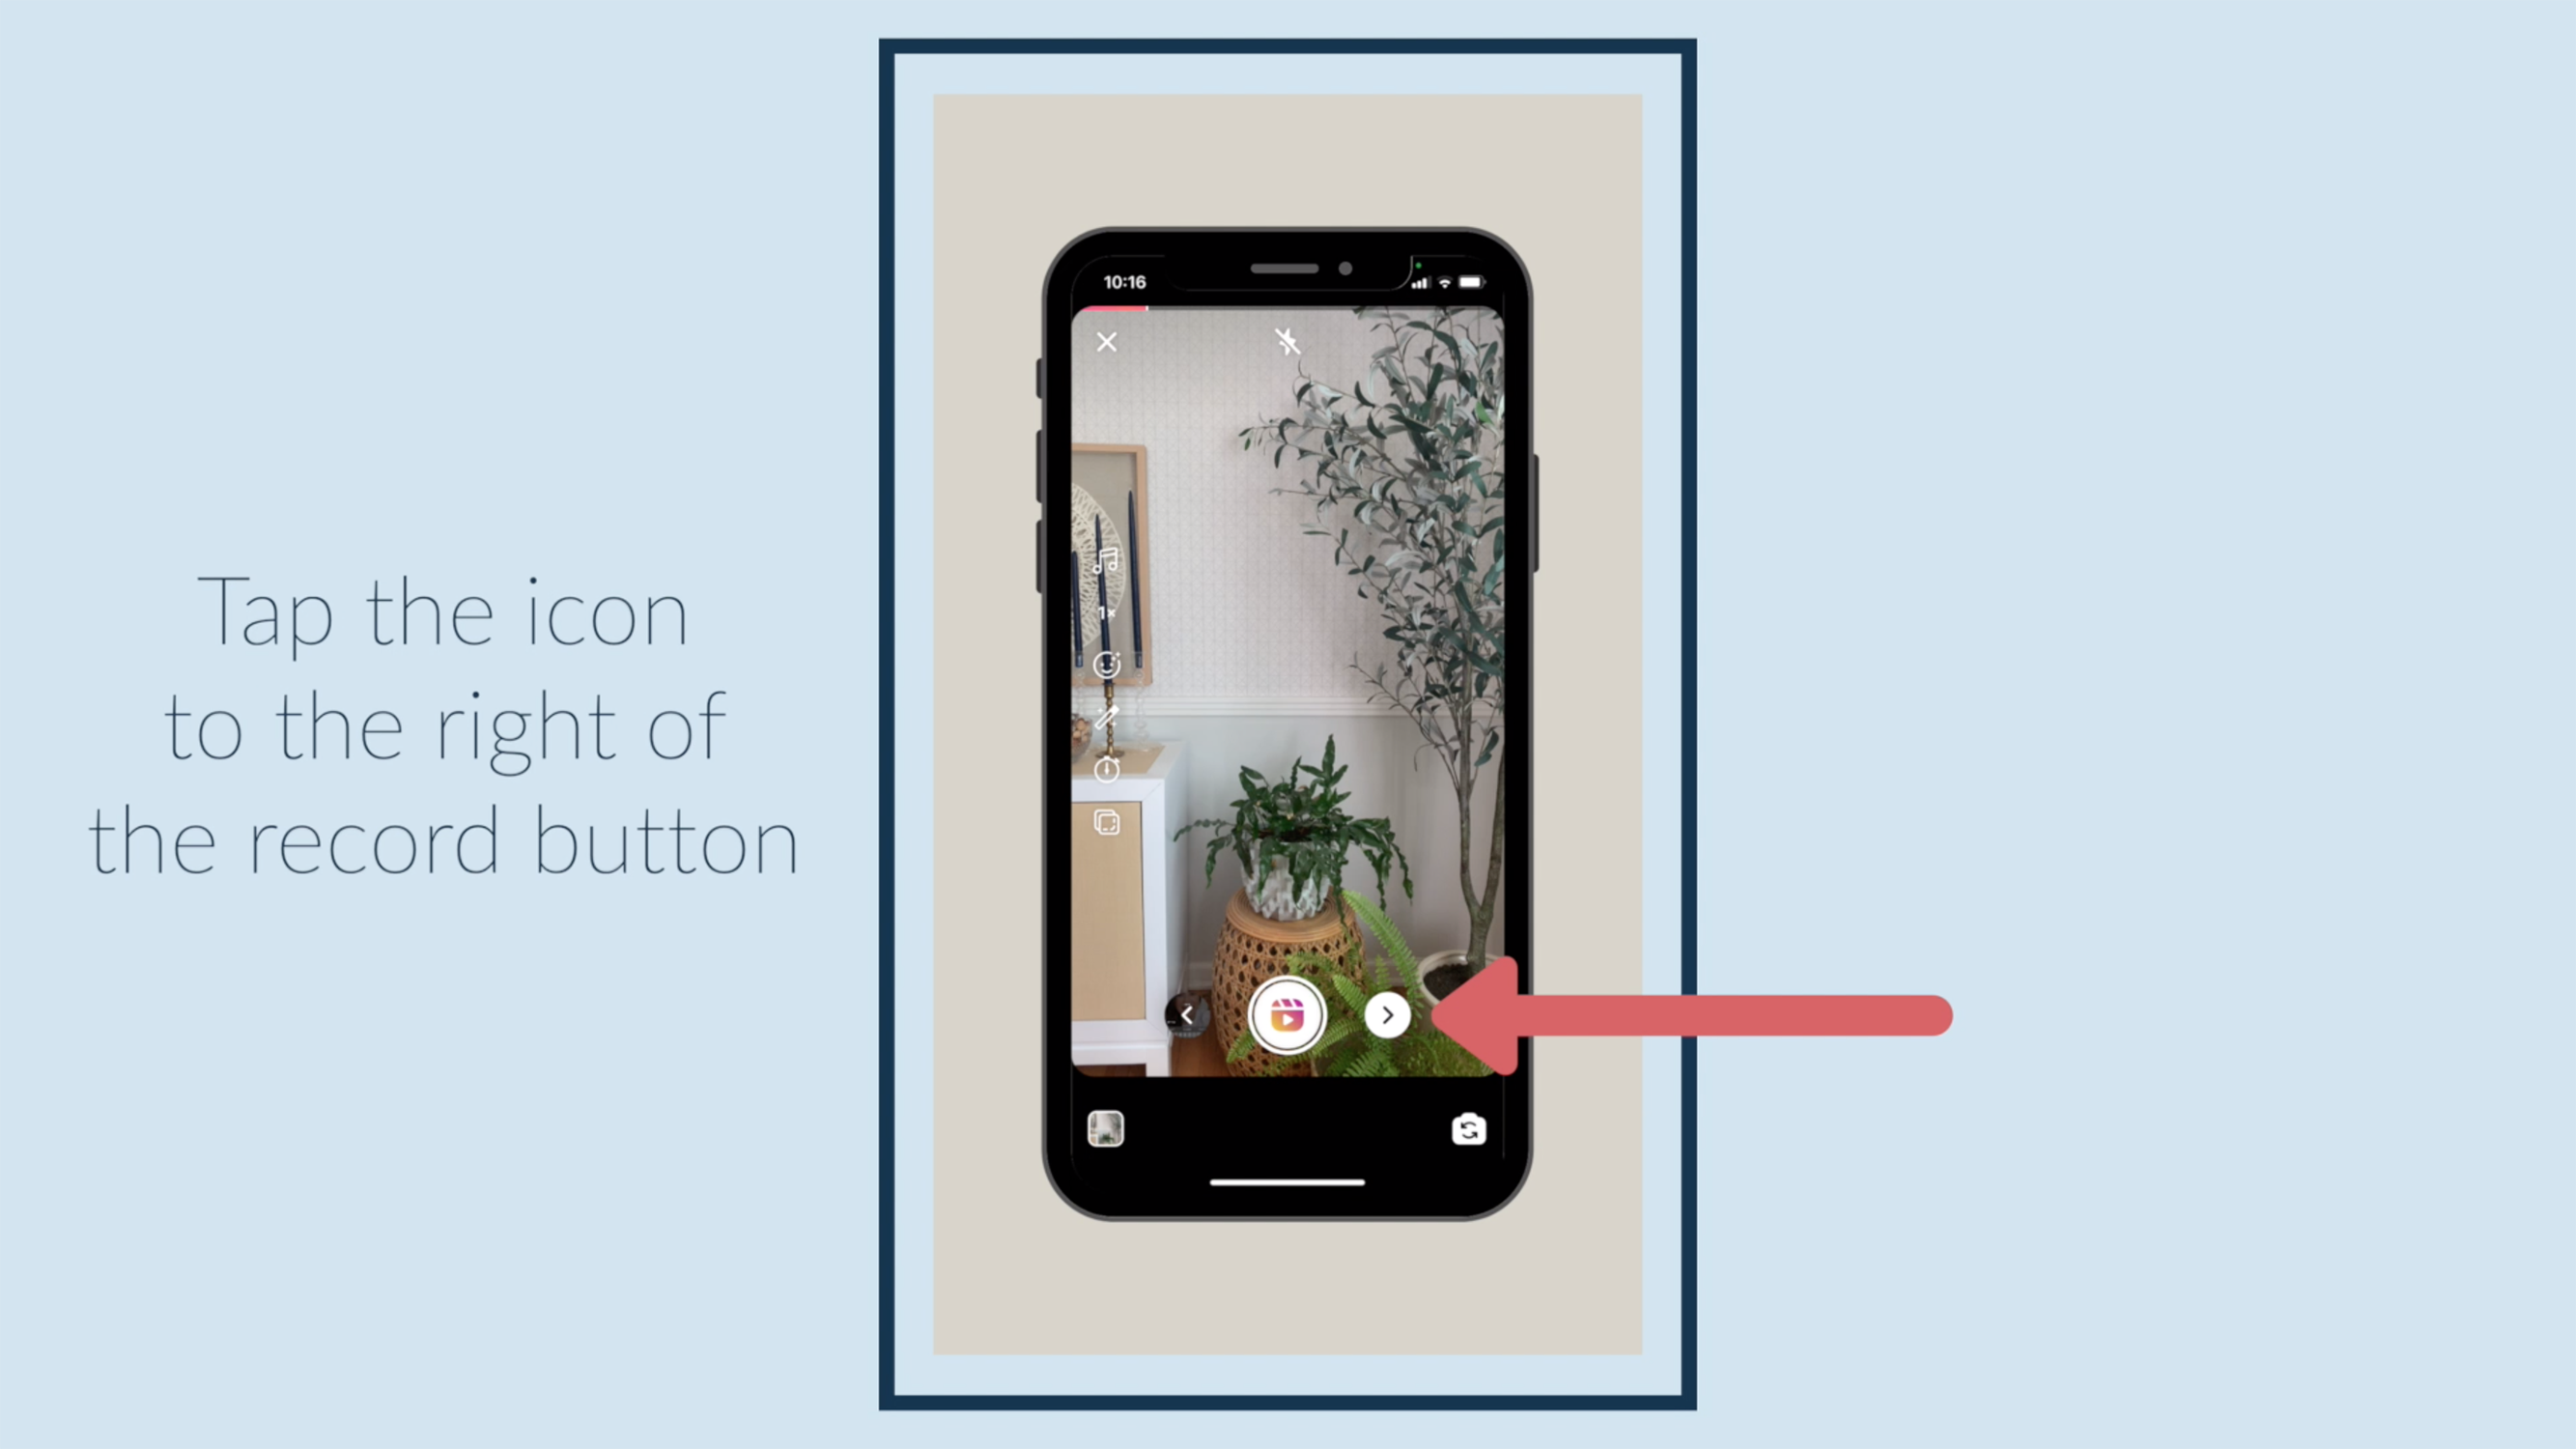
Tap the icon to the right of the record button.
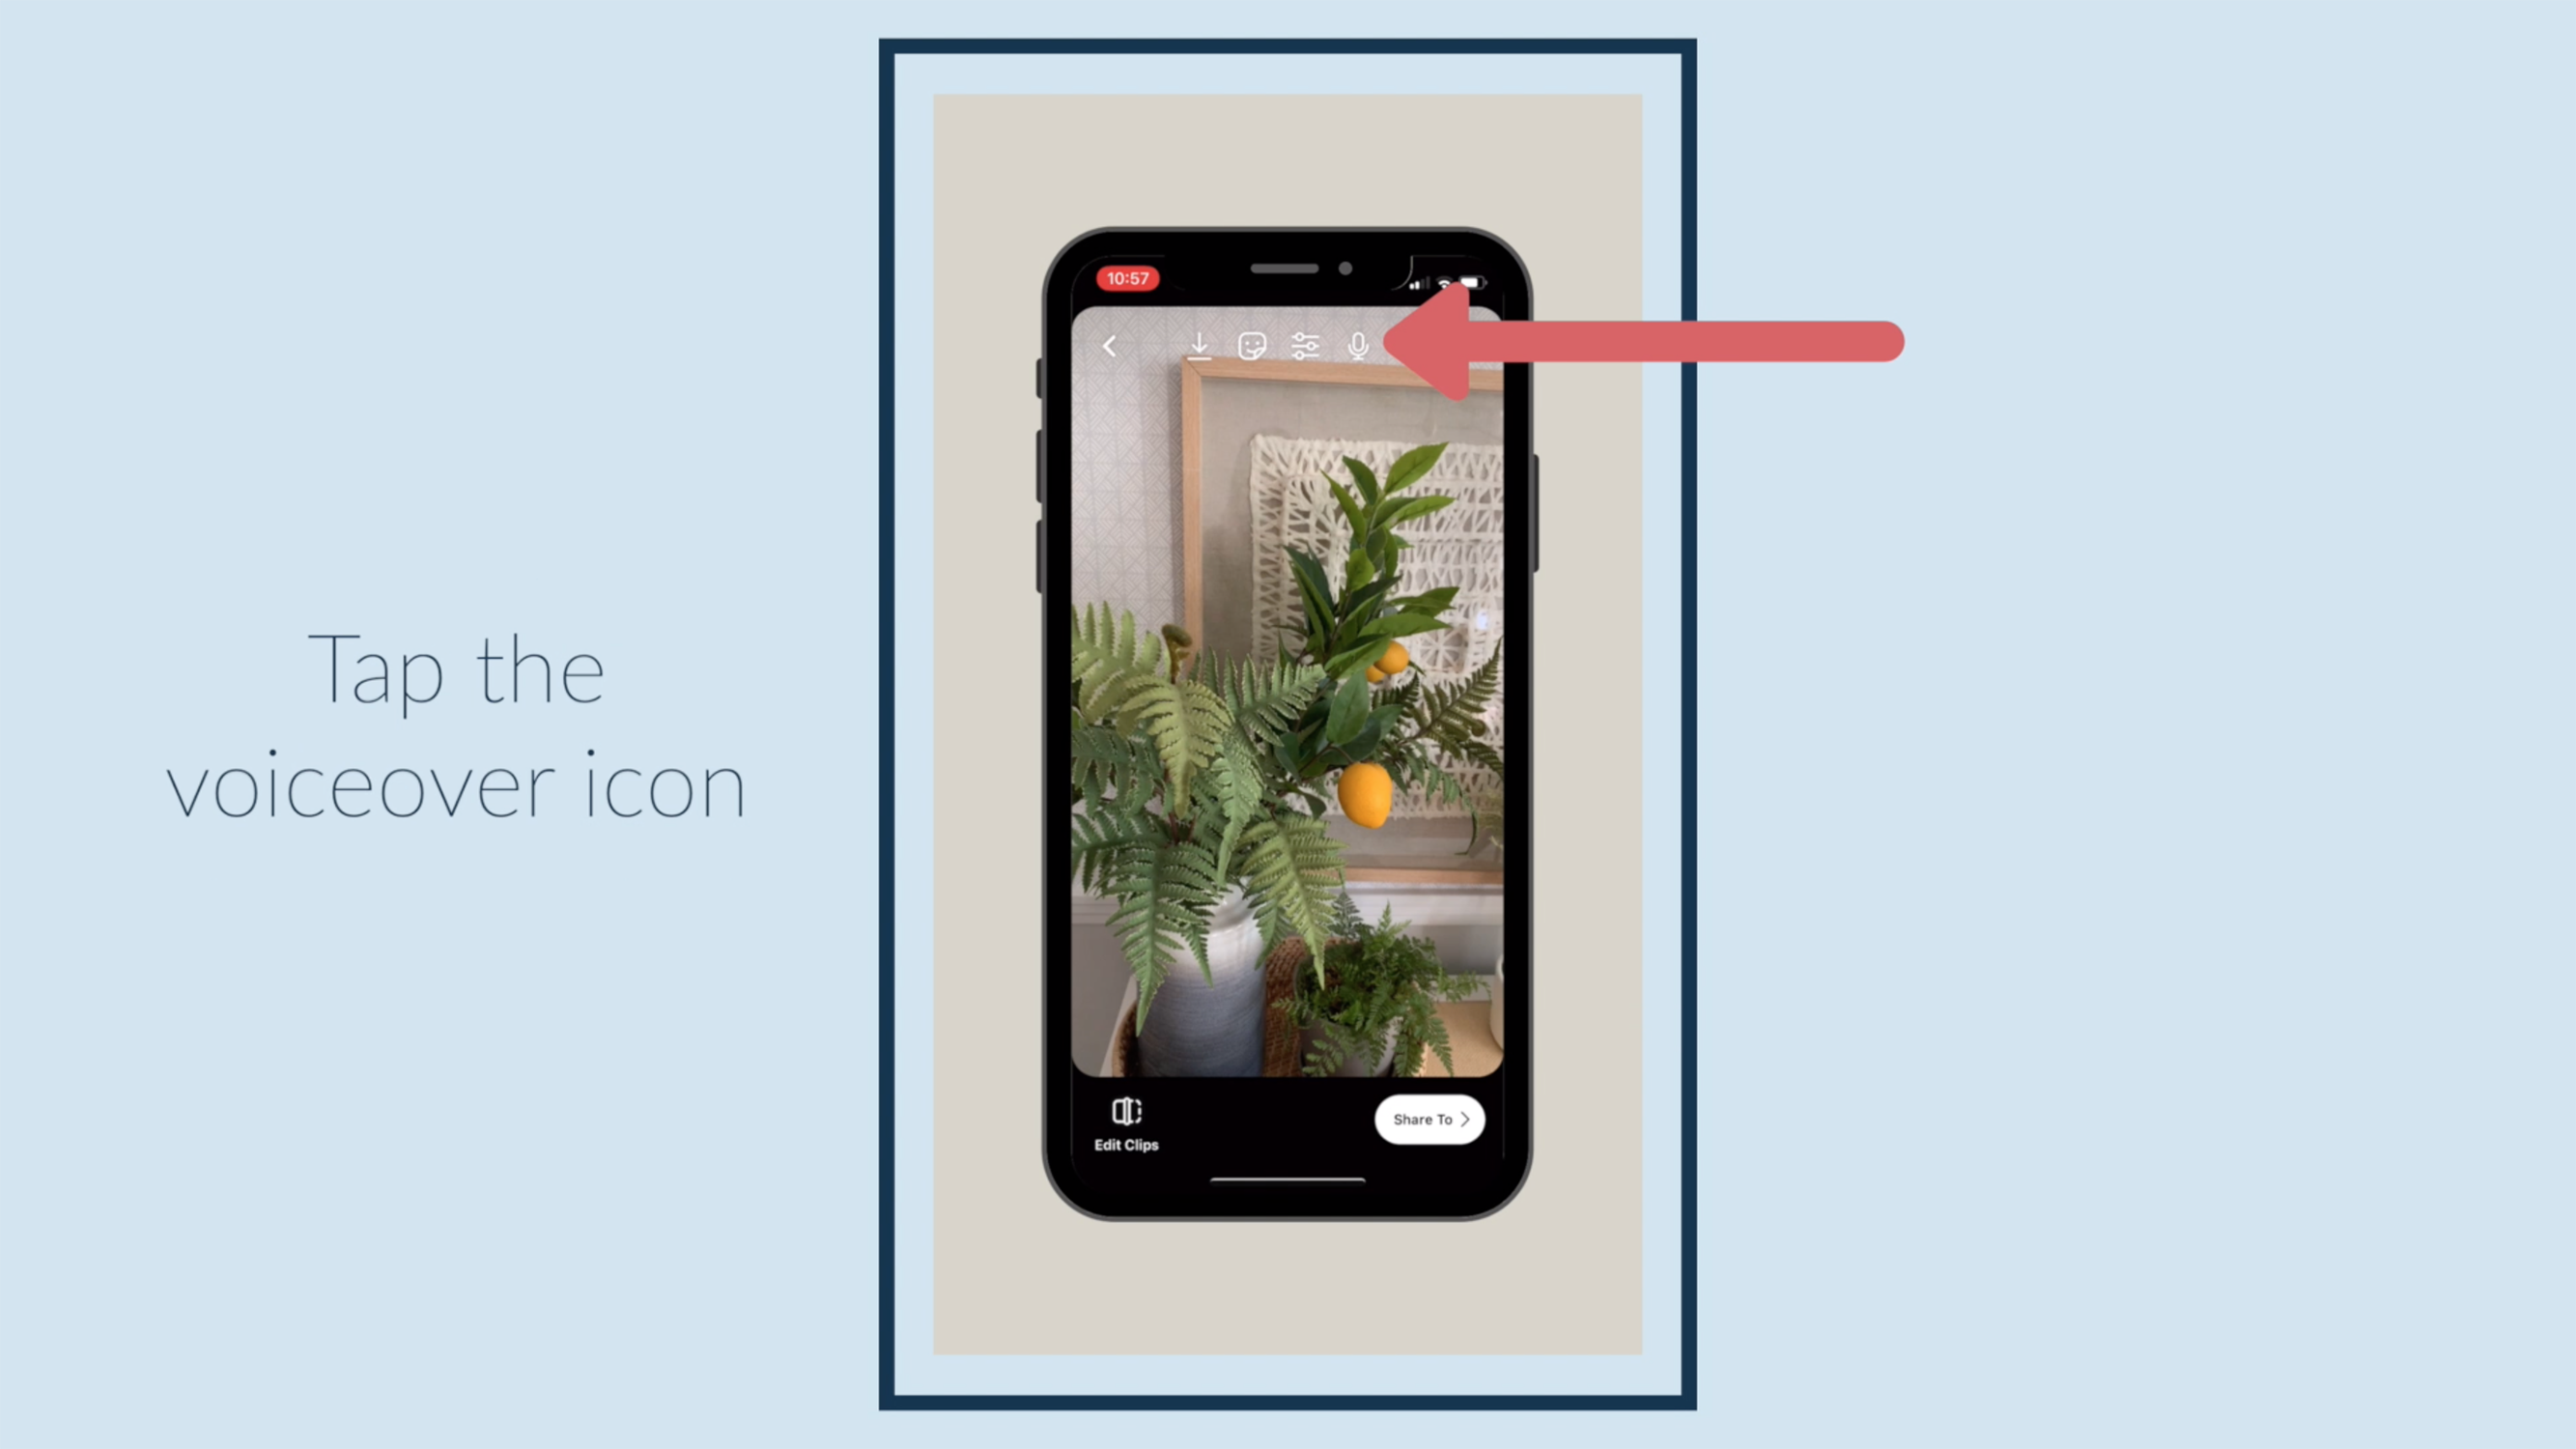
Tap the voiceover icon.
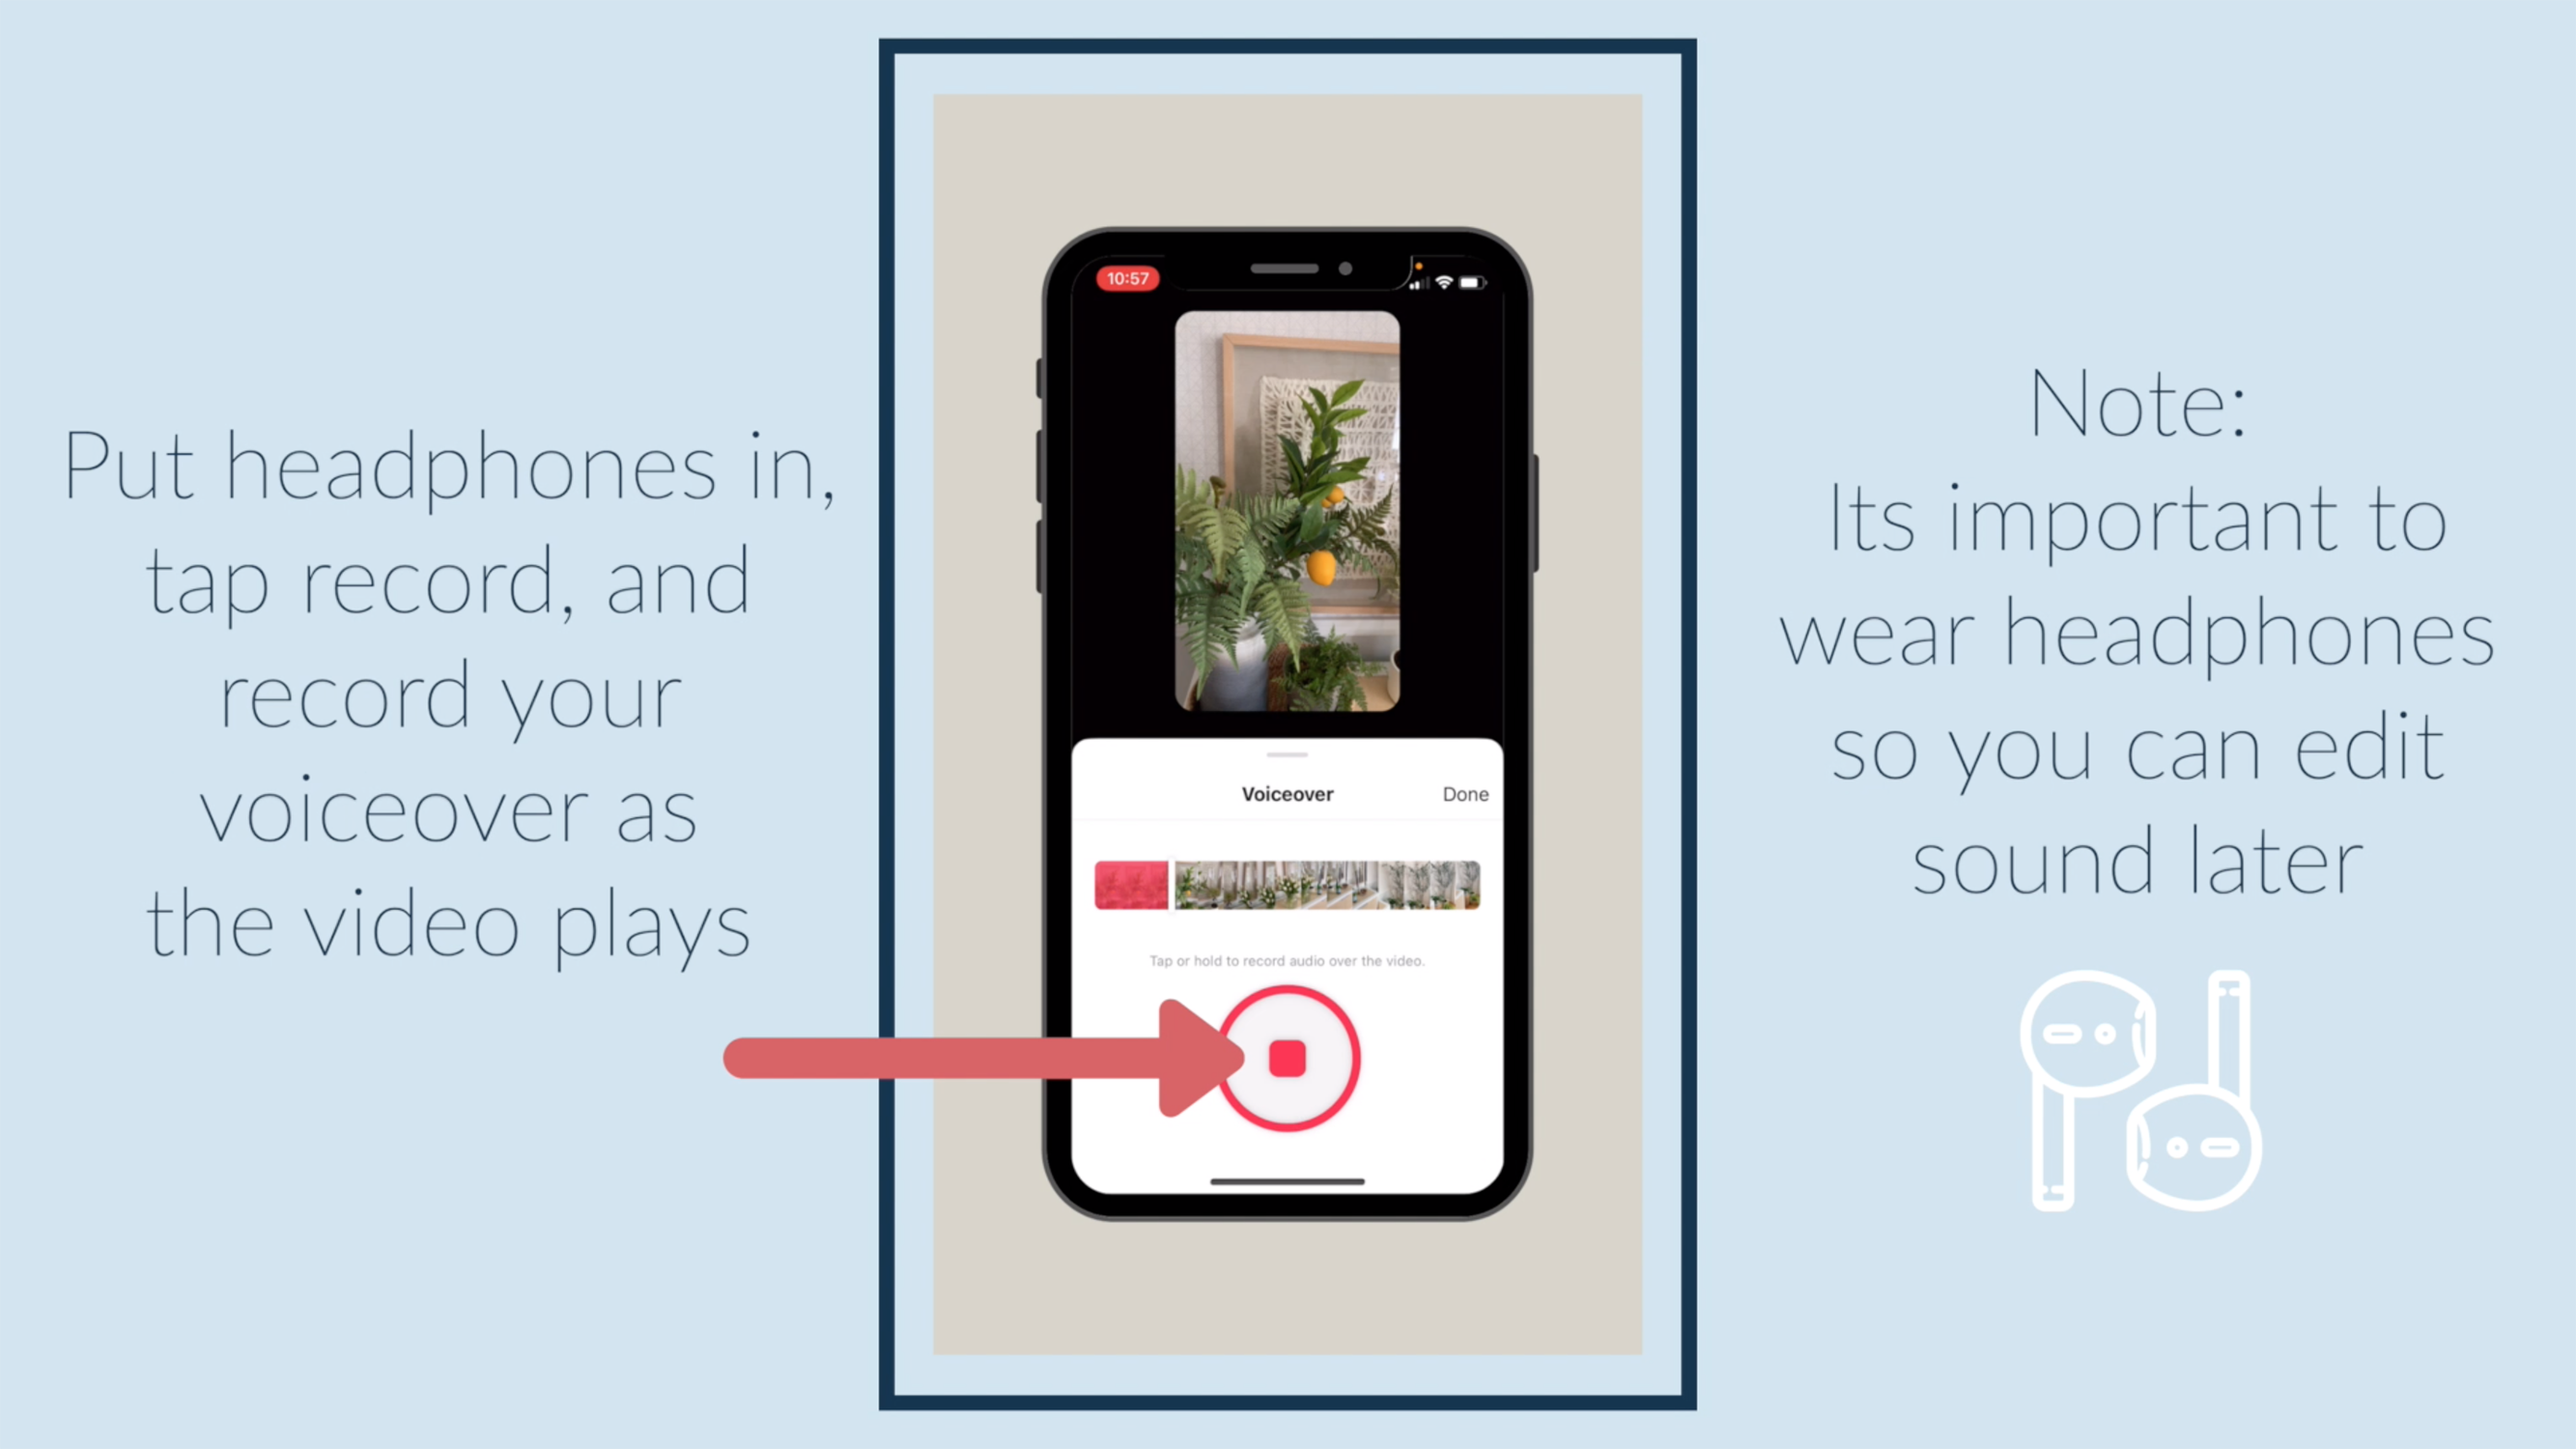
Put headphones in, tap record, and record your voiceover as the video plays. Note: Its important to wear headphones so you can edit sound later.
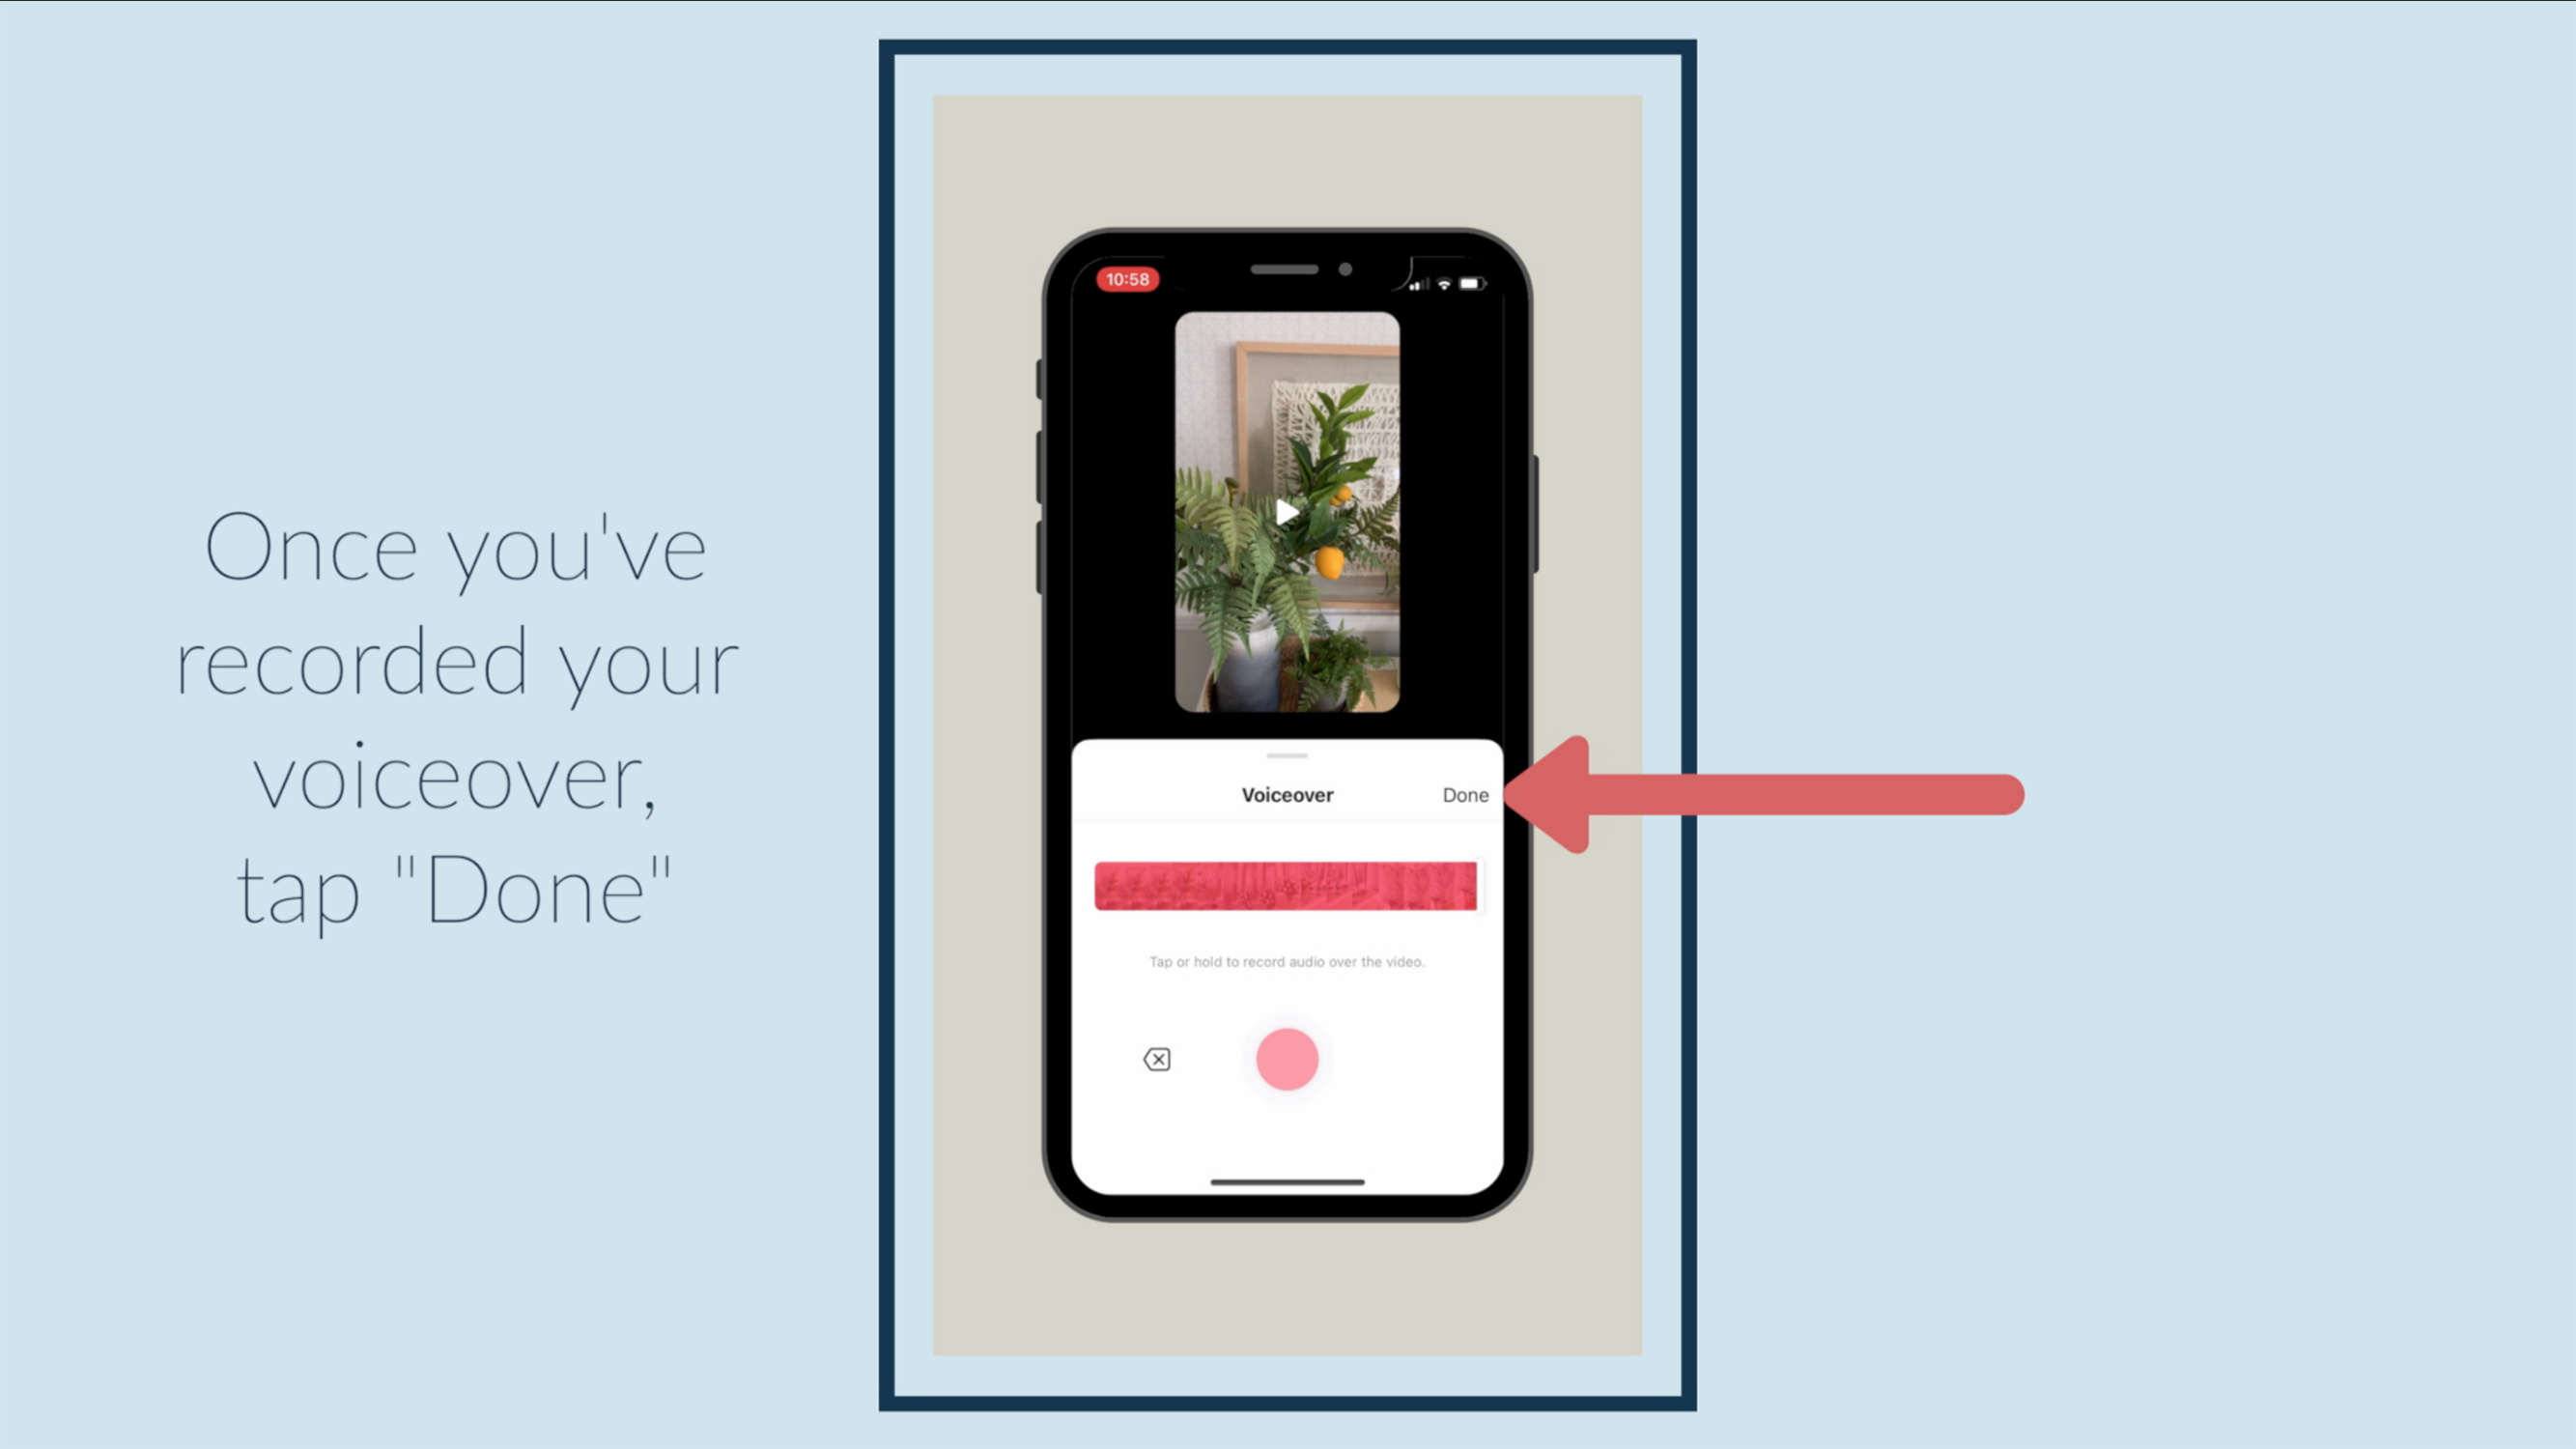
Once you've recorded your voiceover, tap "Done."
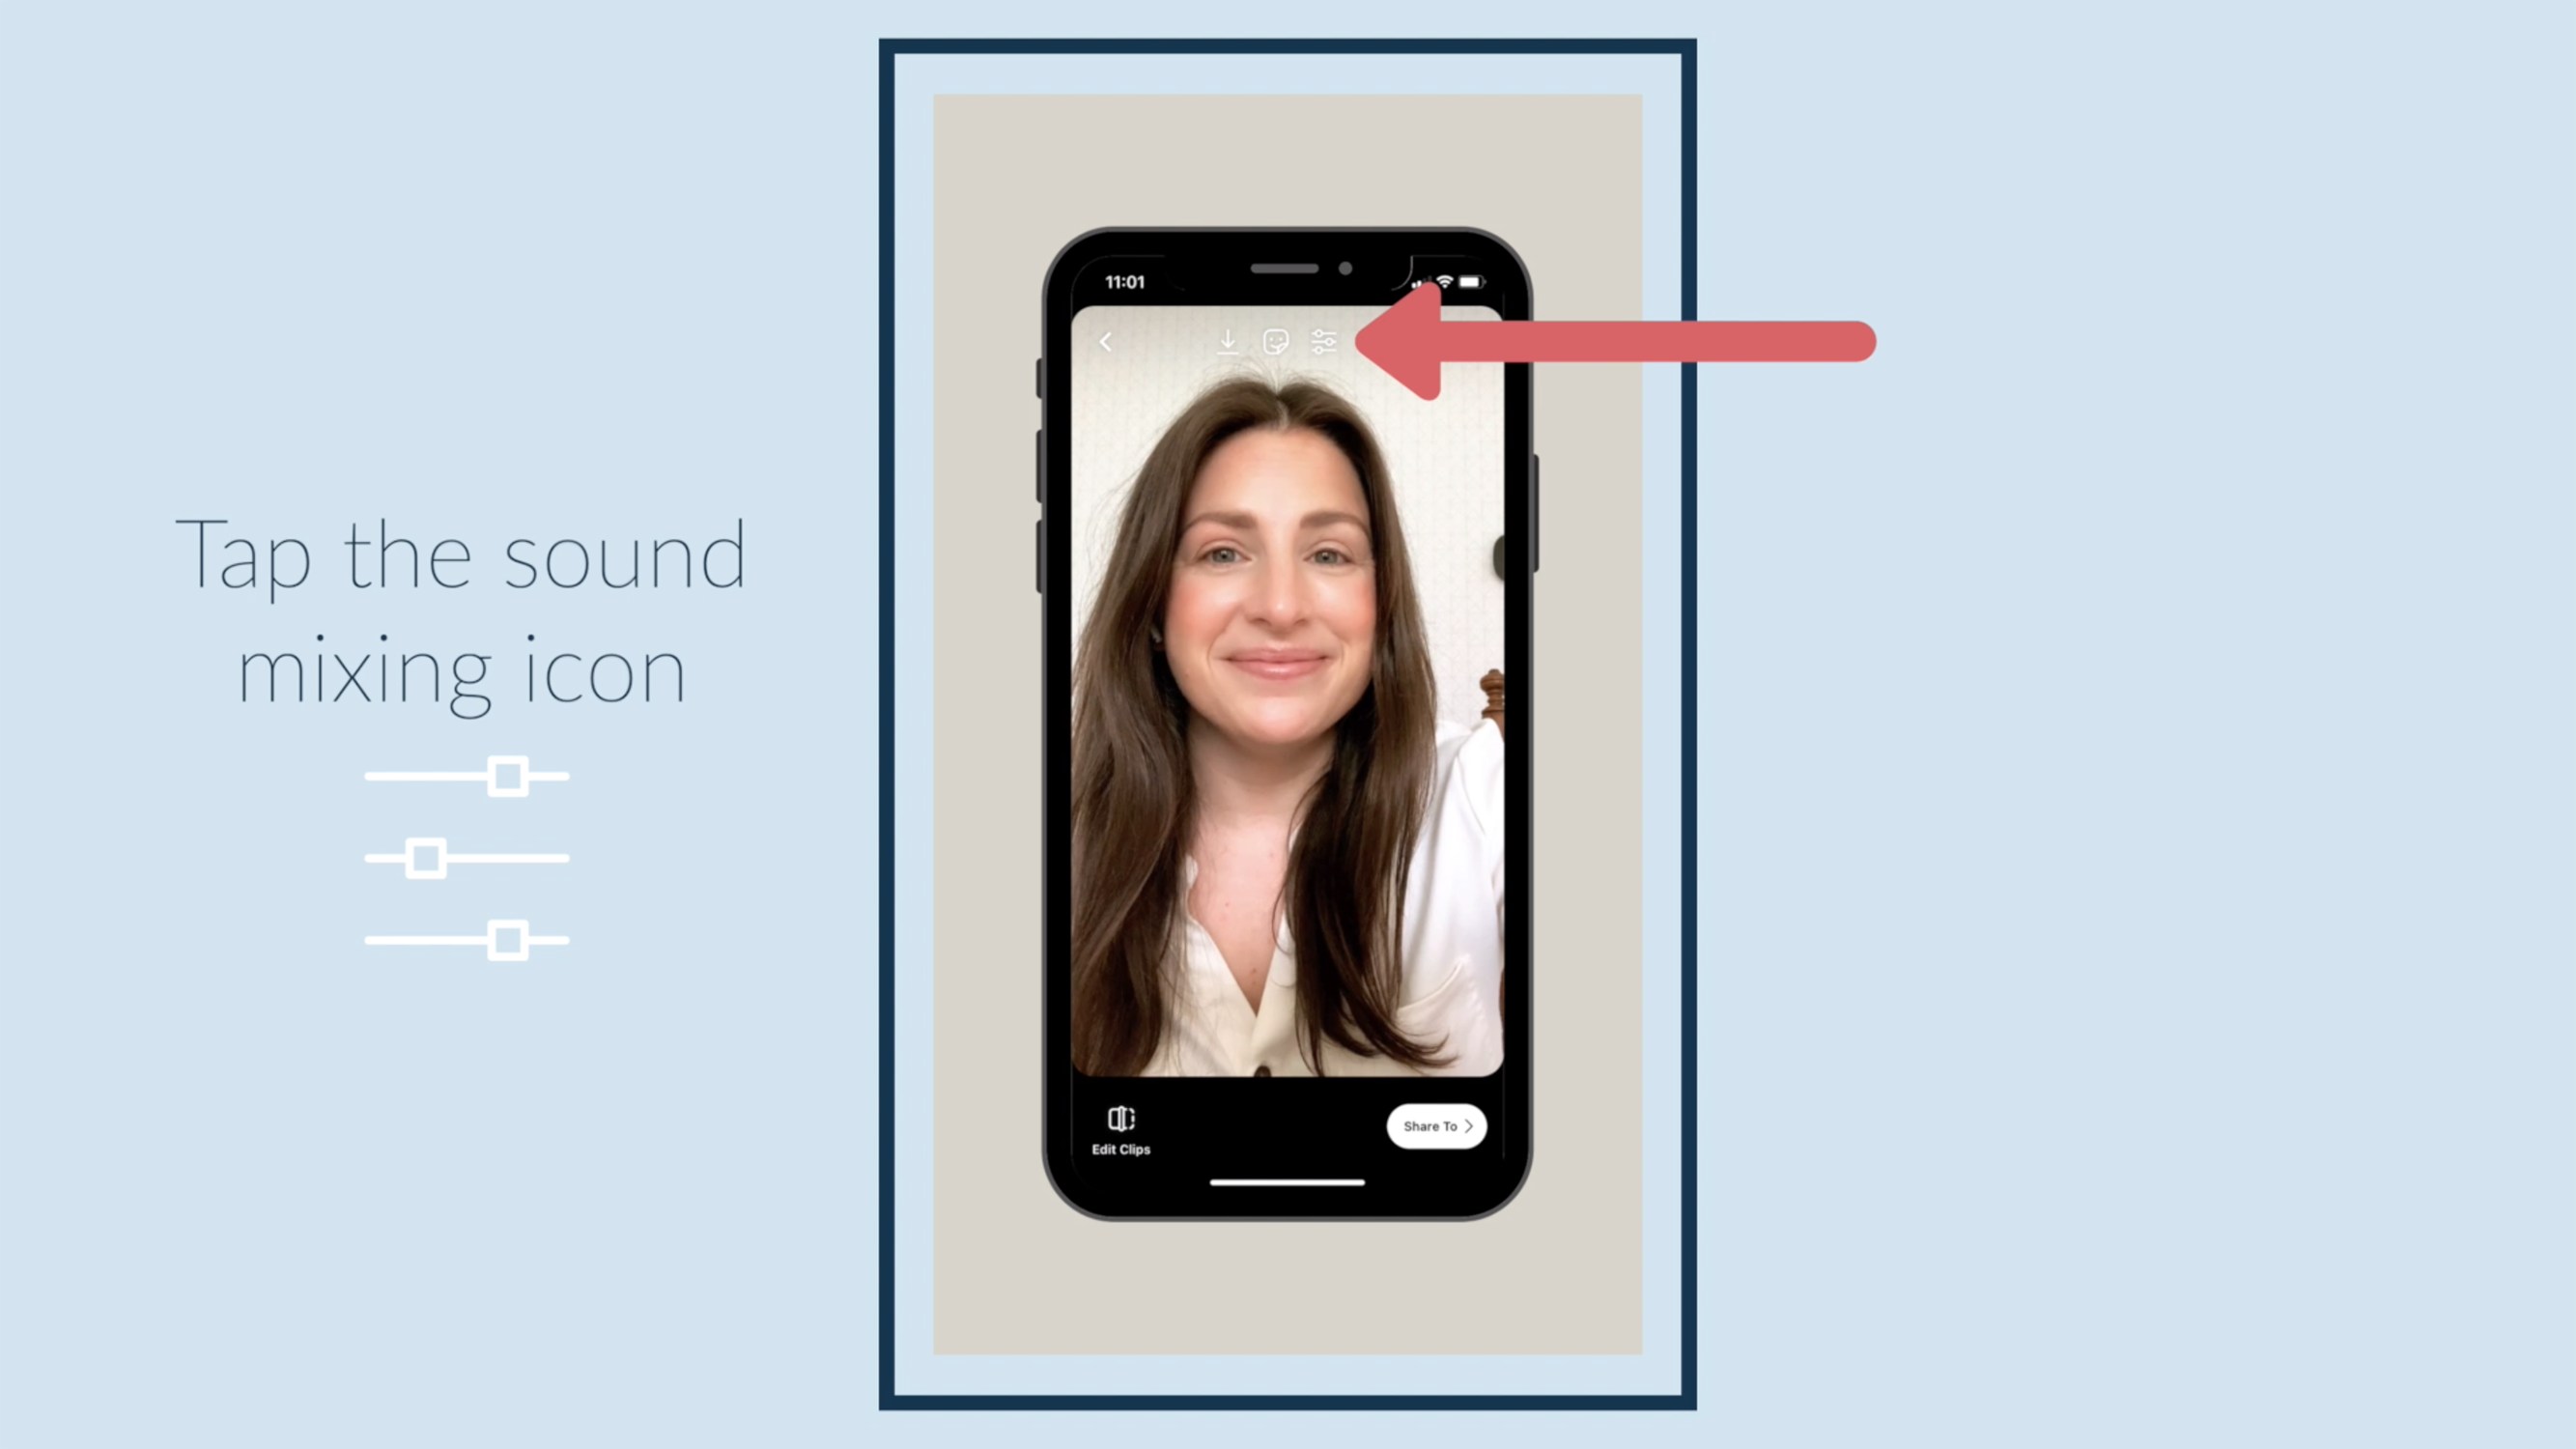
Tap the sound mixing icon.
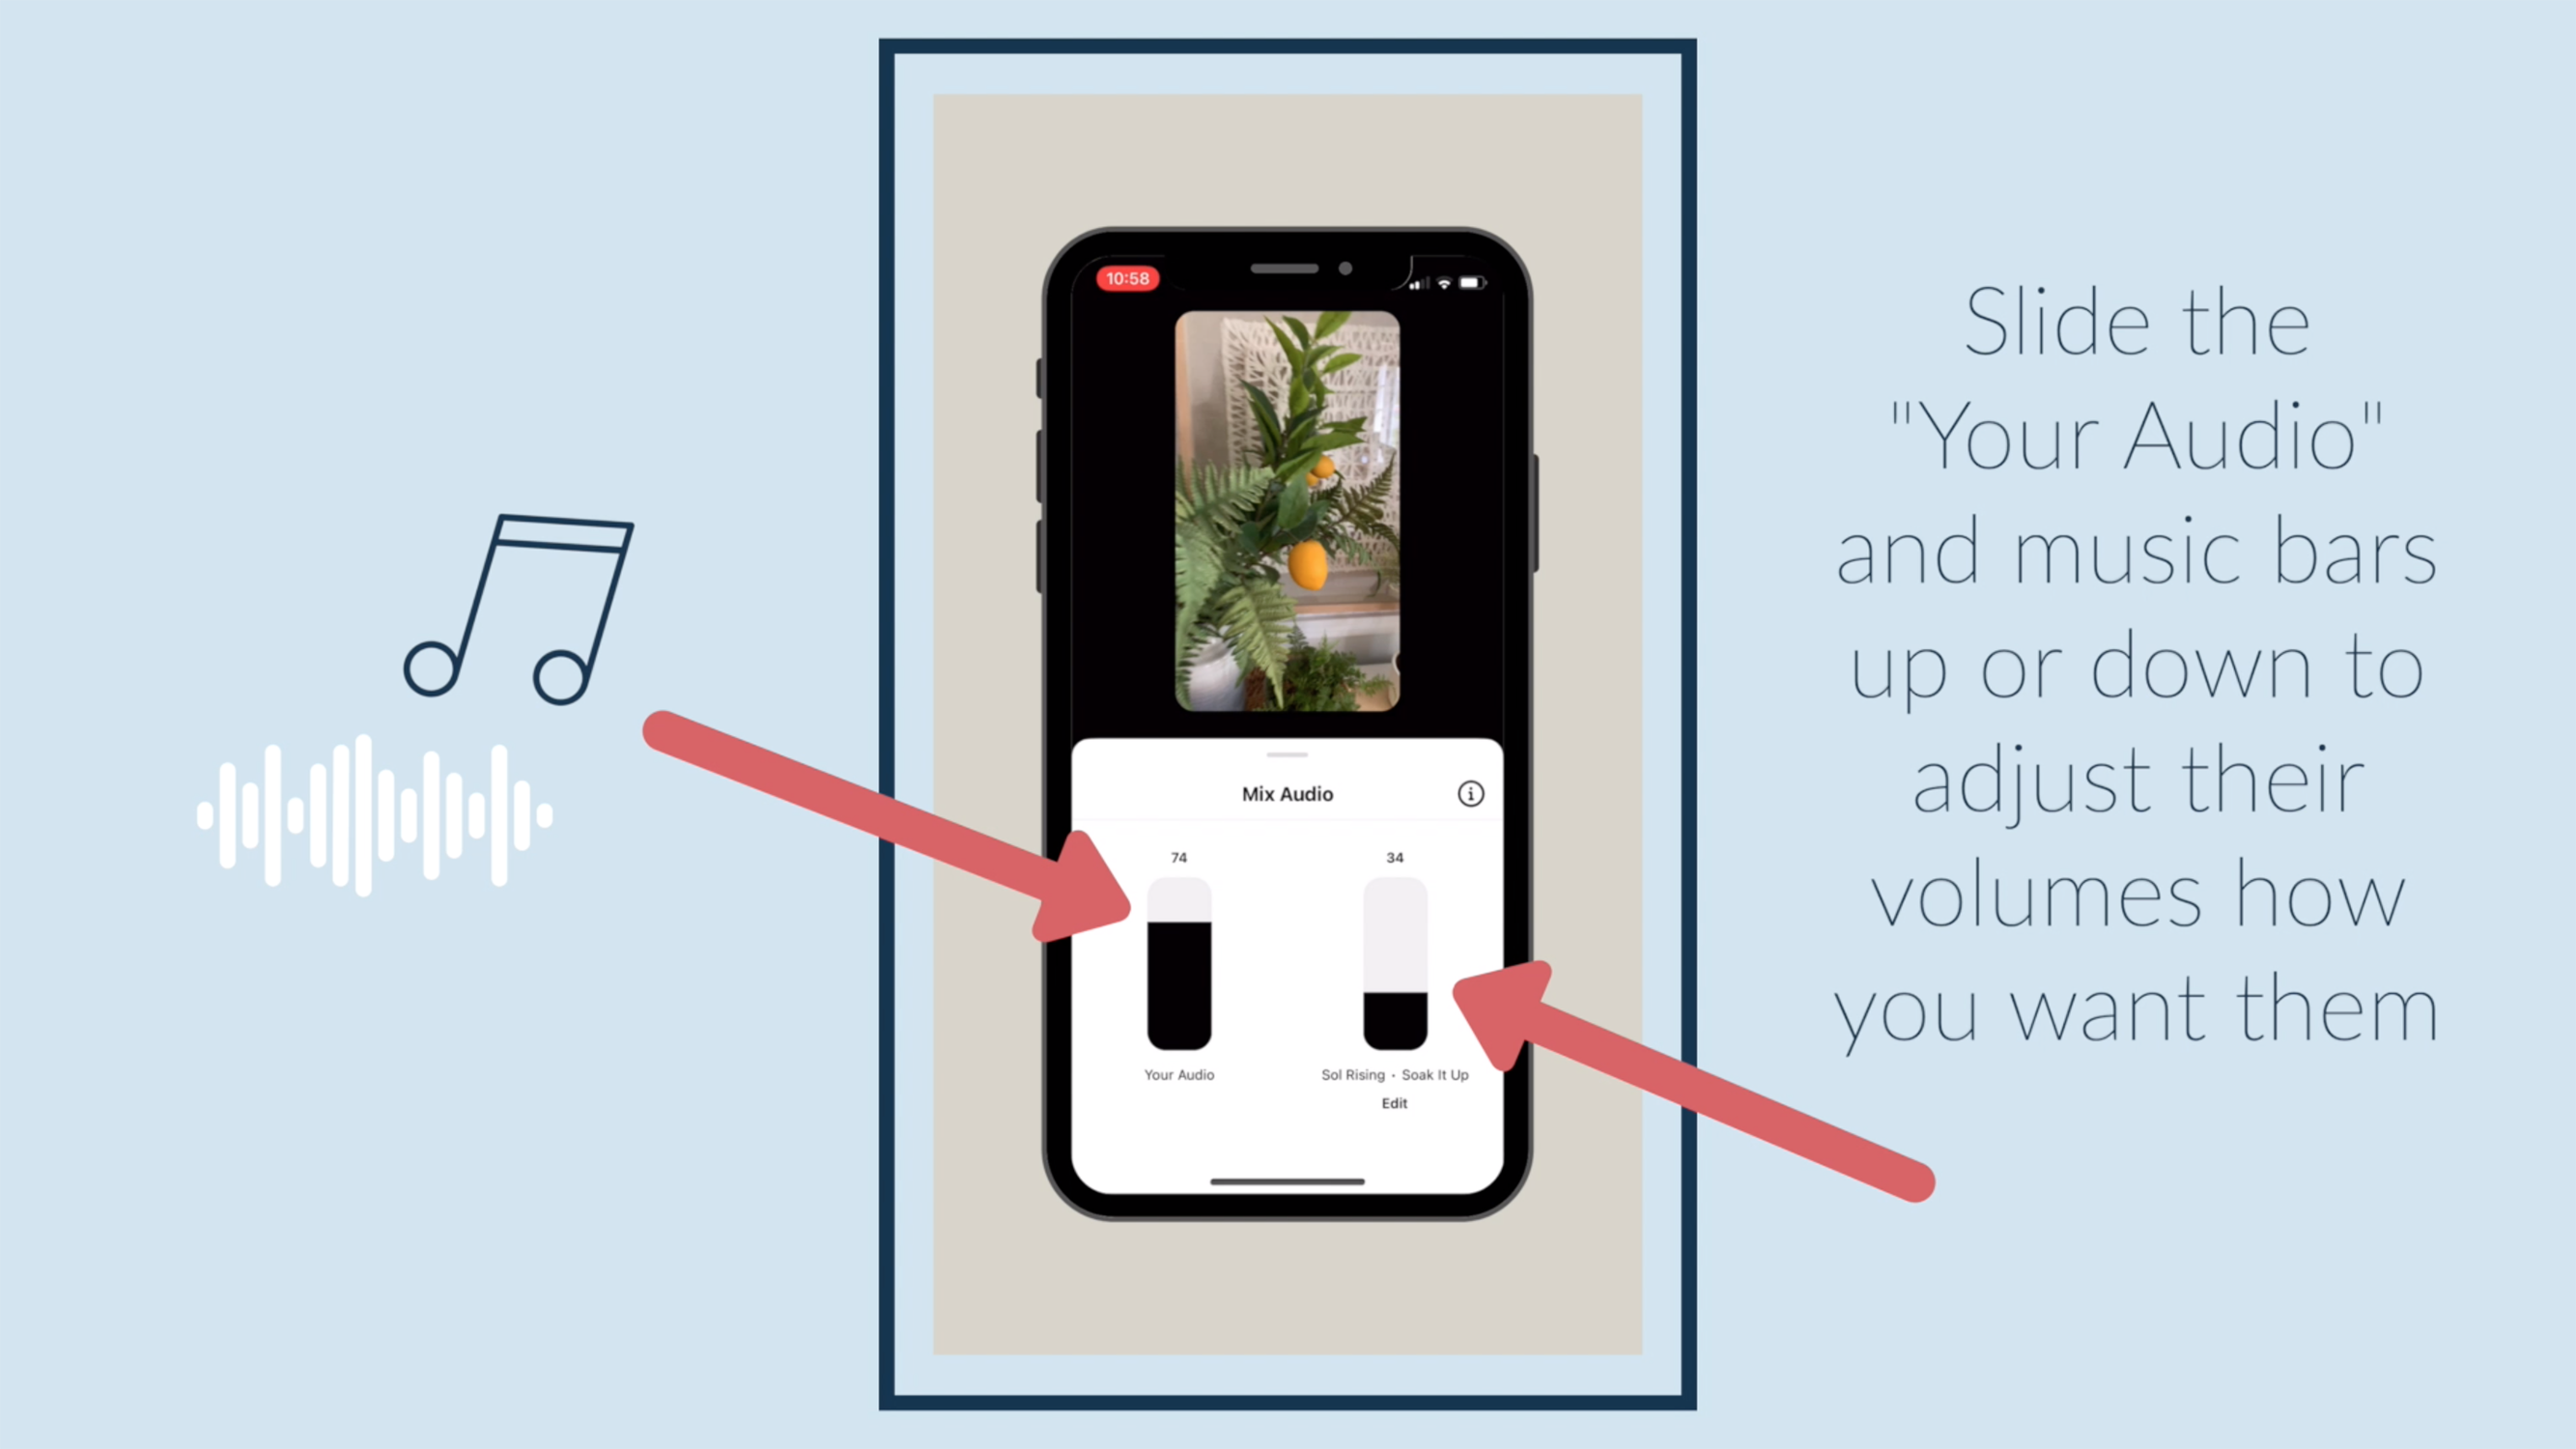
Slide the "Your Audio" and music bars up or down to adjust their volumes how you want them.

Tap your video to leave the sound mixer once y...
Instagram Reel Tutorial: How to Add Captions
Captions are super important for two reasons: accessibility and for viewers watching with sound off. Learn how to get automated captions in your reels right here!
Set your phone up on a tripod or stable surface.

Go to "Story" instead of "Reels." This is where you'll have to record to use the "Captions" option. Later, you're going to save it and upload it in reels.

Tap the record button, and film your clip.
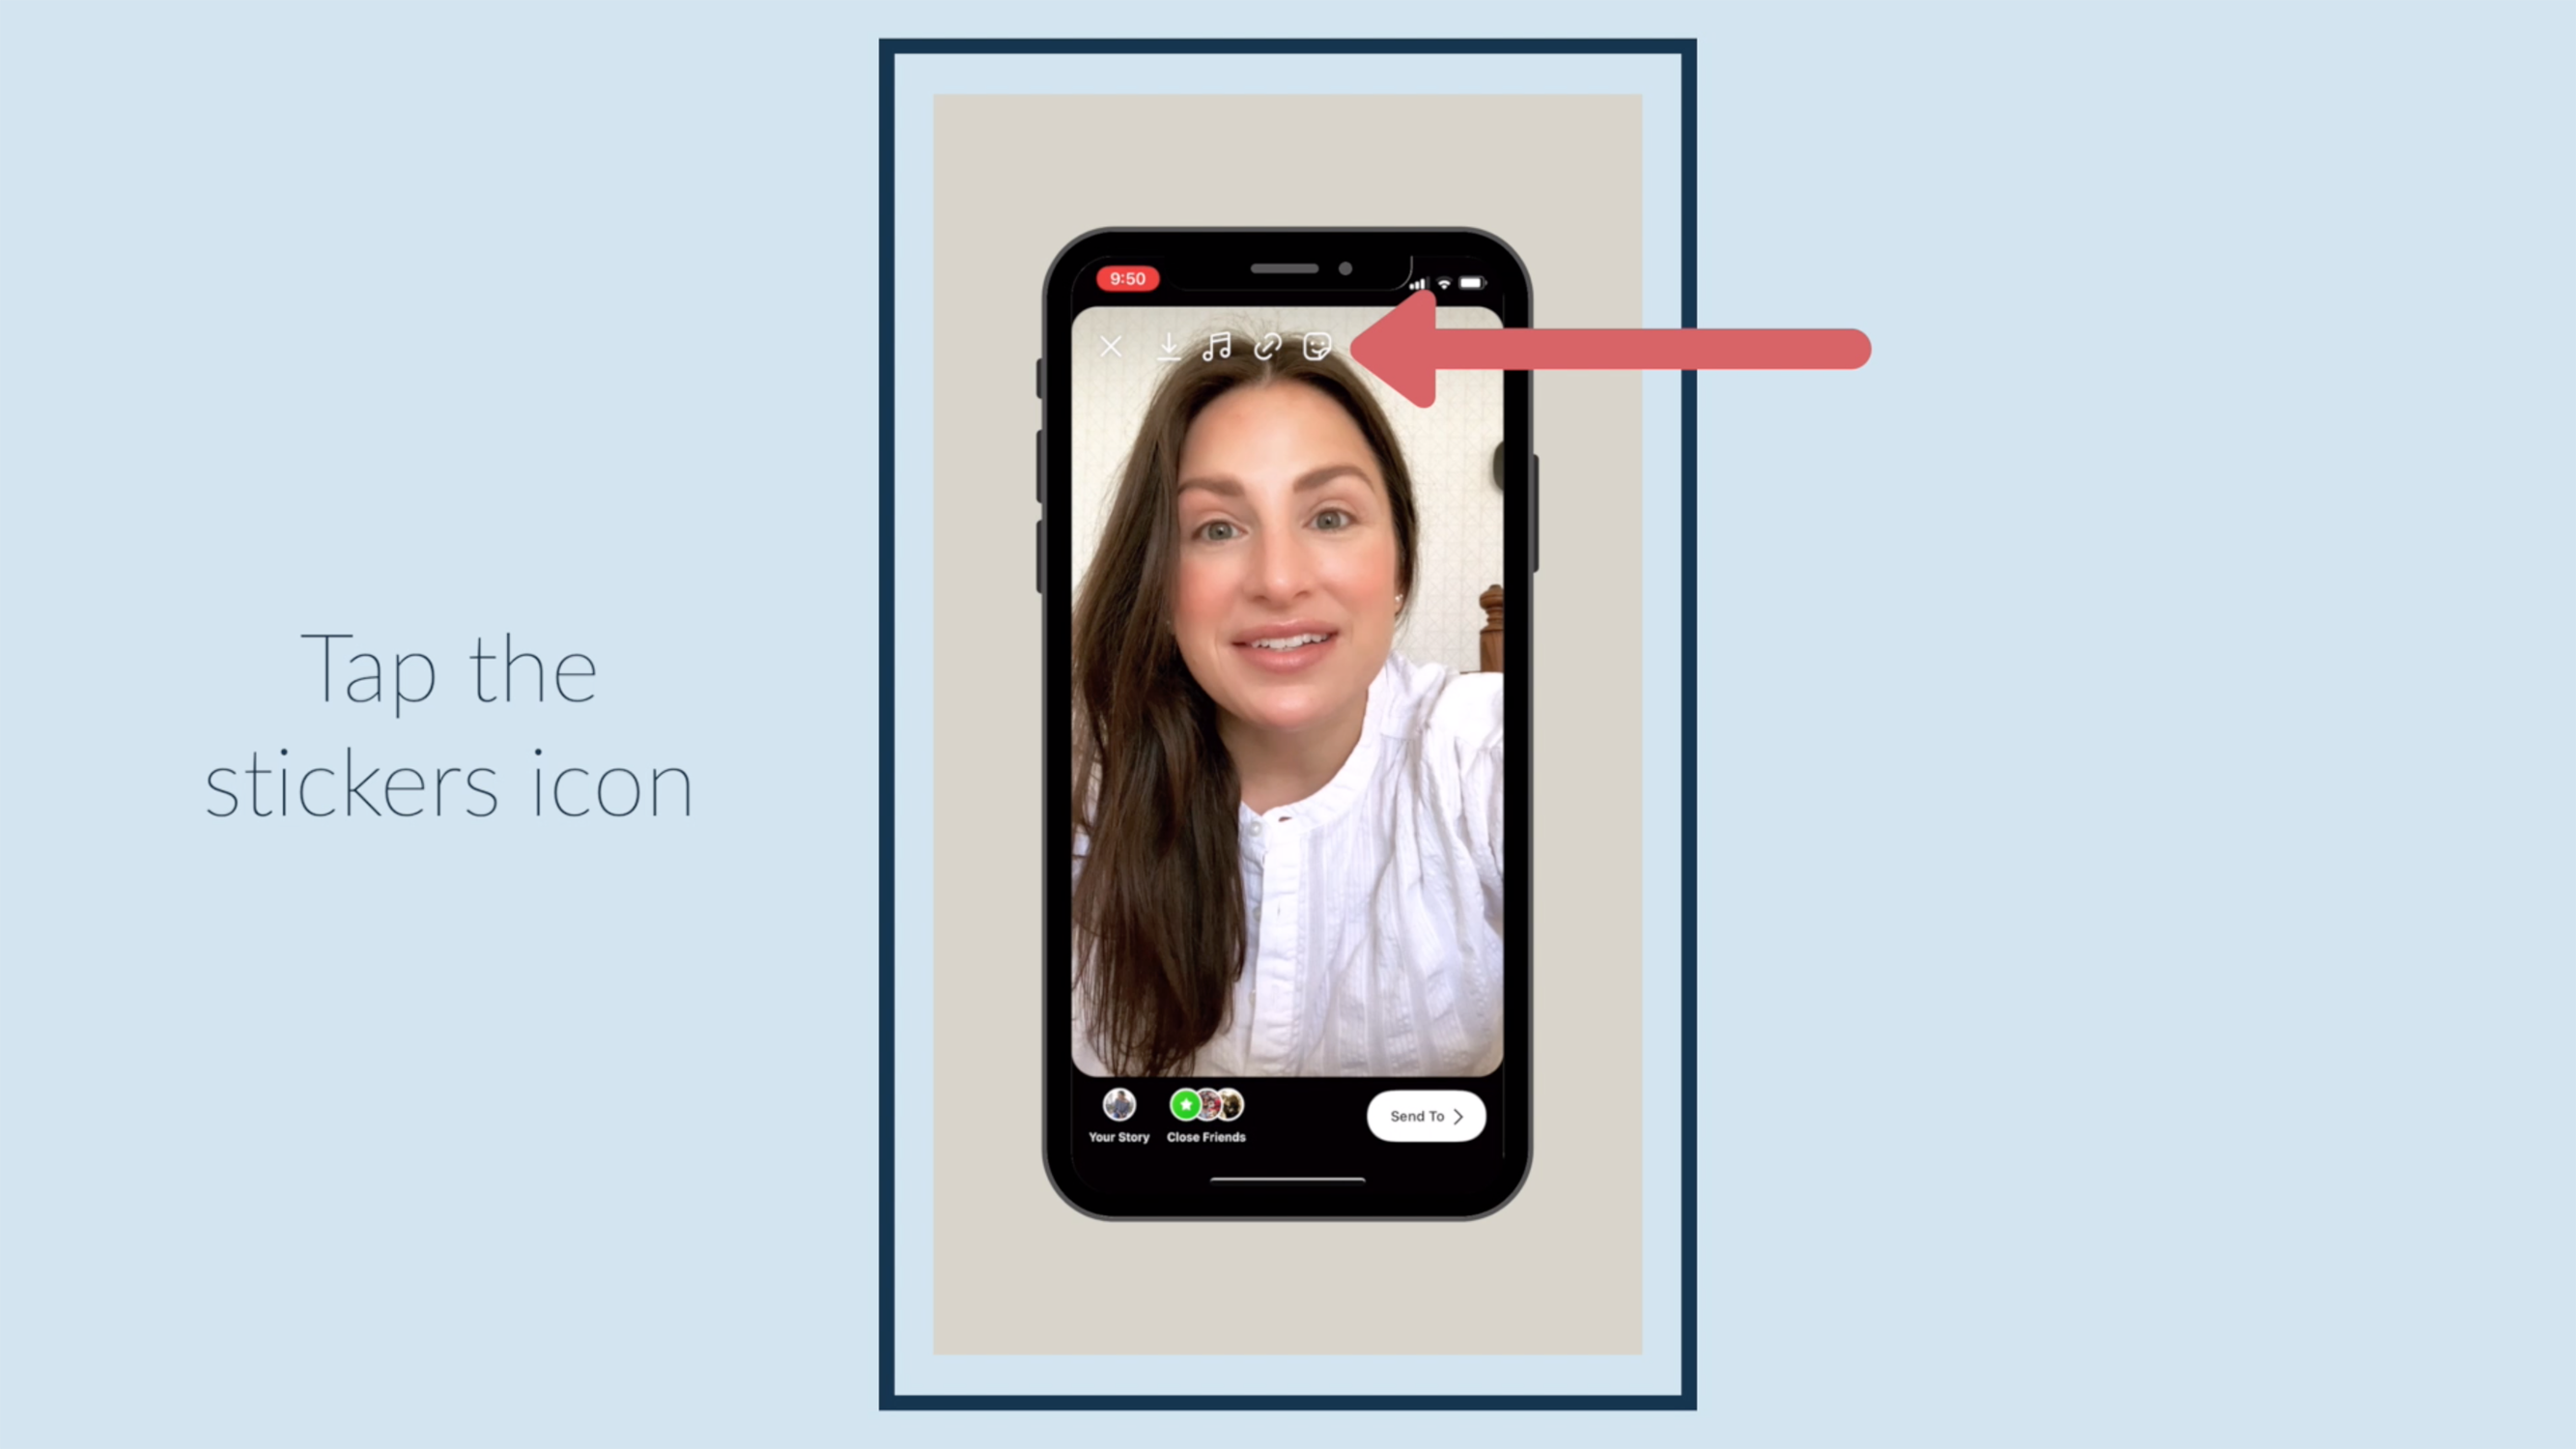
Tap the stickers icon.
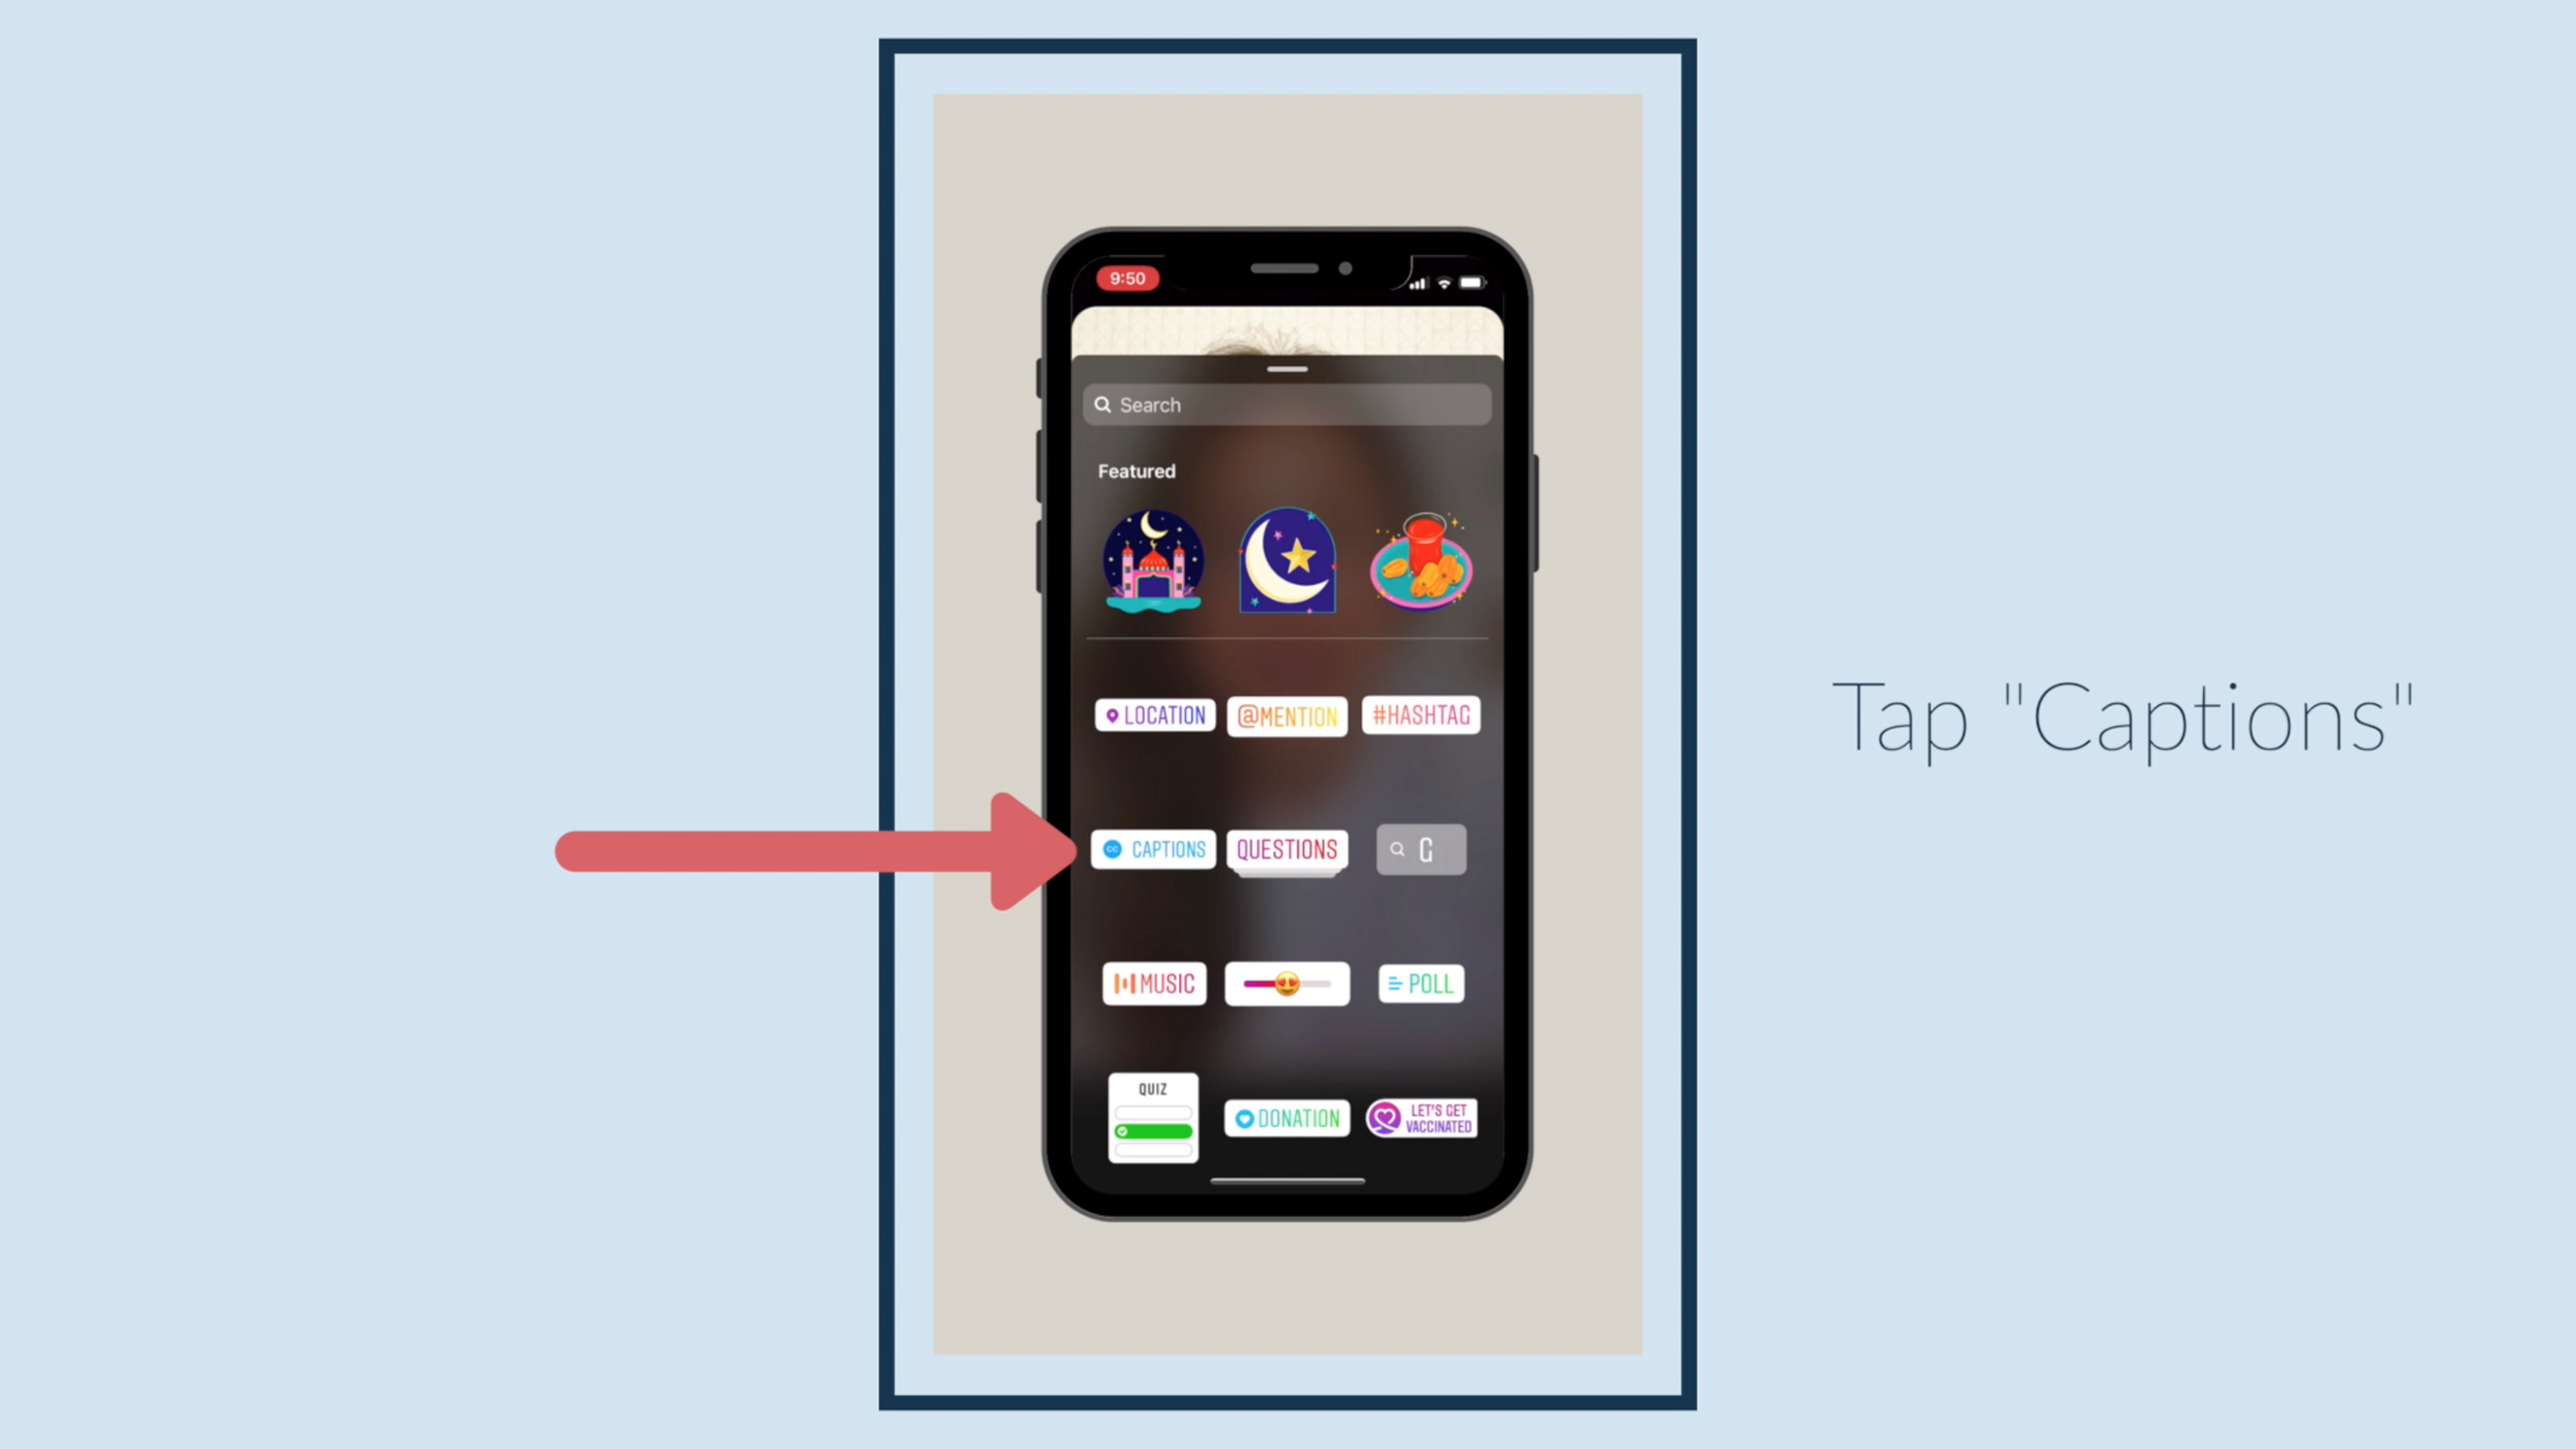
Tap "Captions."

Slide along the bottom to choose the font, and tap the color wheel to change the color of your text.
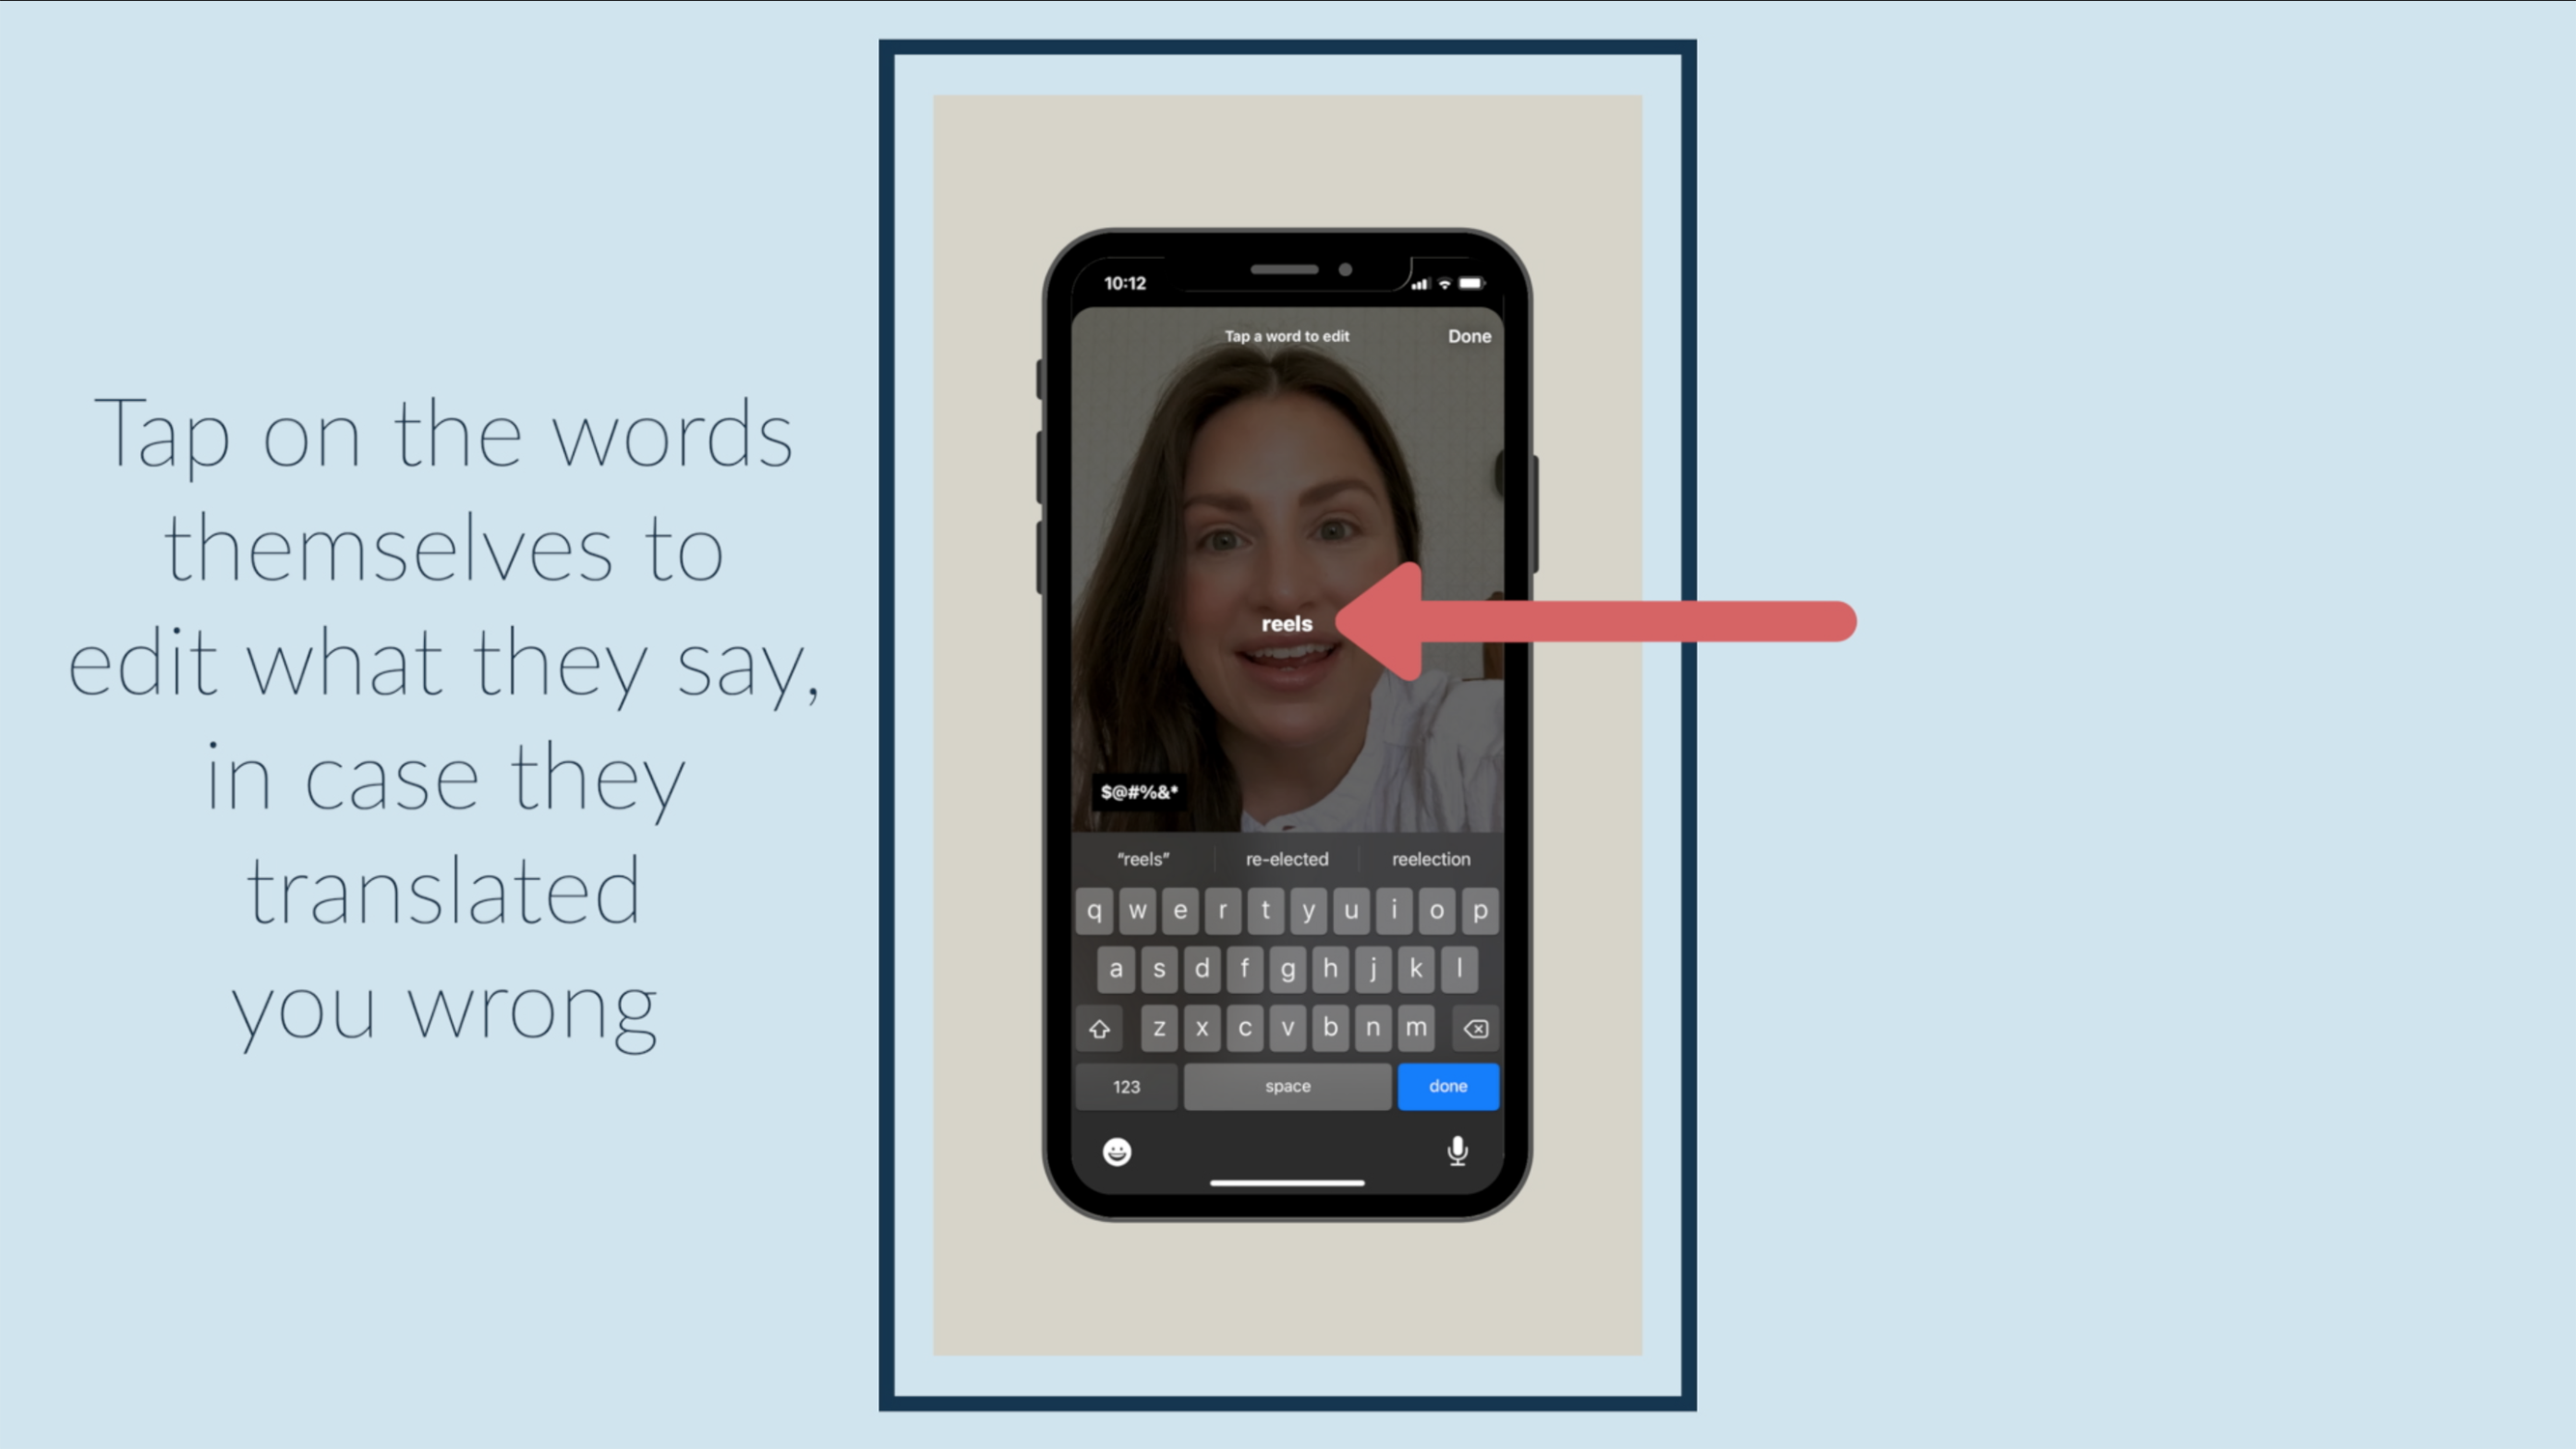
Tap on the words themselves to edit what they say, in case they translated you wrong.
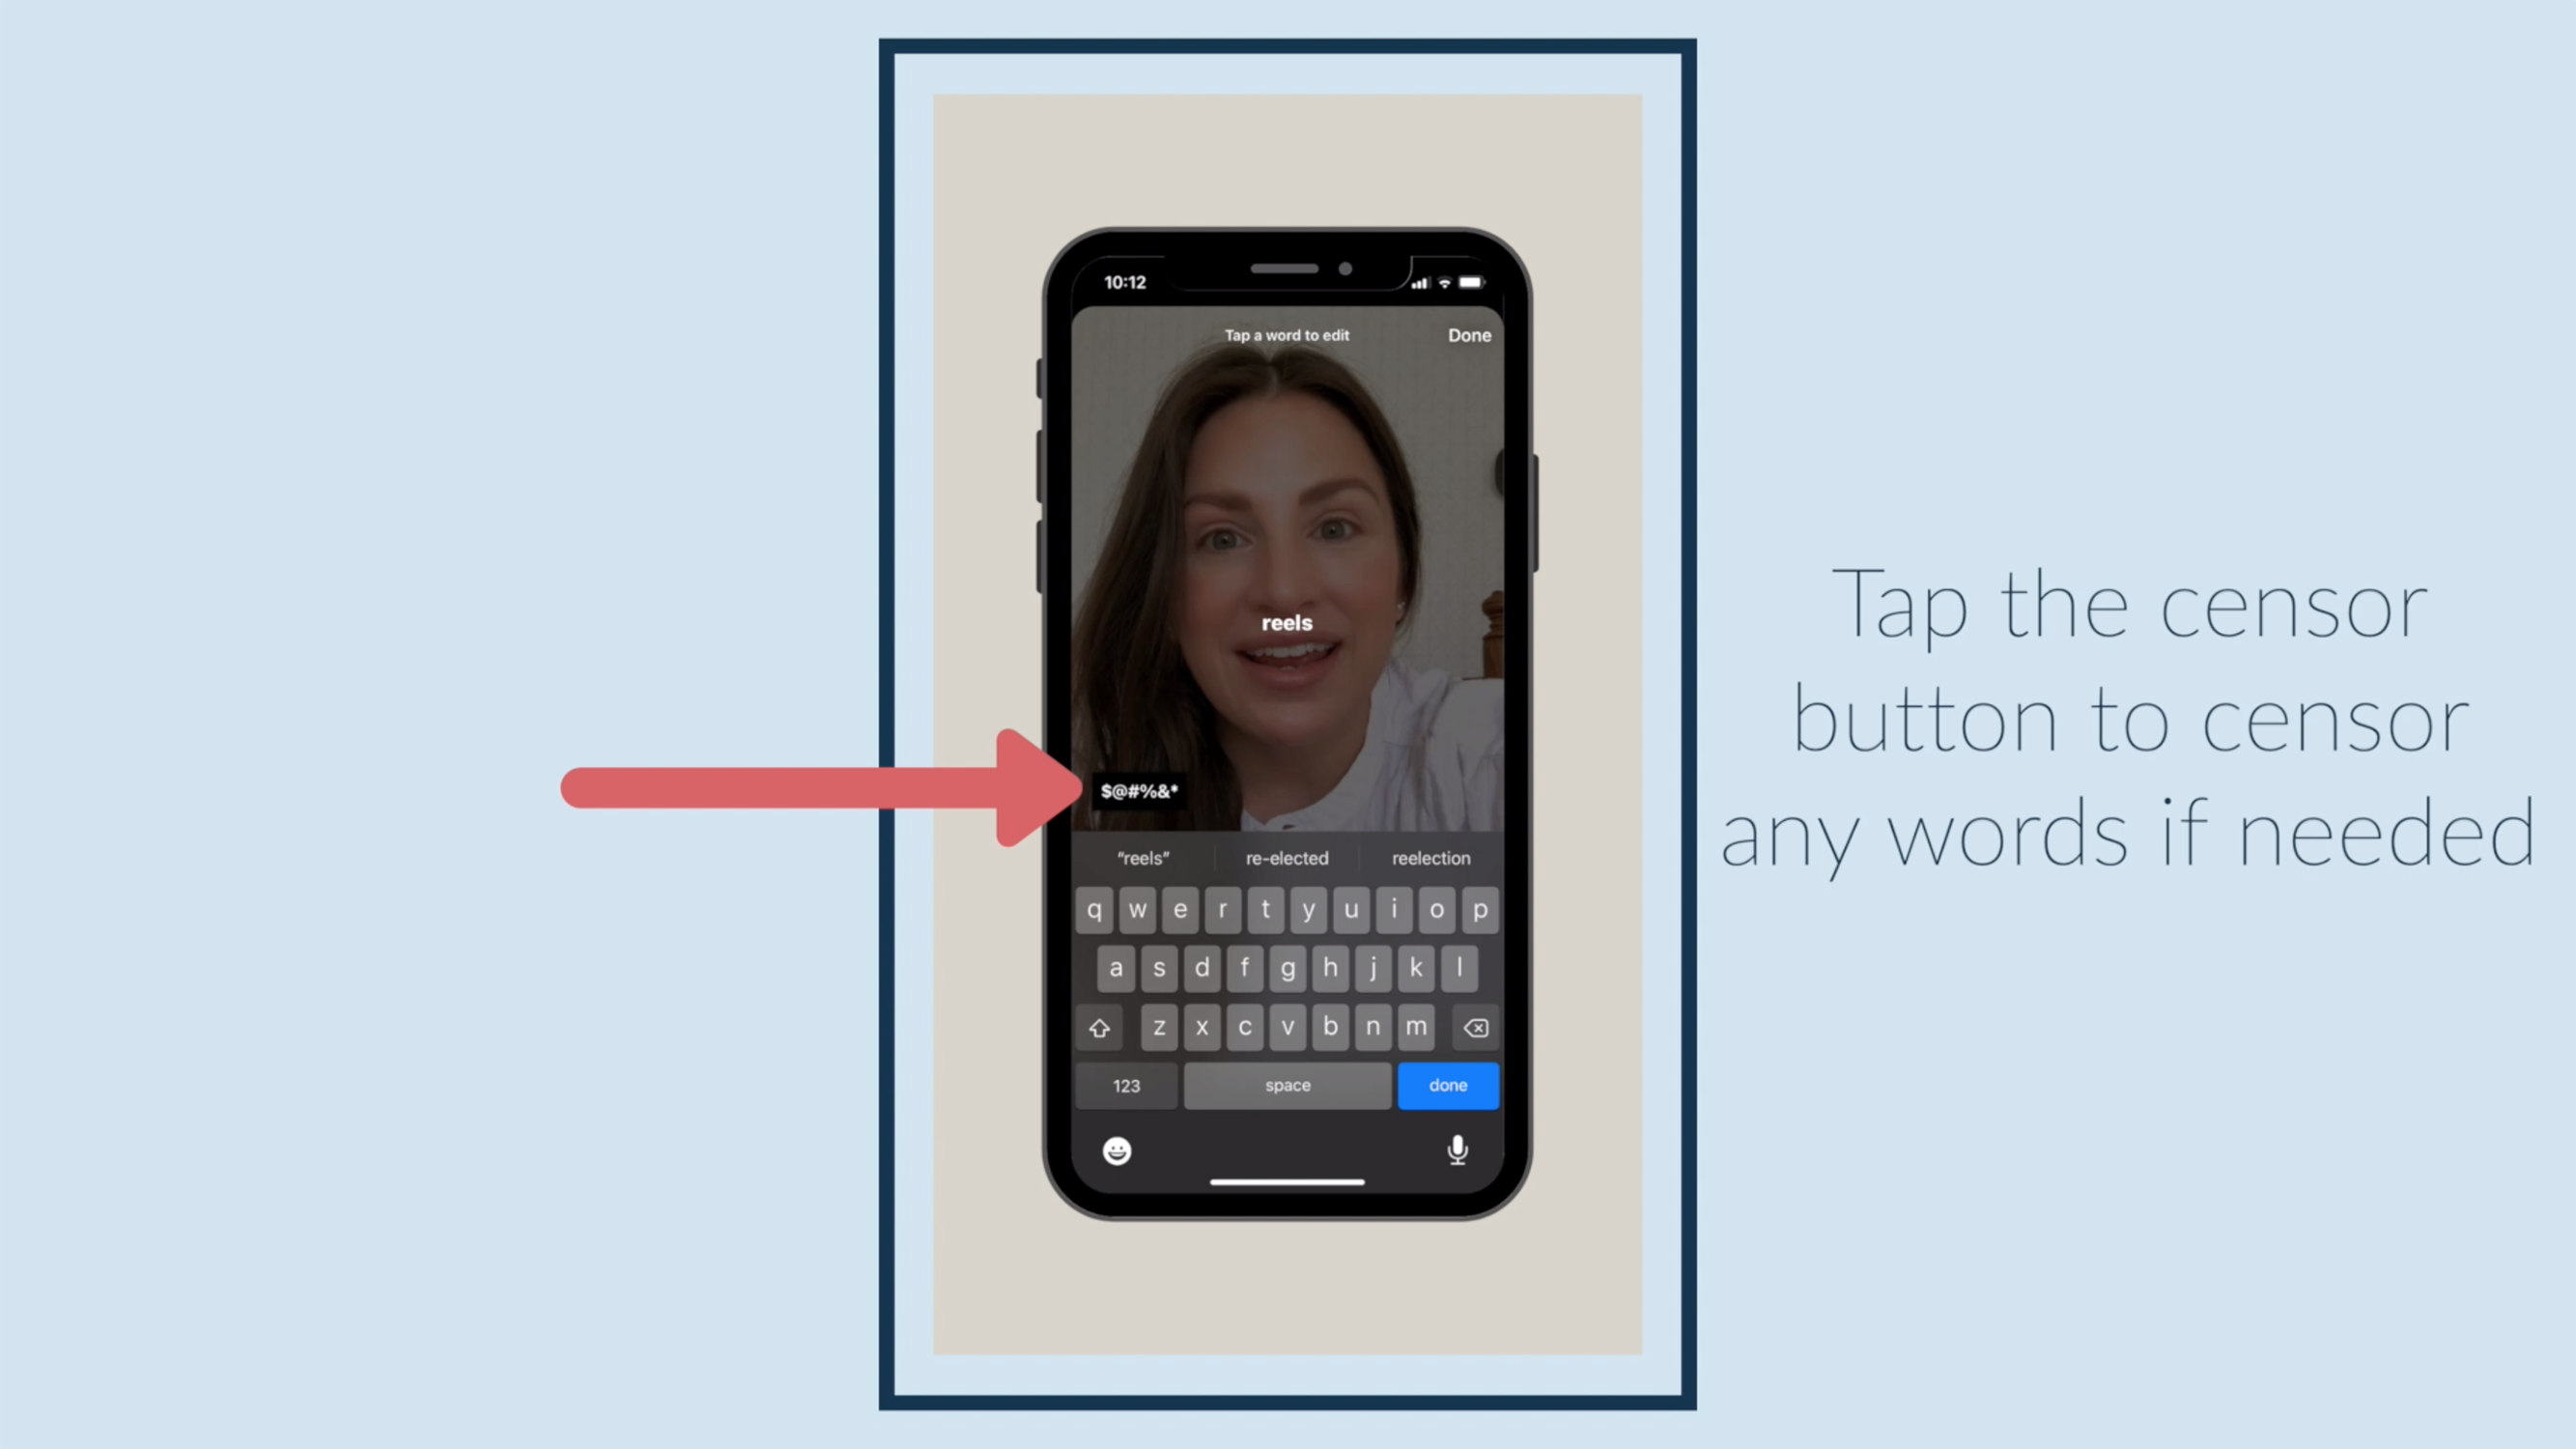
Tap the censor button to censor any words if needed.
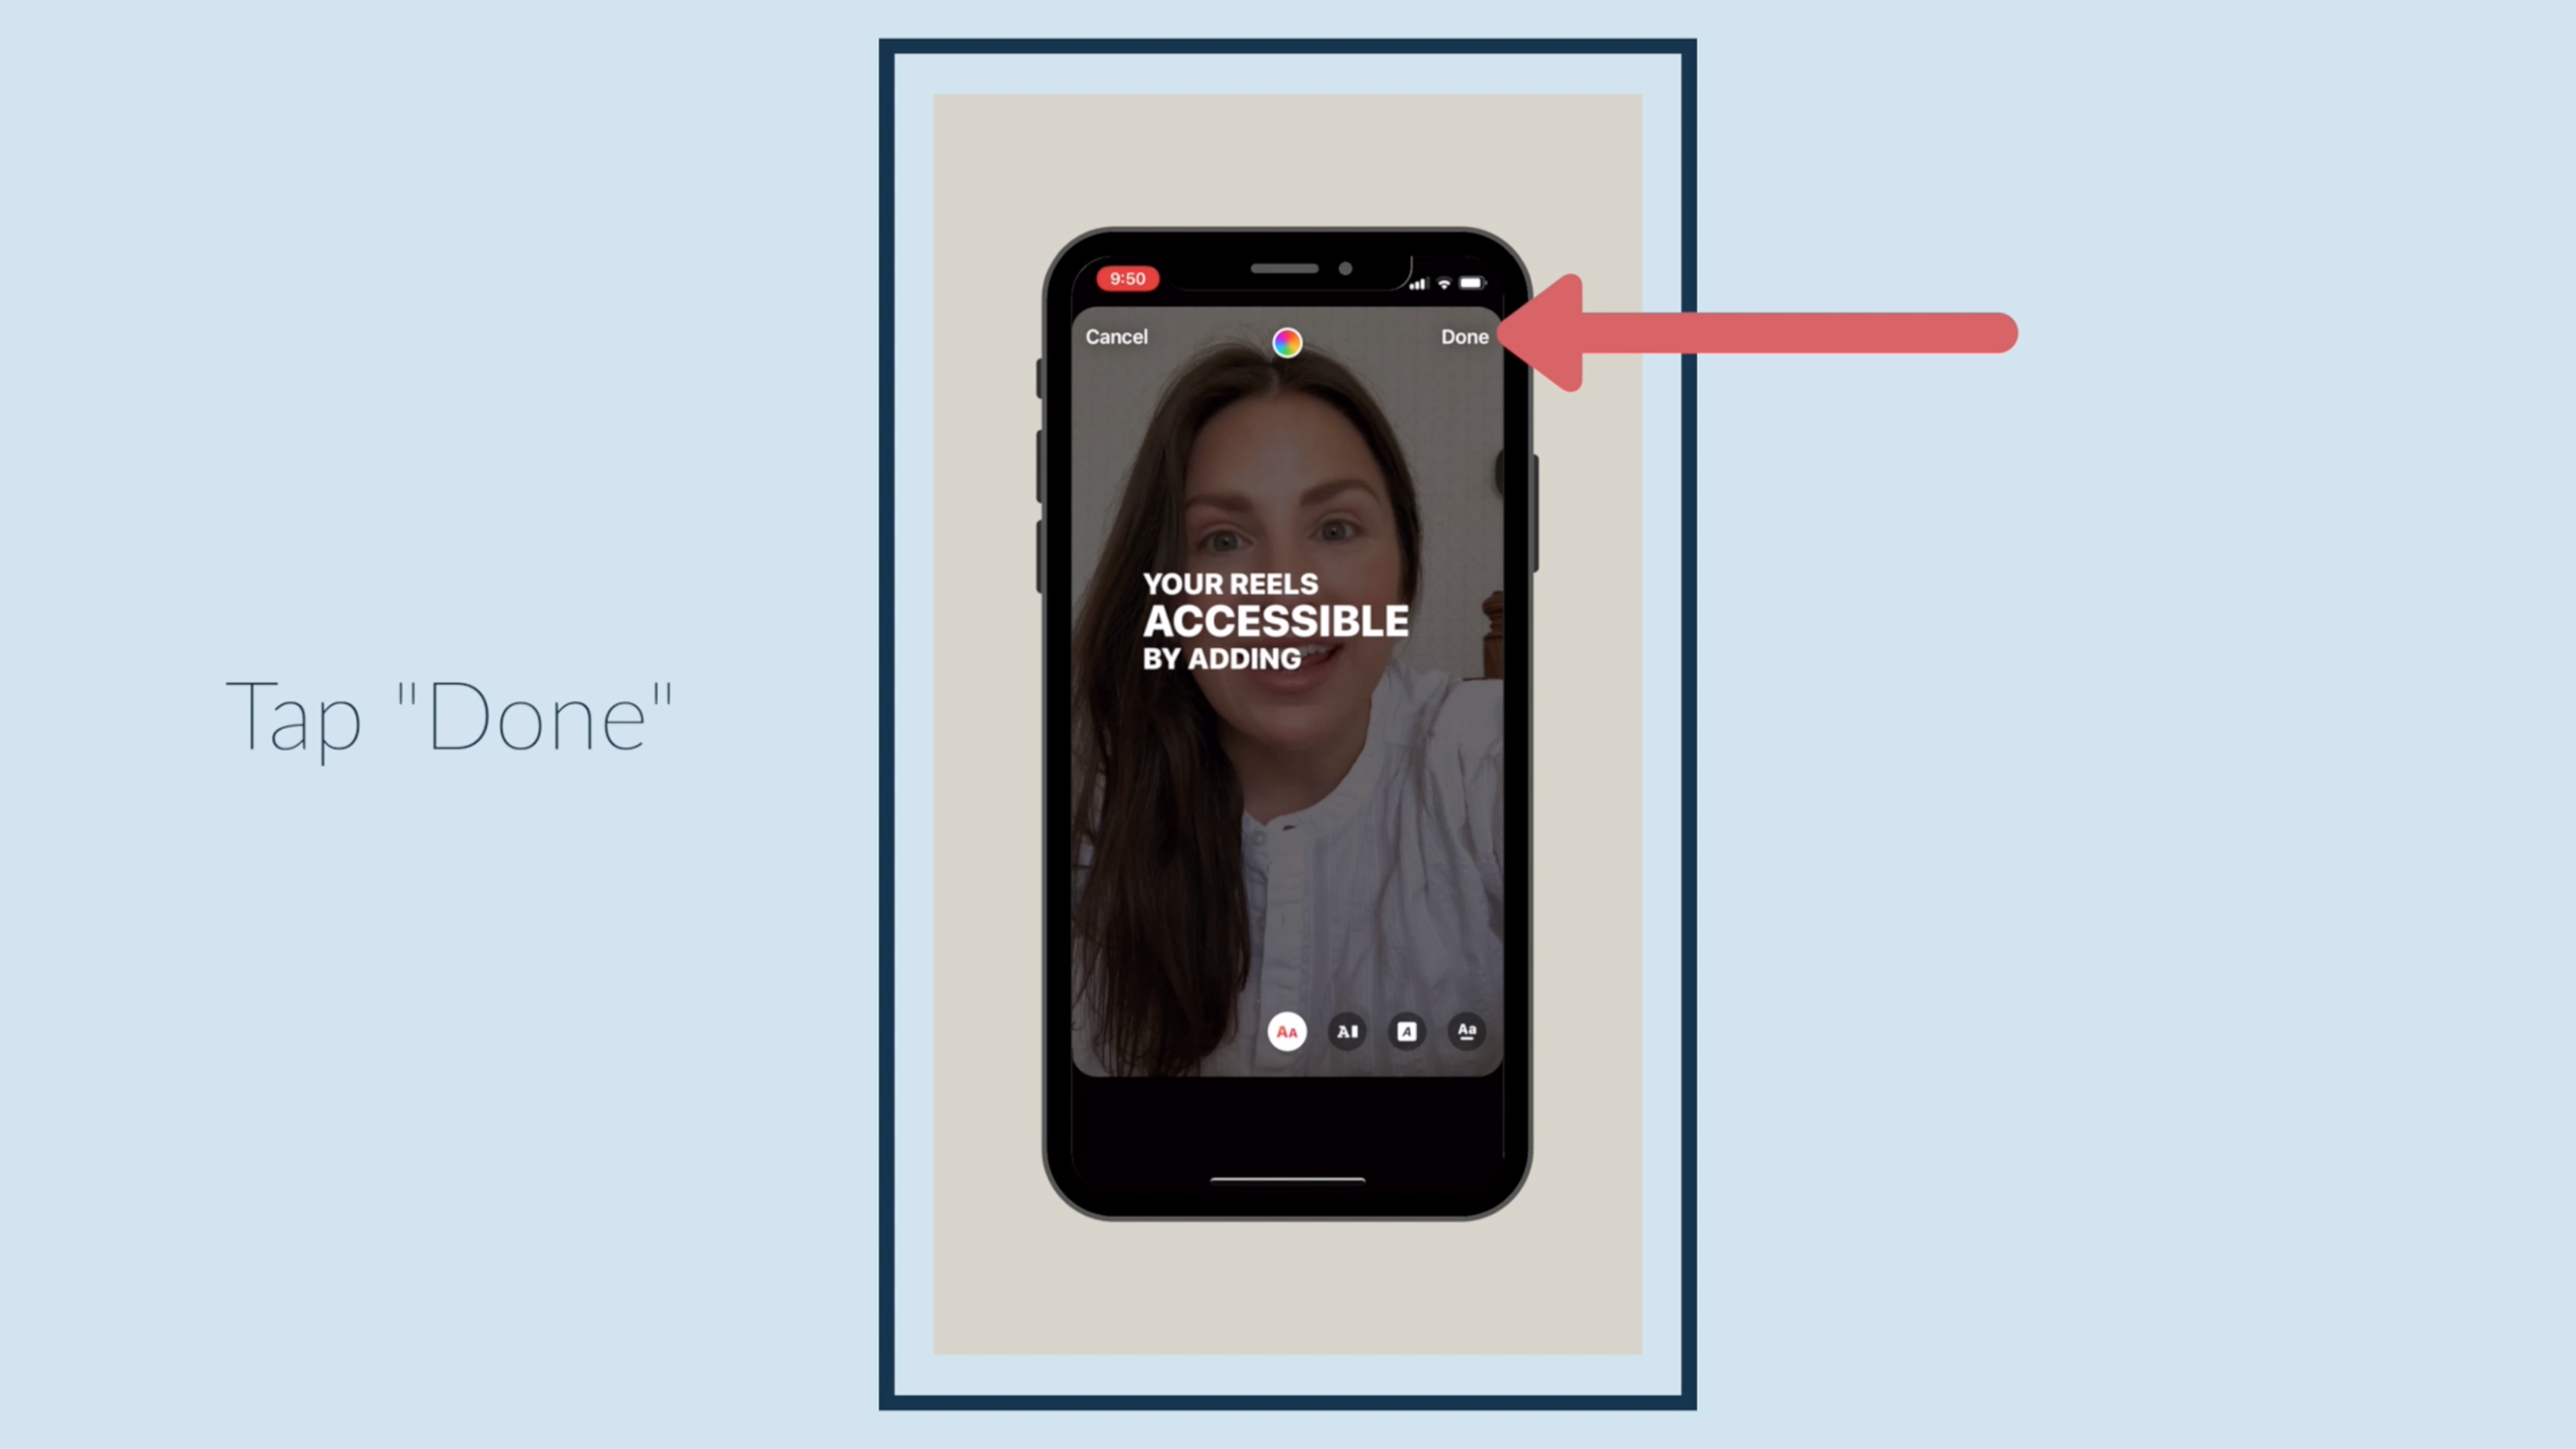
Tap "Done."
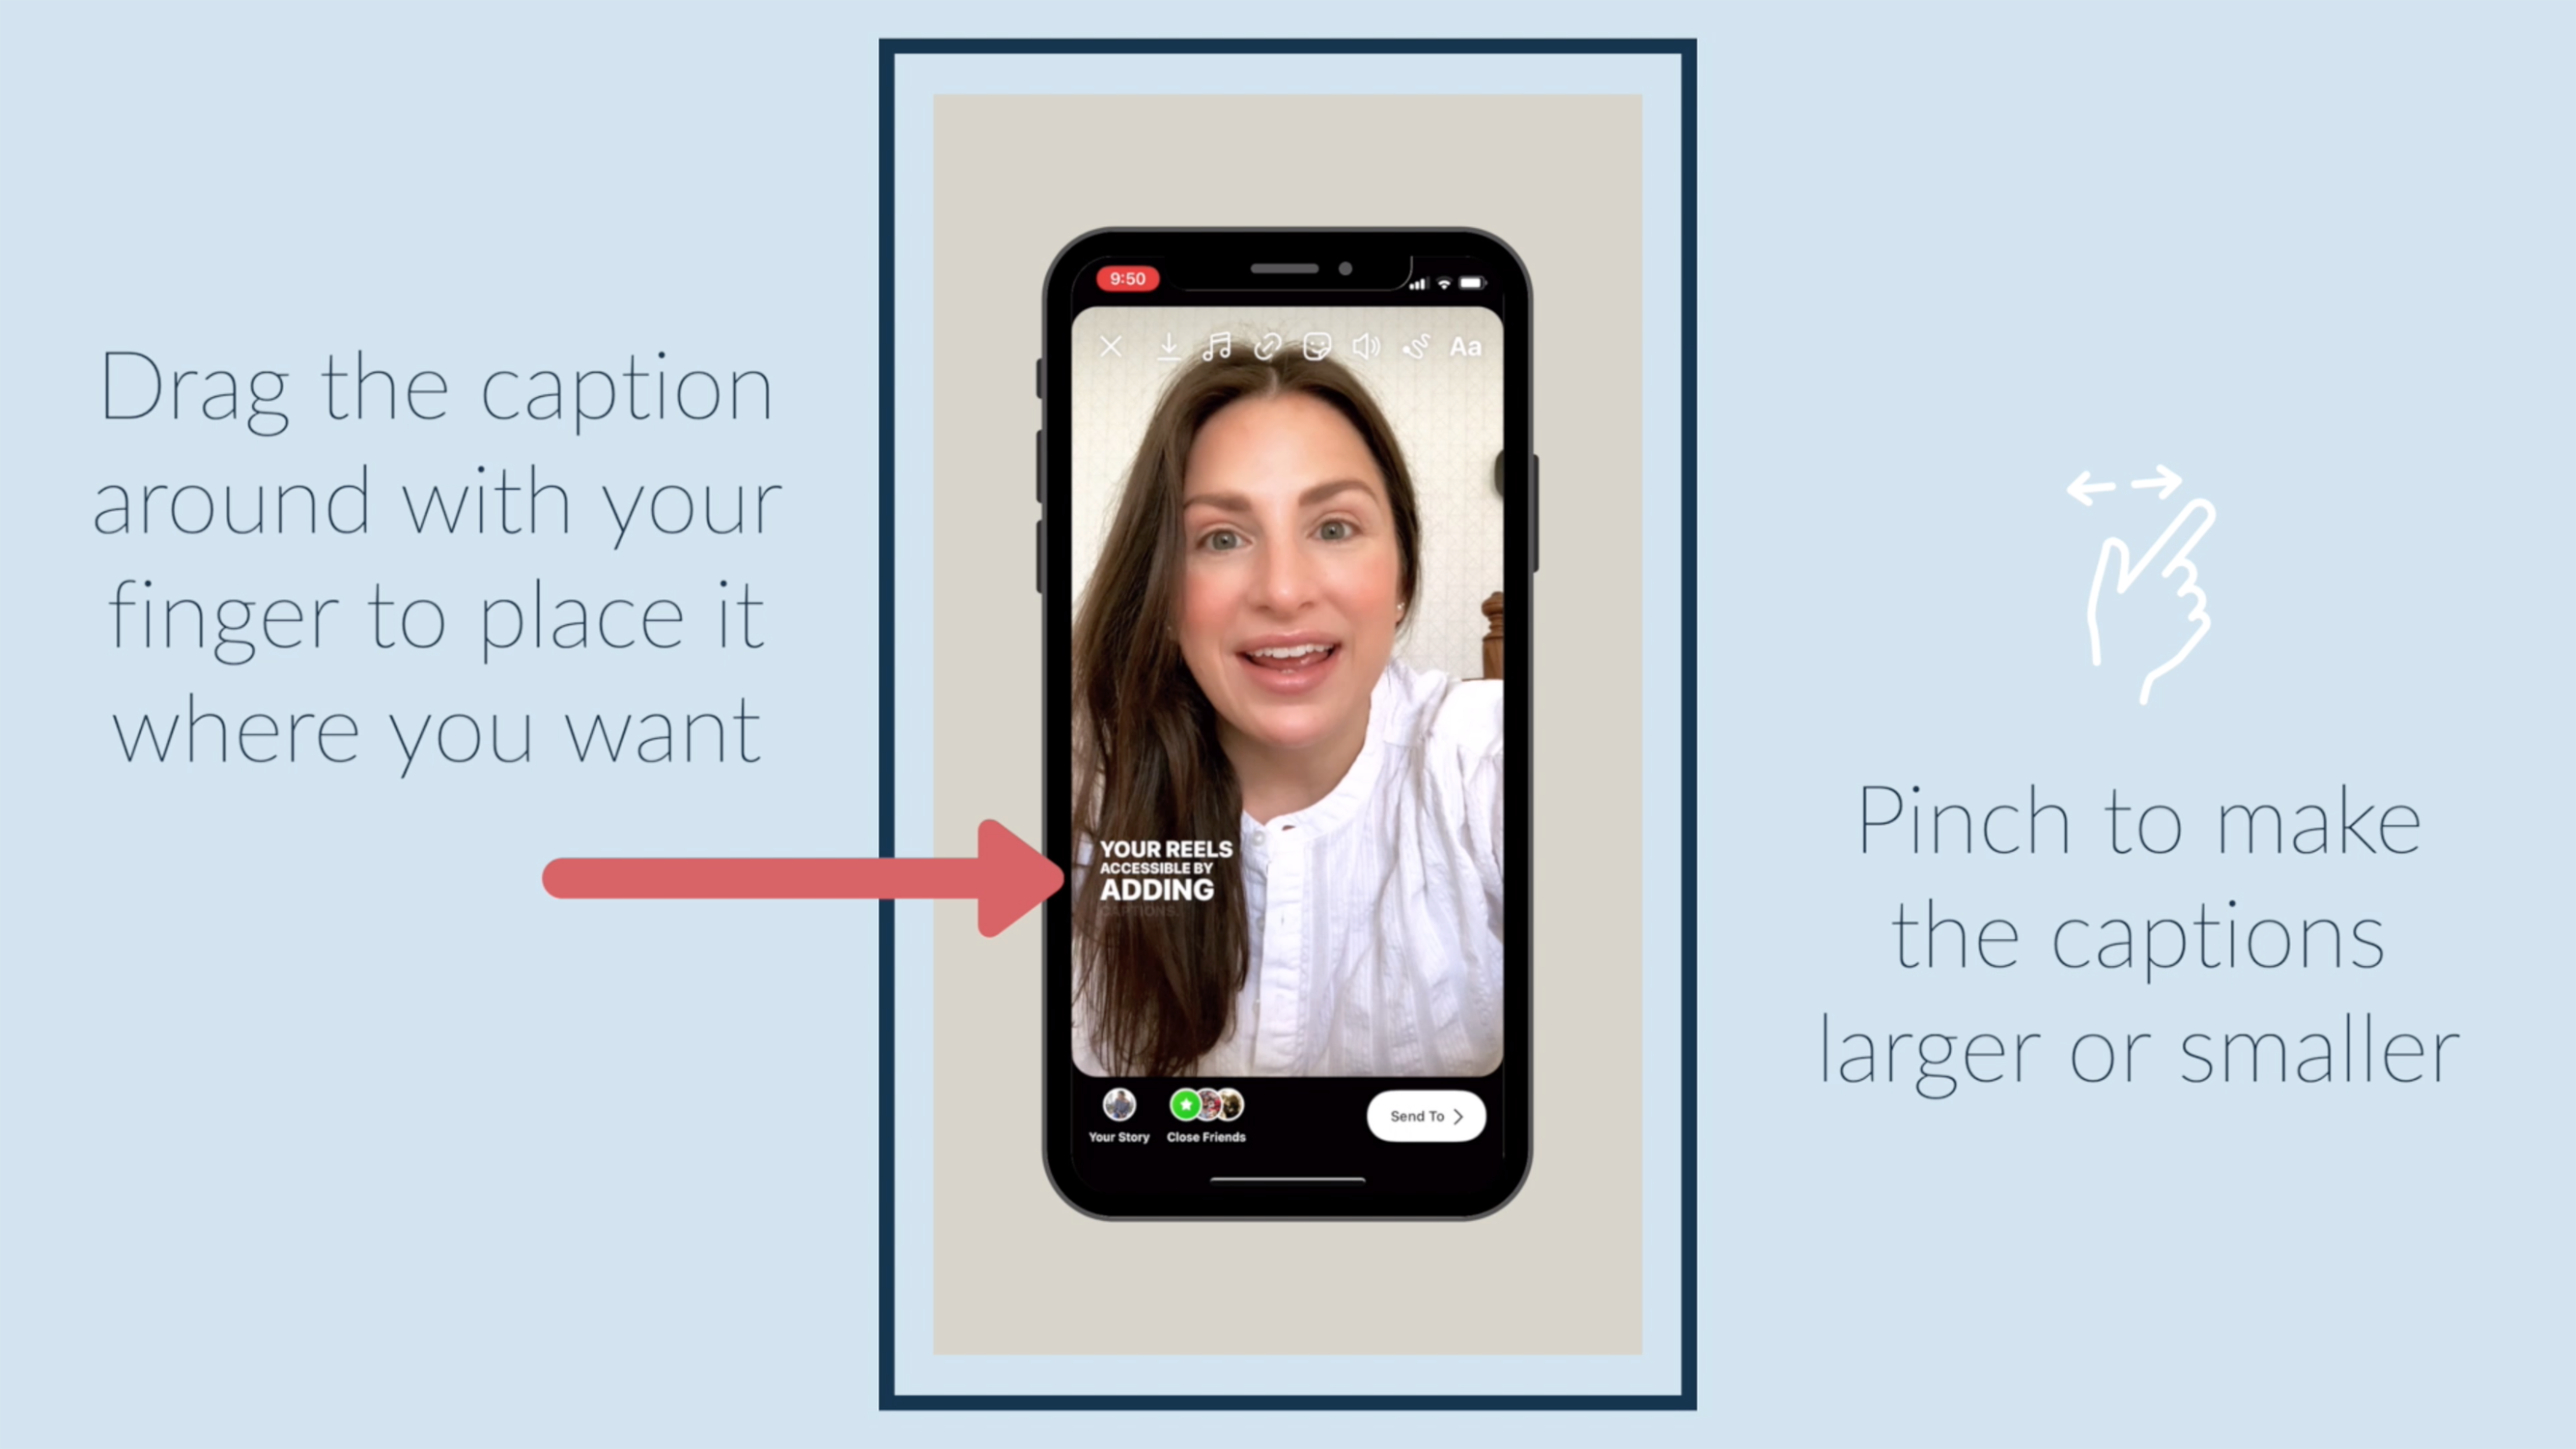
Drag the caption around with your finger to place it where you want. Pinch to make the captions larger or smaller.
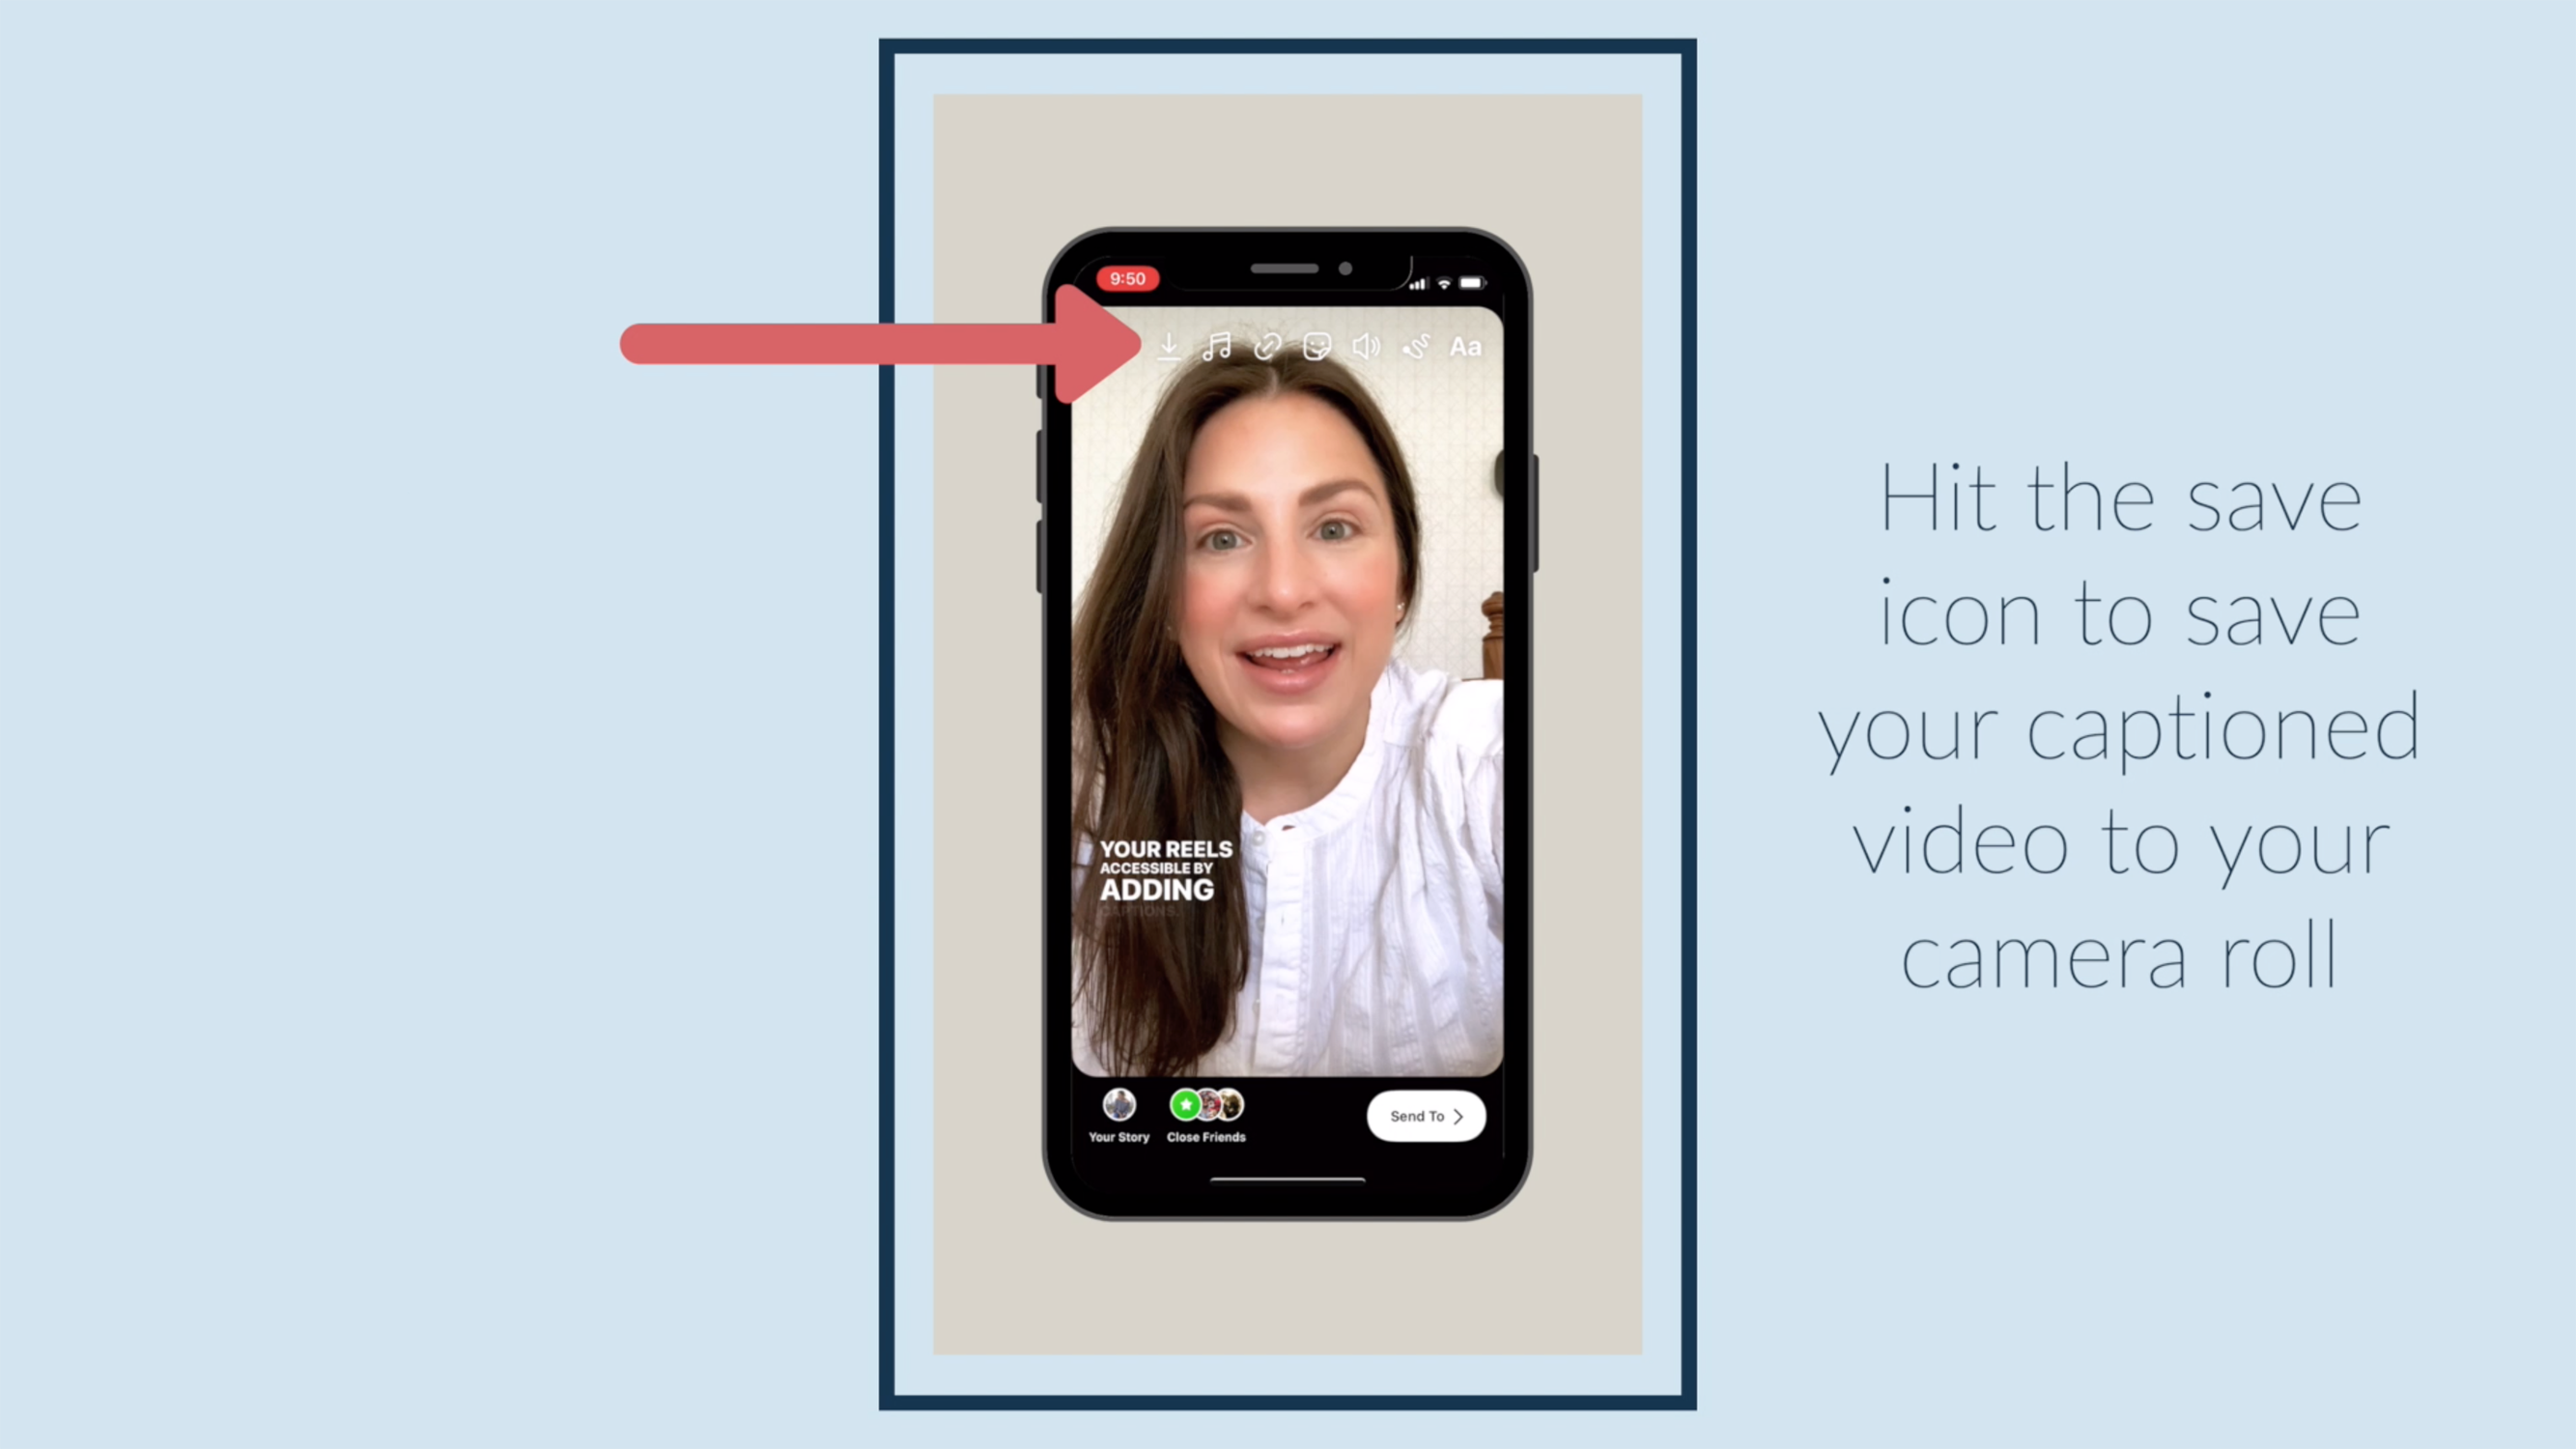
Hit the save icon to save your captioned video to your camera roll.
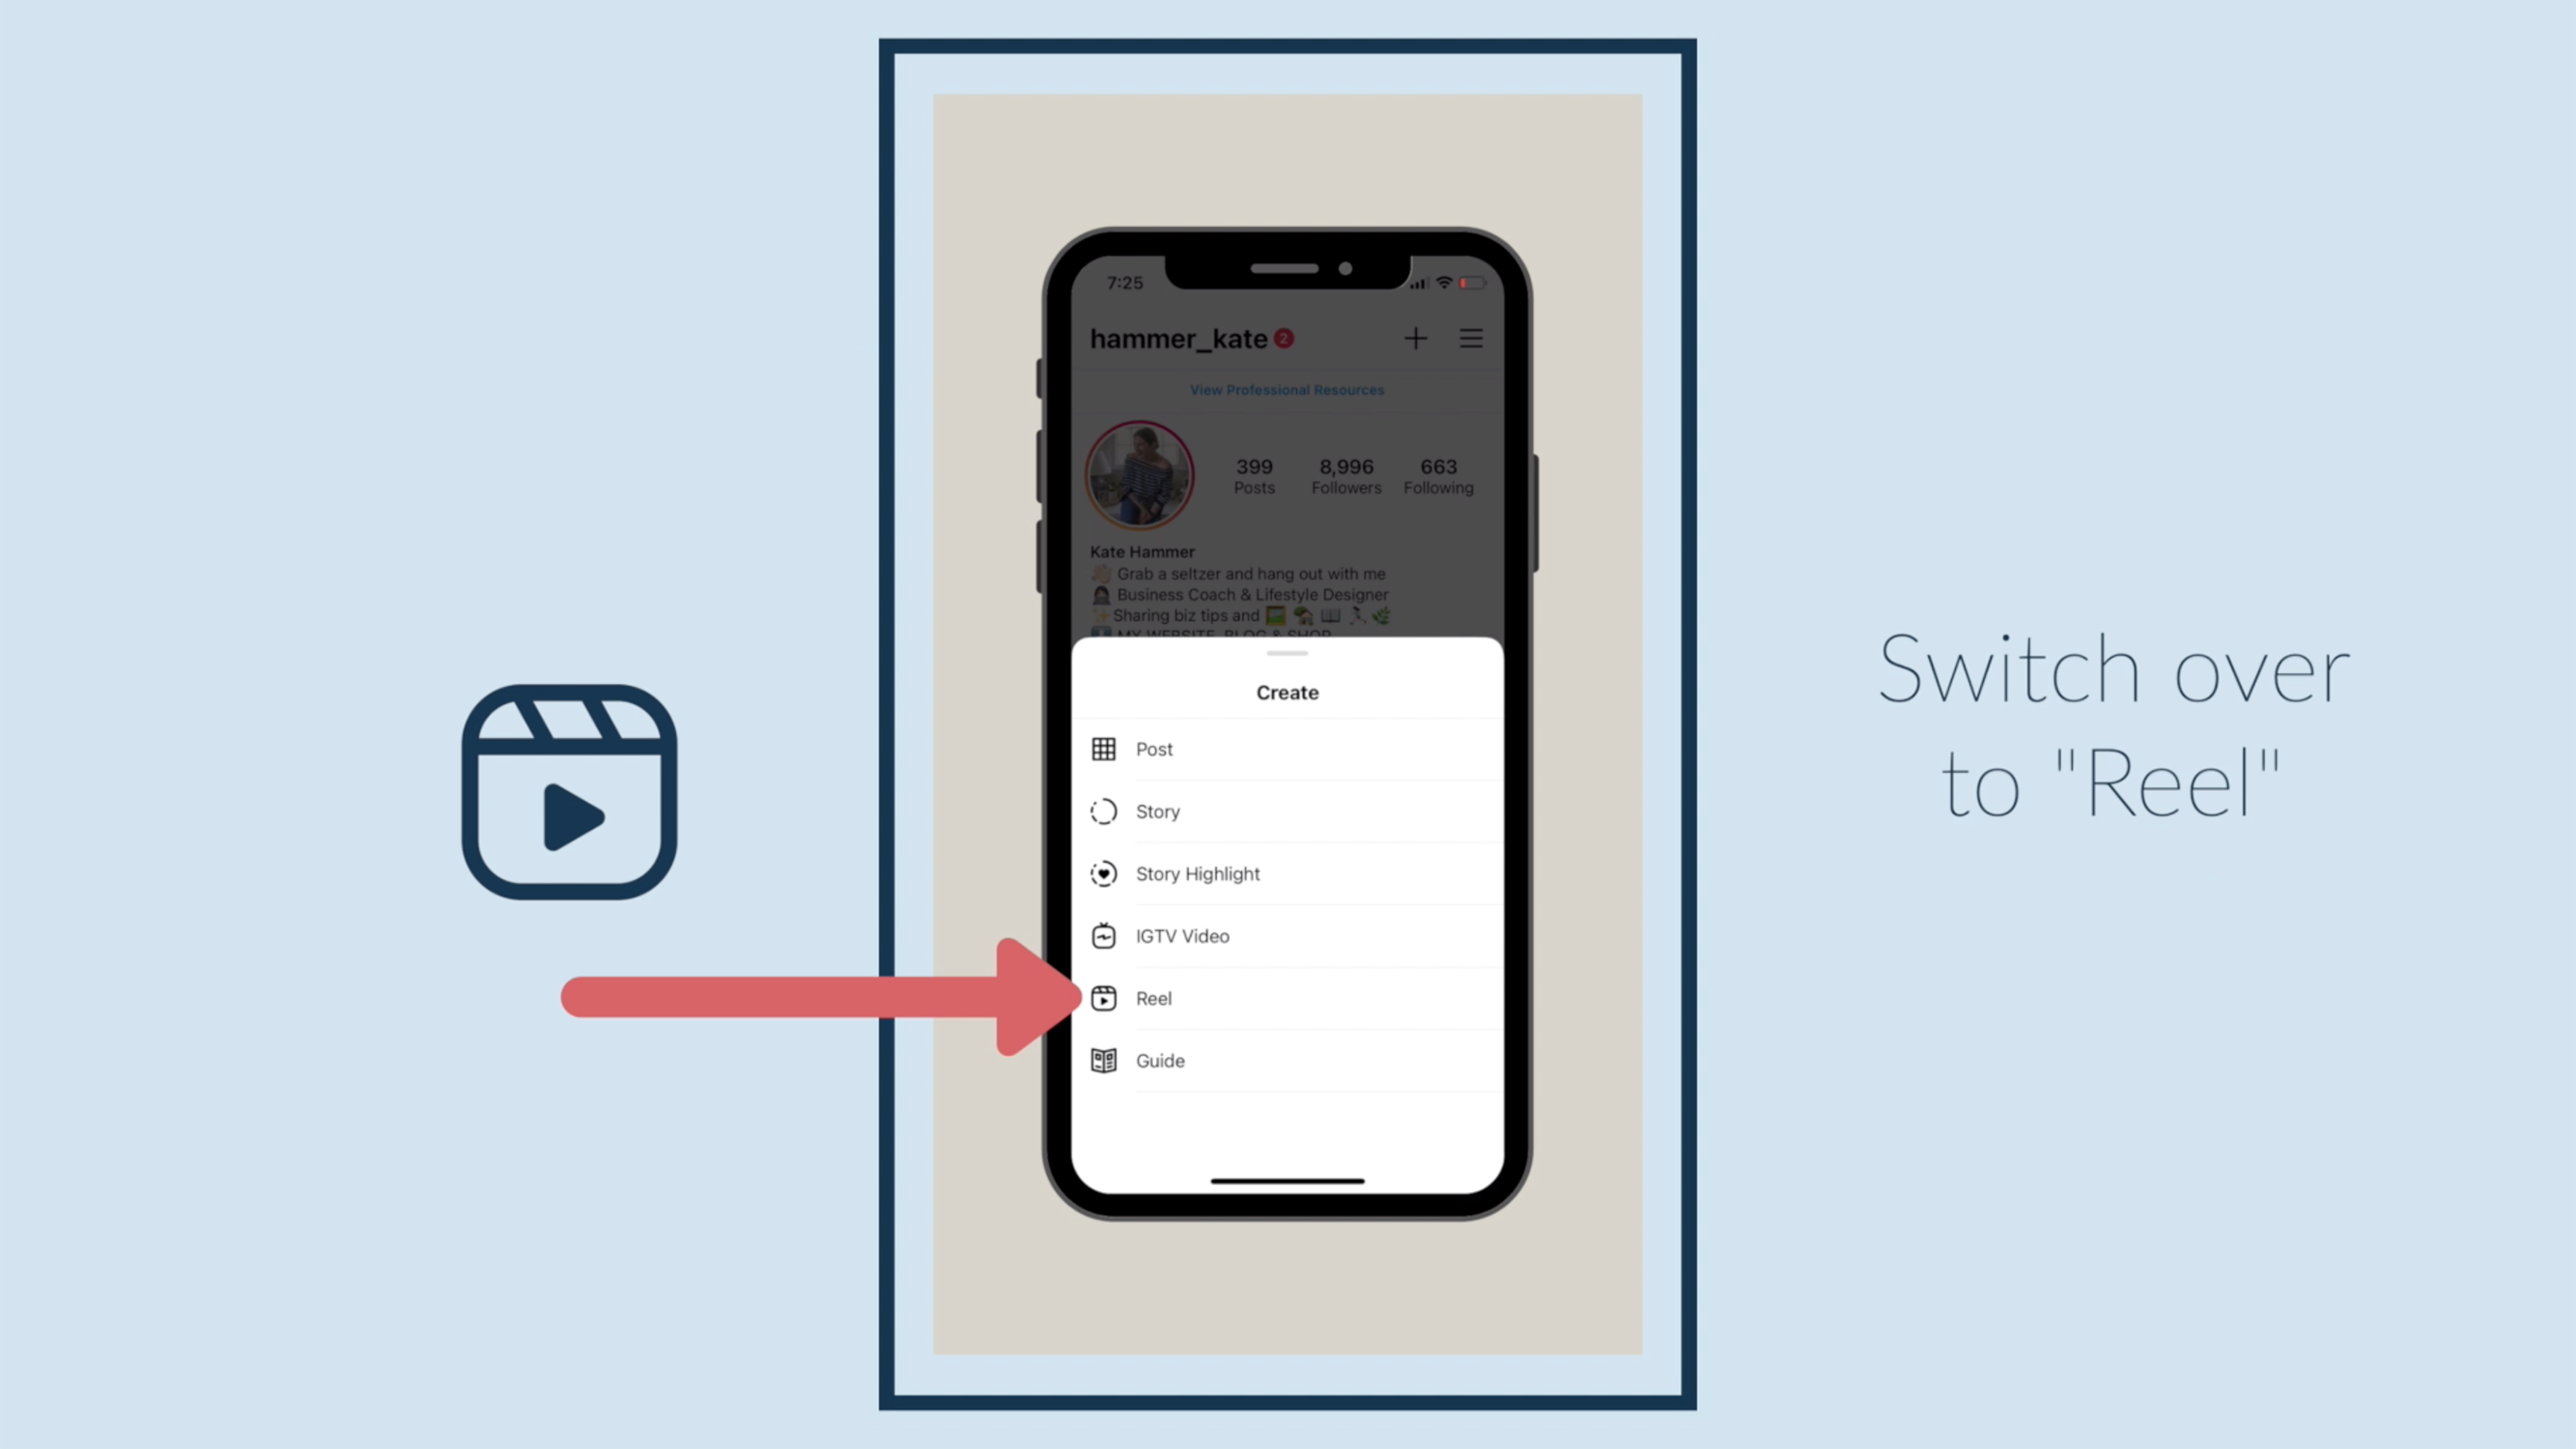
Switch over to "Reel."
Tap the camer...
Instagram Reel Tutorial: How to Make a Cover in Canva
Got a couple minutes? That's all this will take!

In Canva, hover your mouse over "Templates," then choose "Instagram Story" under "Social Media." Choosing an Instagram story template will give you the dimensions you need for a reel cover.

Click your new document to select it, then click the color wheel to change the background color.

On the left side of your screen, choose "Uploads," then "Upload Media," to add an image for your cover.

Drag your image to your document.

Adjust the size of your photo by dragging on any of the corners.
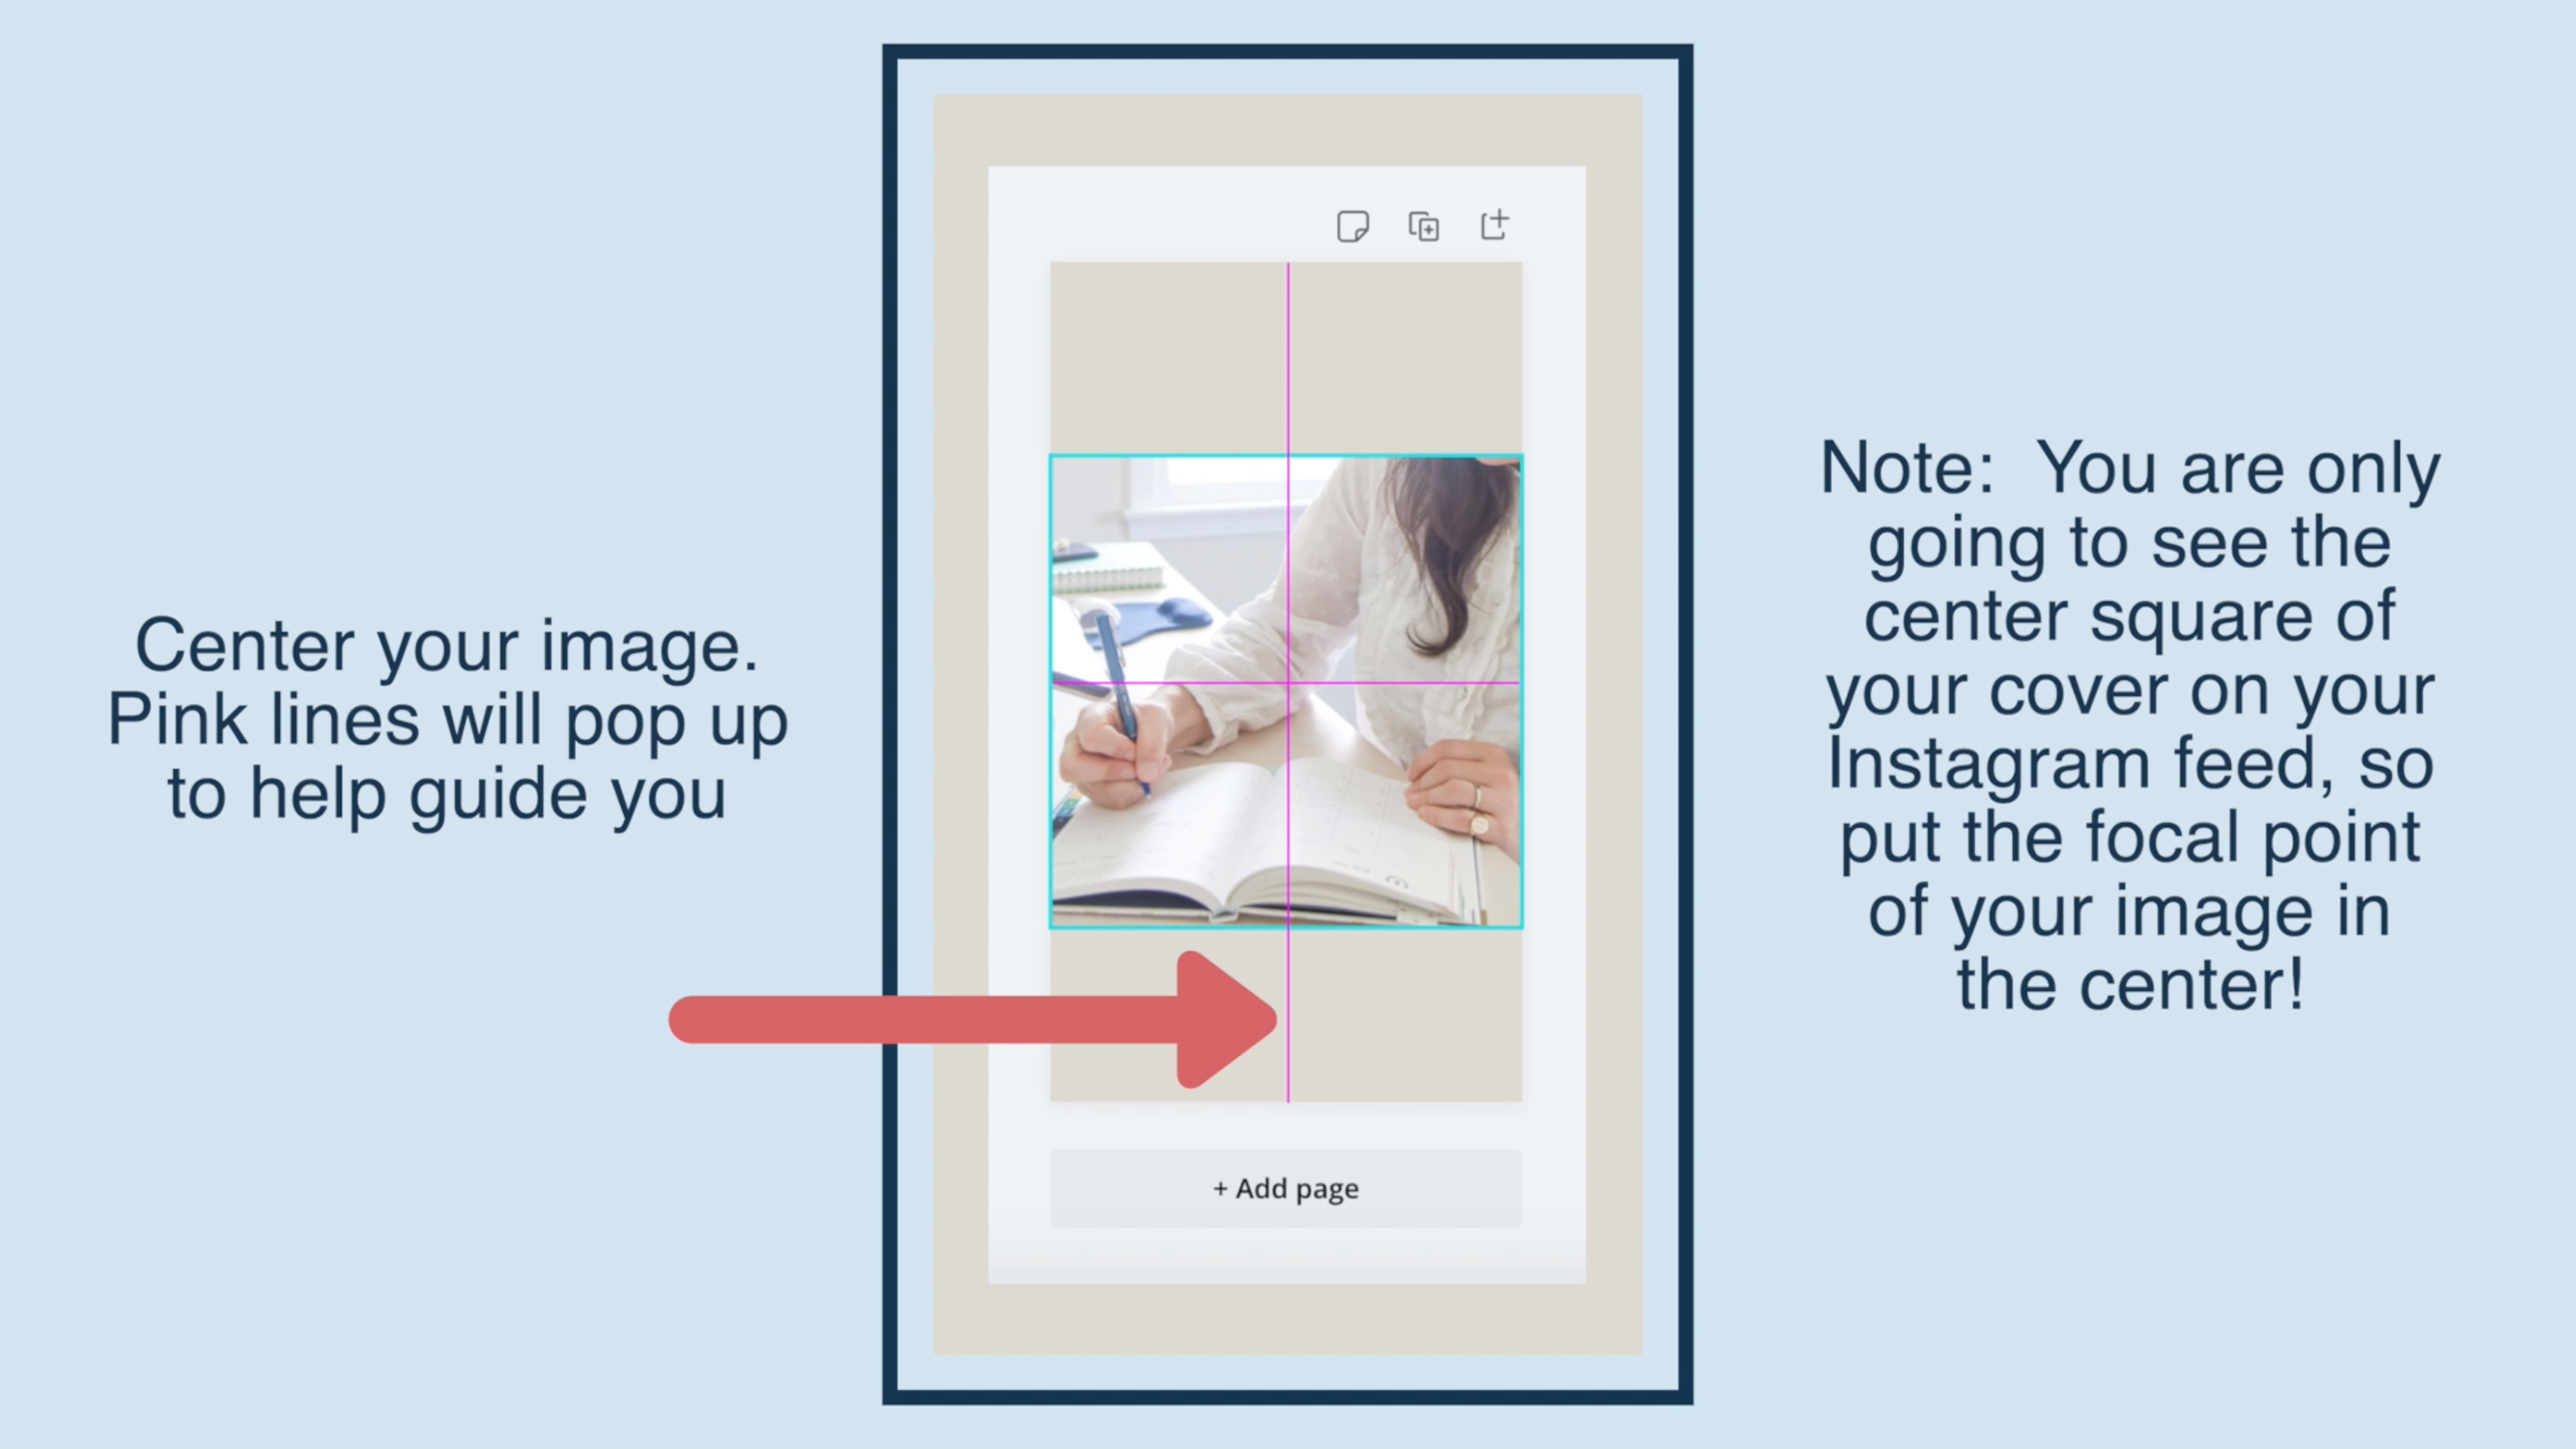
Center your image. Pink lines will pop up to help guide you. Note: You are only going to see the center square of your cover on your Instagram feed, so put the focal point of your image in the center!

Add text by clicking the "Text" icon to the left of your screen, and choosing an option from the menu.

Edit the font, color, size, and other aspects of your text with the tool bar at the top of your screen.
...Instagram Reel Tutorial: How to do a Zoom Transition
Ready to learn a transition for your Instagram Reels? This one is the easiest of all the transitions I've come across-- it's a great place to start!

Set your phone up on a tripod or stable surface.

Tap the music icon to choose your song or sound.

Then tap the timer icon to choose your countdown time and transition spot.

Tap the record button, get into place while the timer counts down, and then move towards the camera until your object covers the lens.

Make any post-transition changes you want, then tap the timer icon to set your clip duration and timer again.

Record the next half of your transition, starting with your object covering the lens, then pulling away to reveal the changes.

Tap the icon to the left of the record icon to see your clips and trim them.
Once you've trimmed your clips, tap "Done."
Tap the icon to the right of the record button to see your final result.

Now you're ready to add text, stickers, and share!
...Instagram Reel Tutorial: How to Add a Cover
In under 2 minutes I will walk you through adding a cover to your Instagram Reels!

When you've finished your reel and are ready to post, tap "Share To."

To change or add your cover, tap "Cover."

Slide your finger along the bar at the bottom to use a still from your reel as the cover.

Or tap "Add from Camera Roll" to use your own custom cover.

Choose the photo you want to use as the cover. You're only going to be able to see the center square of the photo on your feed, so make the center of your cover the focal point!

Click "Done."

And now you're ready to add a caption and share!
✅ You can also download a FREE copy of my 'Success Capture System' for goal planning (and keeping)!

